Blue Ridge Observatory
Blue Ridge Observatory was the first iteration of my permanent observatory journey, built in the summer of 2013 with the help of friends. Perched on the side of a mountain behind my cabin in Blue Ridge, Georgia, this 10’x10’ roll-off roof SkyShed was purpose-built for deep-sky observation and astrophotography.
The observatory featured a science-grade Celestron 14” CGE Pro EdgeHD telescope mounted on a permanent German equatorial pier, along with a full suite of accessories for visual and imaging work. For the first time, I could walk outside, roll off the roof, and be observing within minutes—no setup, no teardown, no excuses.
Blue Ridge Observatory laid the foundation—literally and figuratively—for everything I would later build in New Mexico. It was where I learned what worked, what didn’t, and just how transformative a dedicated space for astronomy could be.
The Blue Ridge Observatory was built in the summer of 2013 on the sloped hillside behind my cabin in northern Georgia. After months of research during the winter, I chose to construct a roll-off roof observatory using detailed plans from SkyShed Observatories. While I initially considered a traditional dome—what many picture when they hear “observatory”—I realized that roll-off designs offered better sky access, more usable interior space, and a greater sense of immersion under the stars. With a maximum budget of $5,000, I ordered lumber from a local supplier and sourced additional hardware and roof components from nearby vendors. Though I had no formal construction experience, the SkyShed plans were thorough and approachable, giving me the confidence to take the project on myself.
Construction officially began in July 2013. One of the first decisions was how to handle the foundation. The SkyShed plans recommend using paver stones—an option that could well for flat ground, but also might suffer from settling over time. Given the uneven, slate-rich terrain behind my cabin, I was concerned about the difficulty of leveling pavers or digging deep pier holes. I decided instead to pour a 12-inch-wide concrete perimeter footing, which offered the best balance between stability and feasibility on my site. It provided a solid and level base for the observatory while avoiding the headaches that would’ve come with other methods.
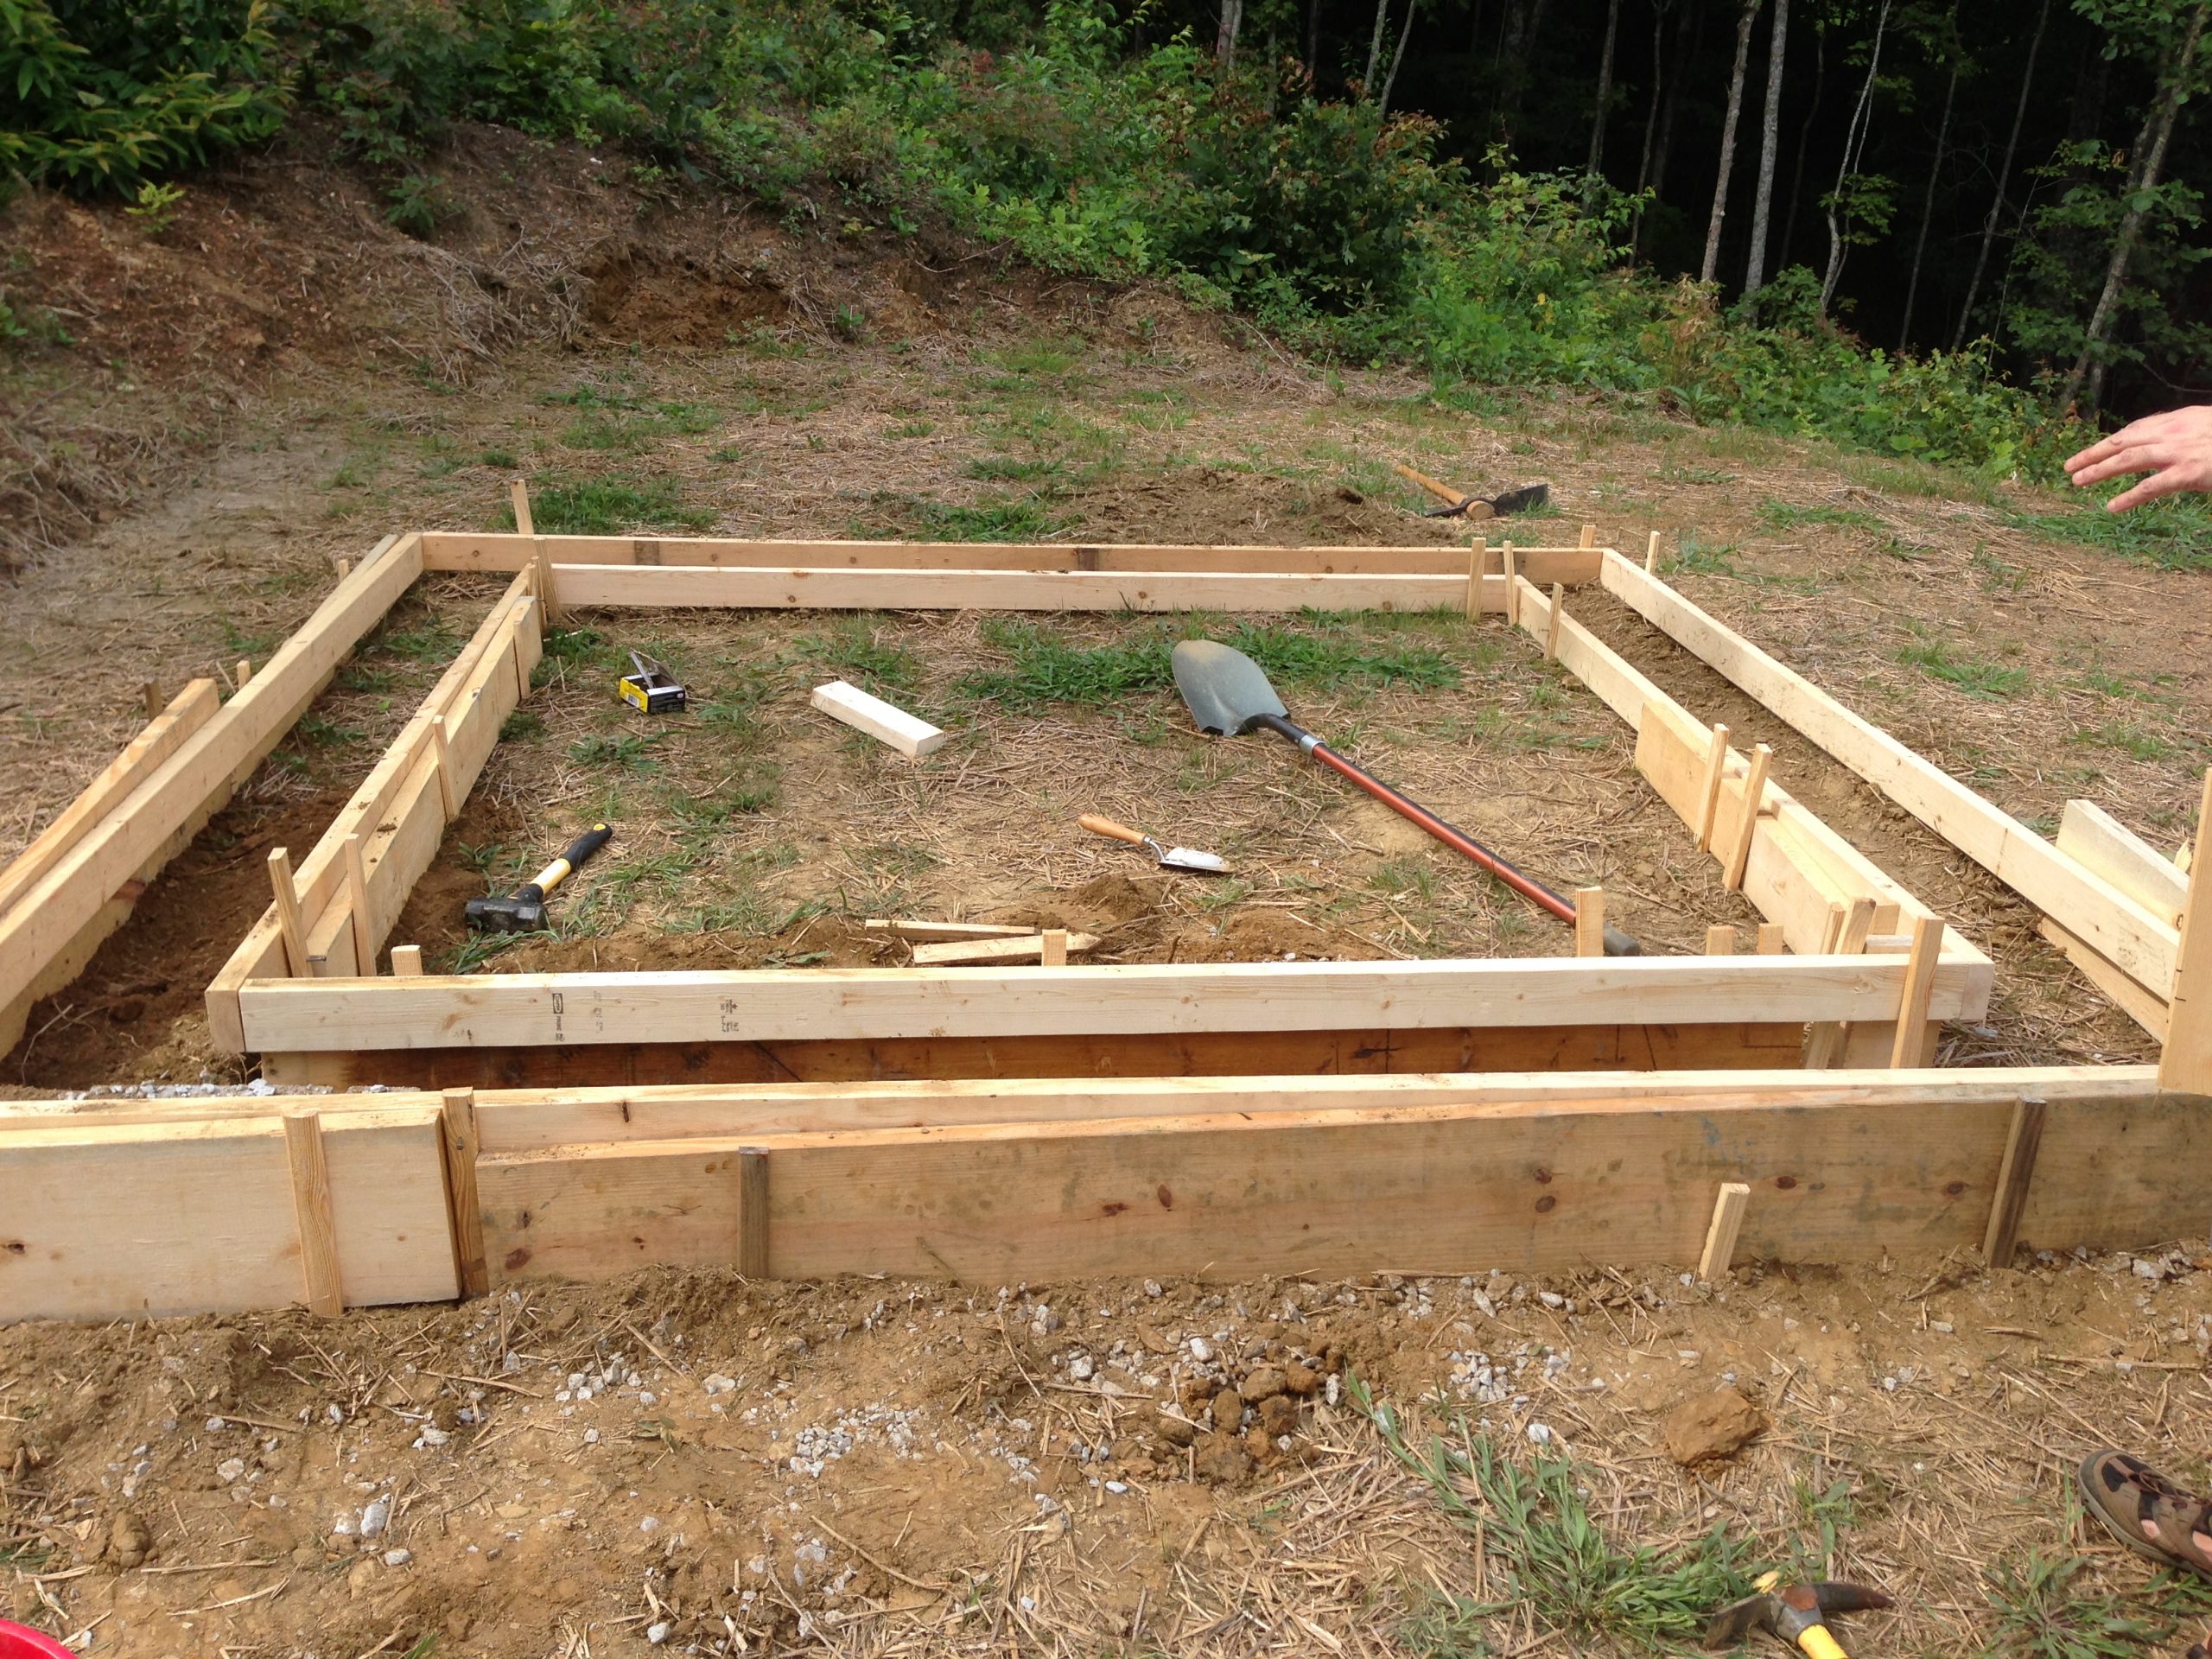
The first step was laying out the forms for the 12-inch-wide concrete footing. Because the hillside was anything but level, getting this framed in took some patience. I went with a full perimeter pour instead of pavers or piers, since my rocky ground would’ve made digging a nightmare.
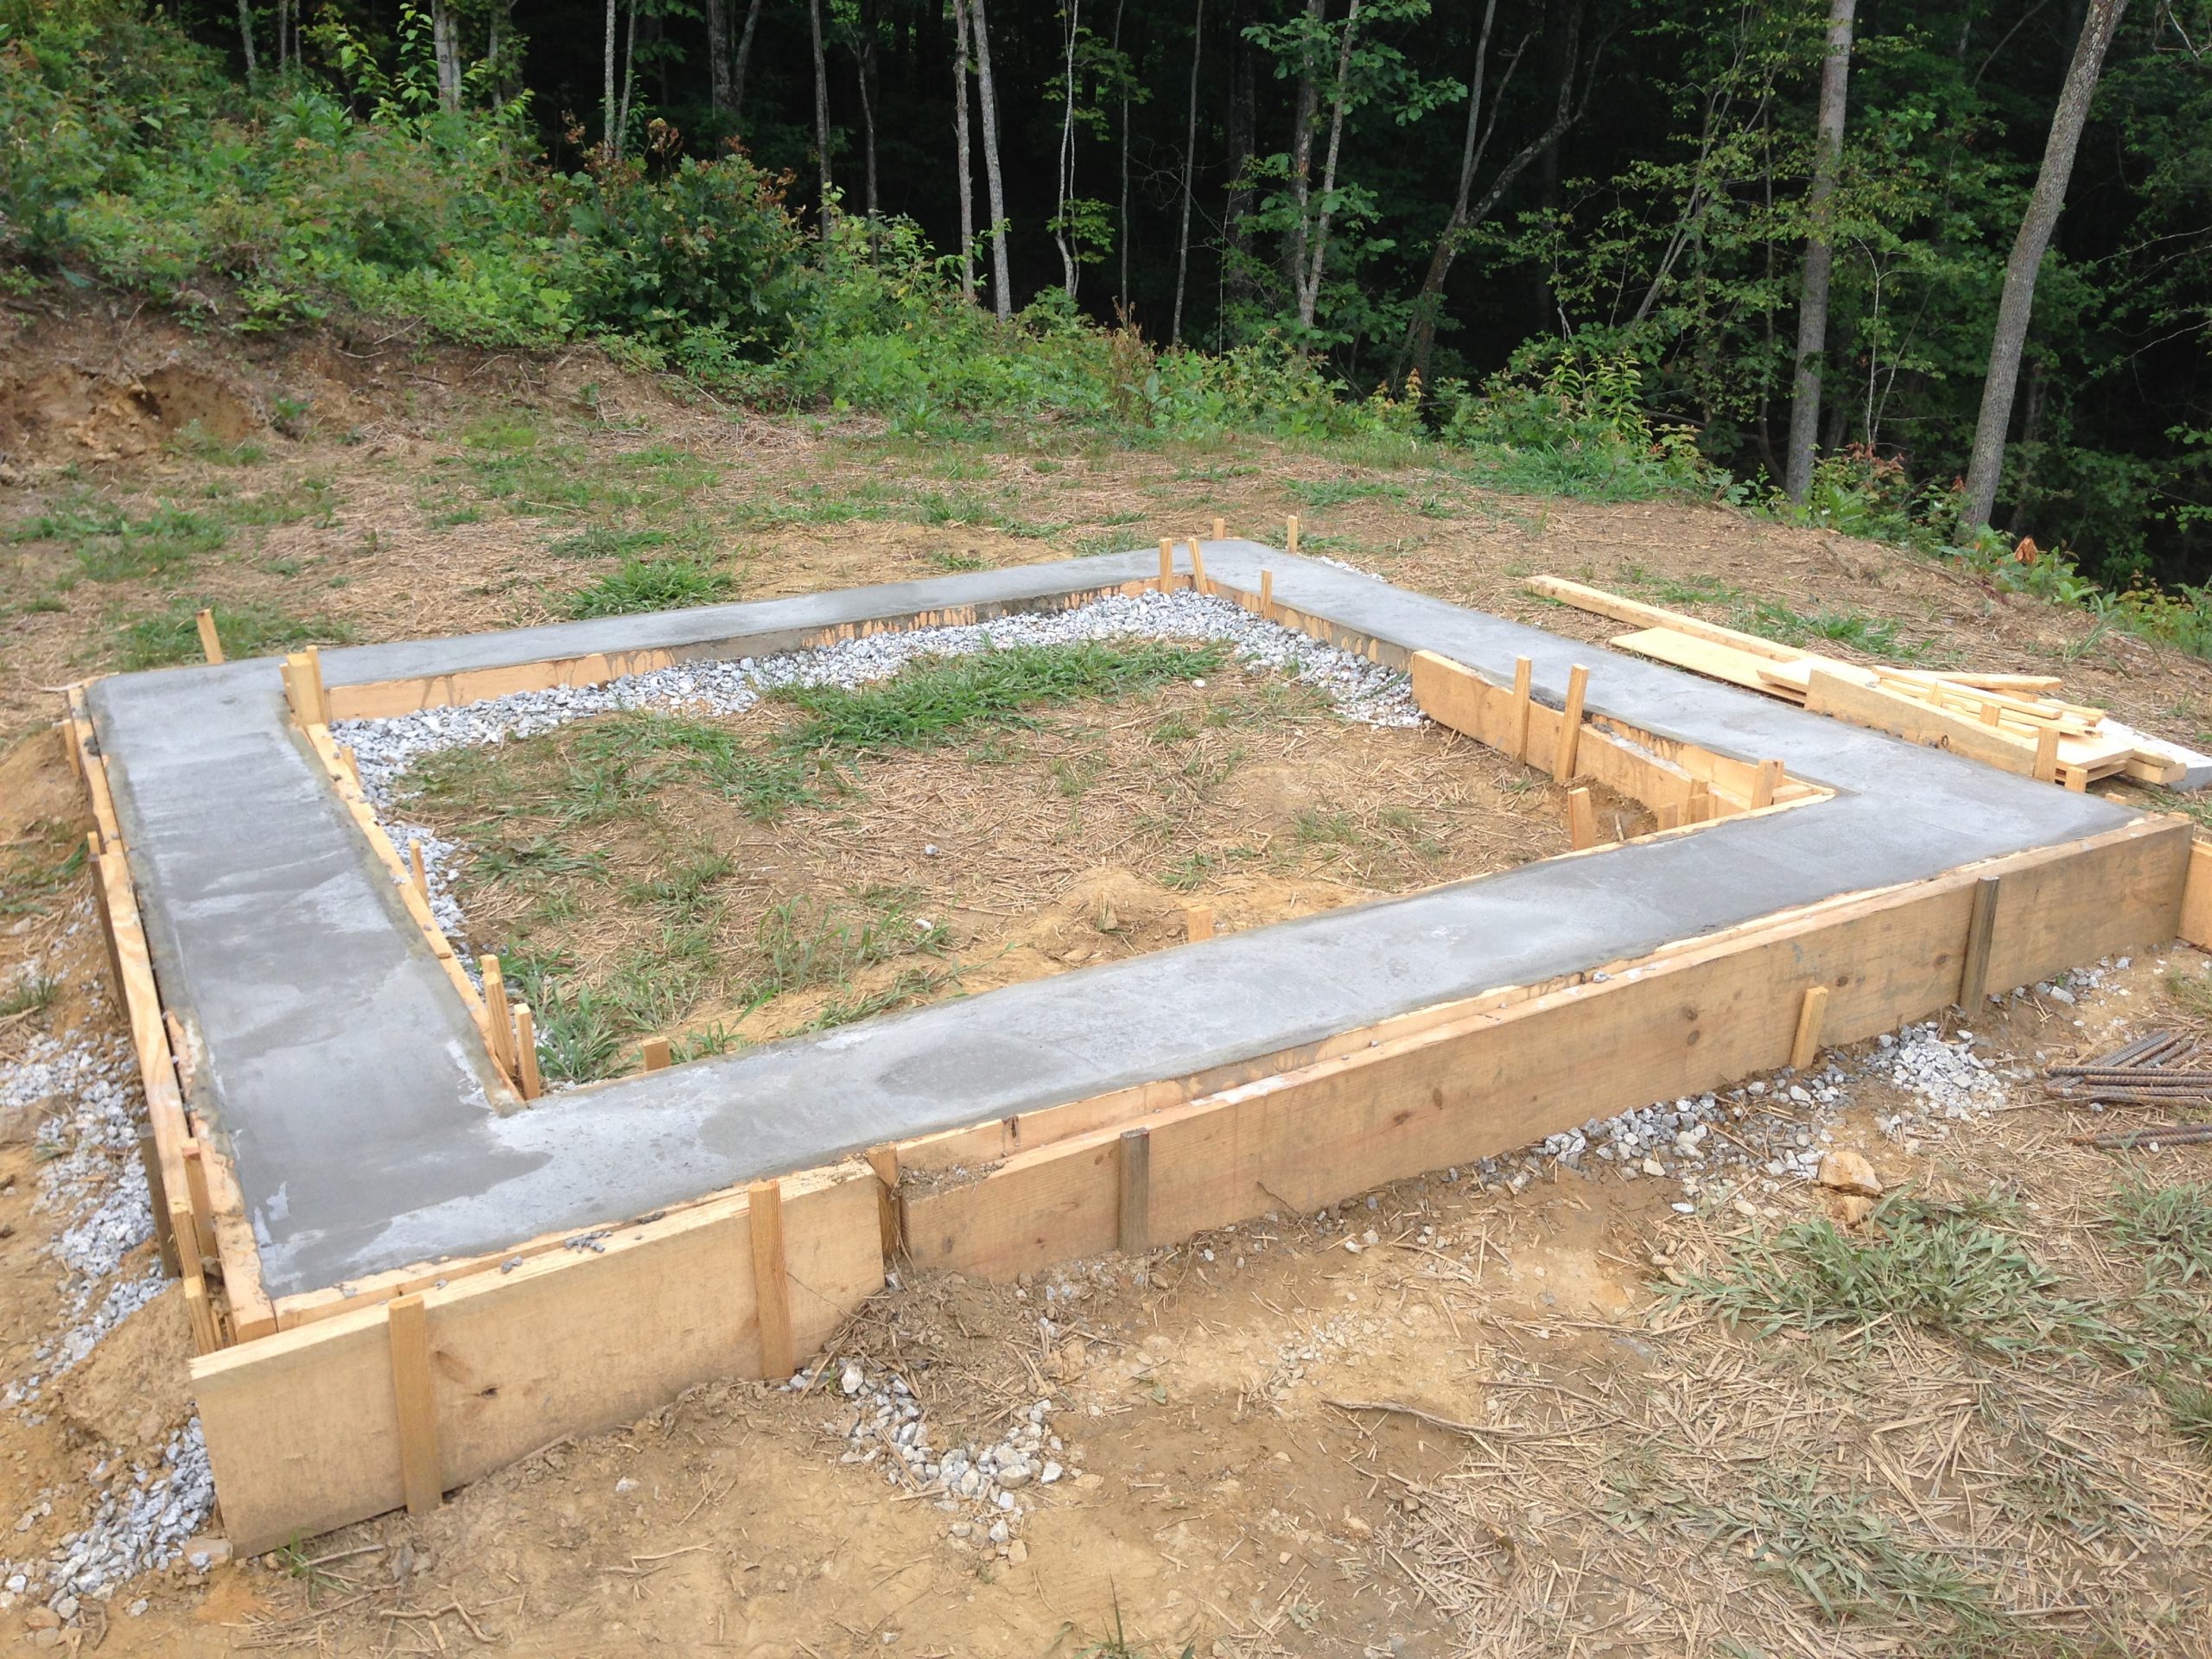
The pour went smoothly, and the perimeter footing turned out nice and level — which was honestly a relief given the slope and the heat that day. I added some gravel around the inside edge to help with drainage and keep things tidy under the future floor.
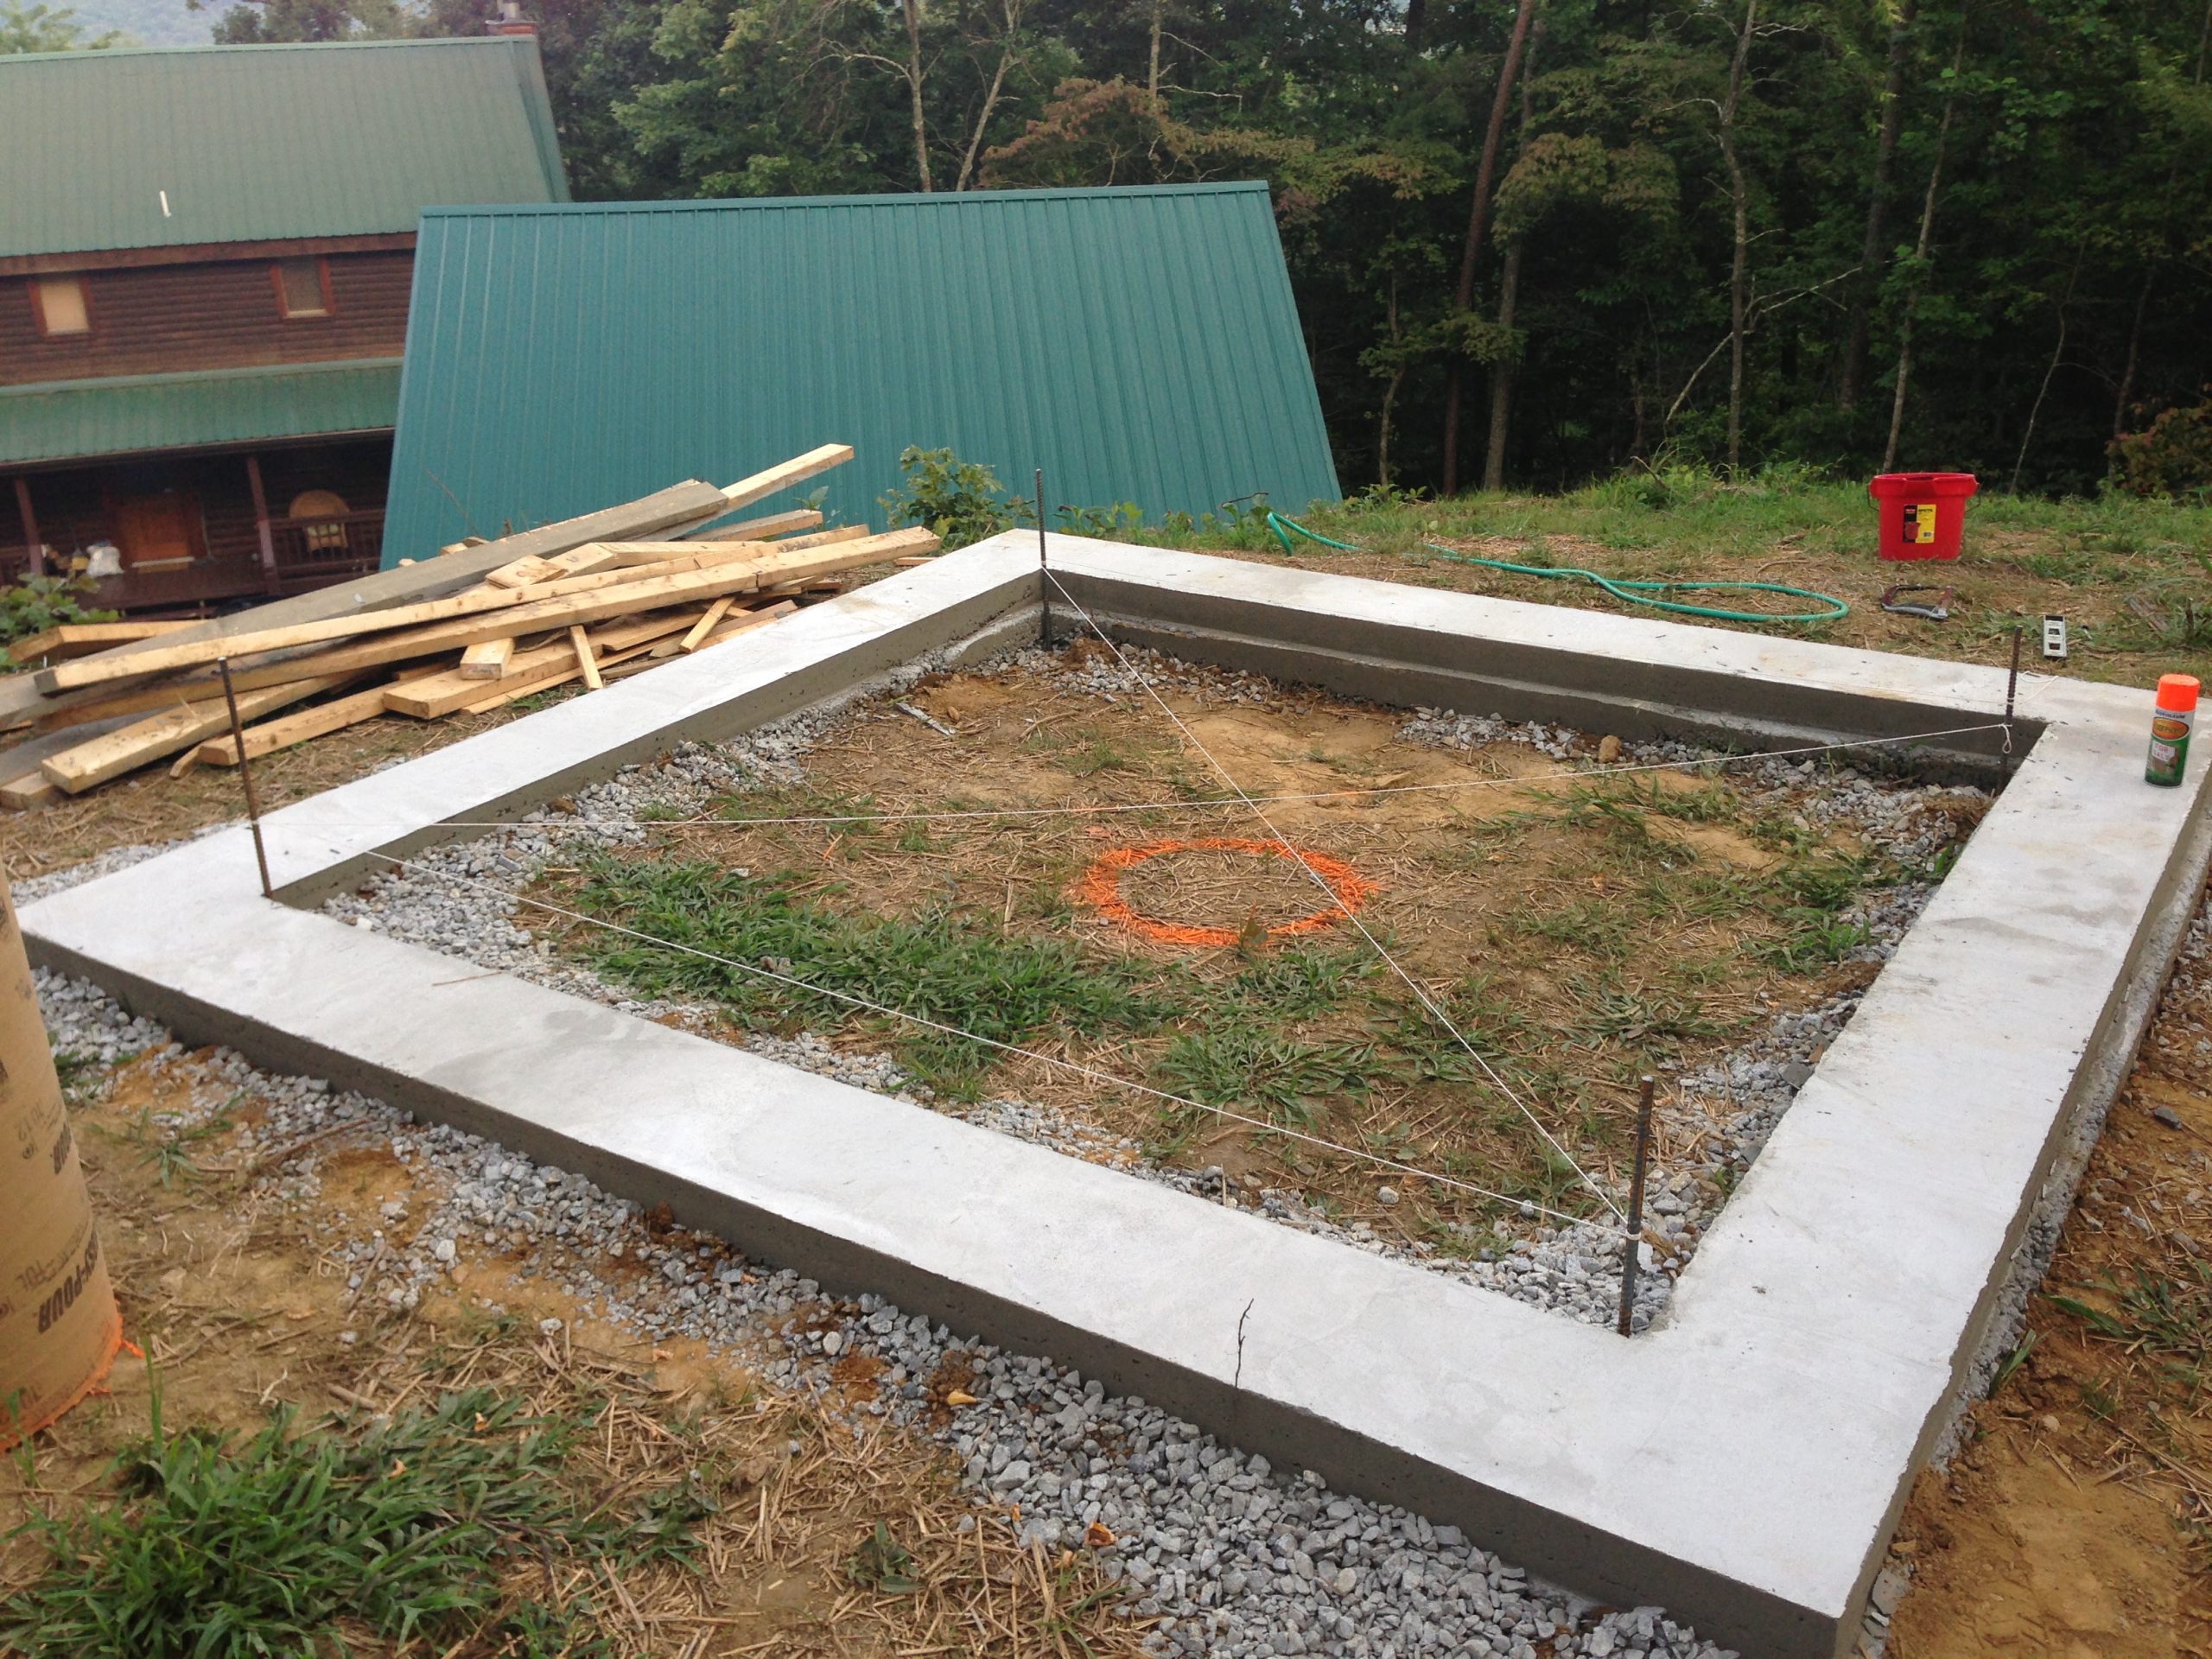
With the forms removed, the concrete had cured nicely and the site was ready for floor construction. I marked the center point for the telescope pier using string lines and a bit of spray paint — a satisfying moment, knowing that everything would be built around that spot. My log cabin is visible in the background, just down the hill.
With the foundation cured and ready, we turned our attention to the telescope pier. I opted for a hybrid setup — a poured concrete base with a steel pier bolted on top. After doing some comparison shopping with local metal fabricators, I ended up ordering the steel pier directly from SkyShed. Even with shipping, their price was better, and it was specifically designed to work with the plans I was using. Since I’d be mounting a hefty 14” Schmidt-Cassegrain setup weighing over 200 pounds with the mount, I went with their largest model: an 8 5/8” steel pier.
To support that size of steel pier, I needed a 14” Sonotube and a hole 48” deep. A quick heads-up for anyone following a similar path — you won’t find a 14” Sonotube at Home Depot or Lowe’s. I had to get mine from a local concrete supply yard. Before pouring the concrete, I also built a wooden J-bolt template based on a downloadable file from SkyShed. This let me get the bolts positioned correctly even before ordering the mount.
Digging the pier hole was definitely a workout. The soil here is mostly slate — not the worst to dig through, but it breaks into sharp chunks and makes progress slow. Between a gas-powered auger, post hole diggers, and a lot of manual effort, it took most of a day to finish the hole. We lined the bottom with gravel for drainage and leveled it out before setting the Sonotube and pouring the concrete. I measured carefully to ensure the top of the pier would sit just below the wooden floor once it was installed. Everything came together nicely — solid, level, and ready to support serious weight.
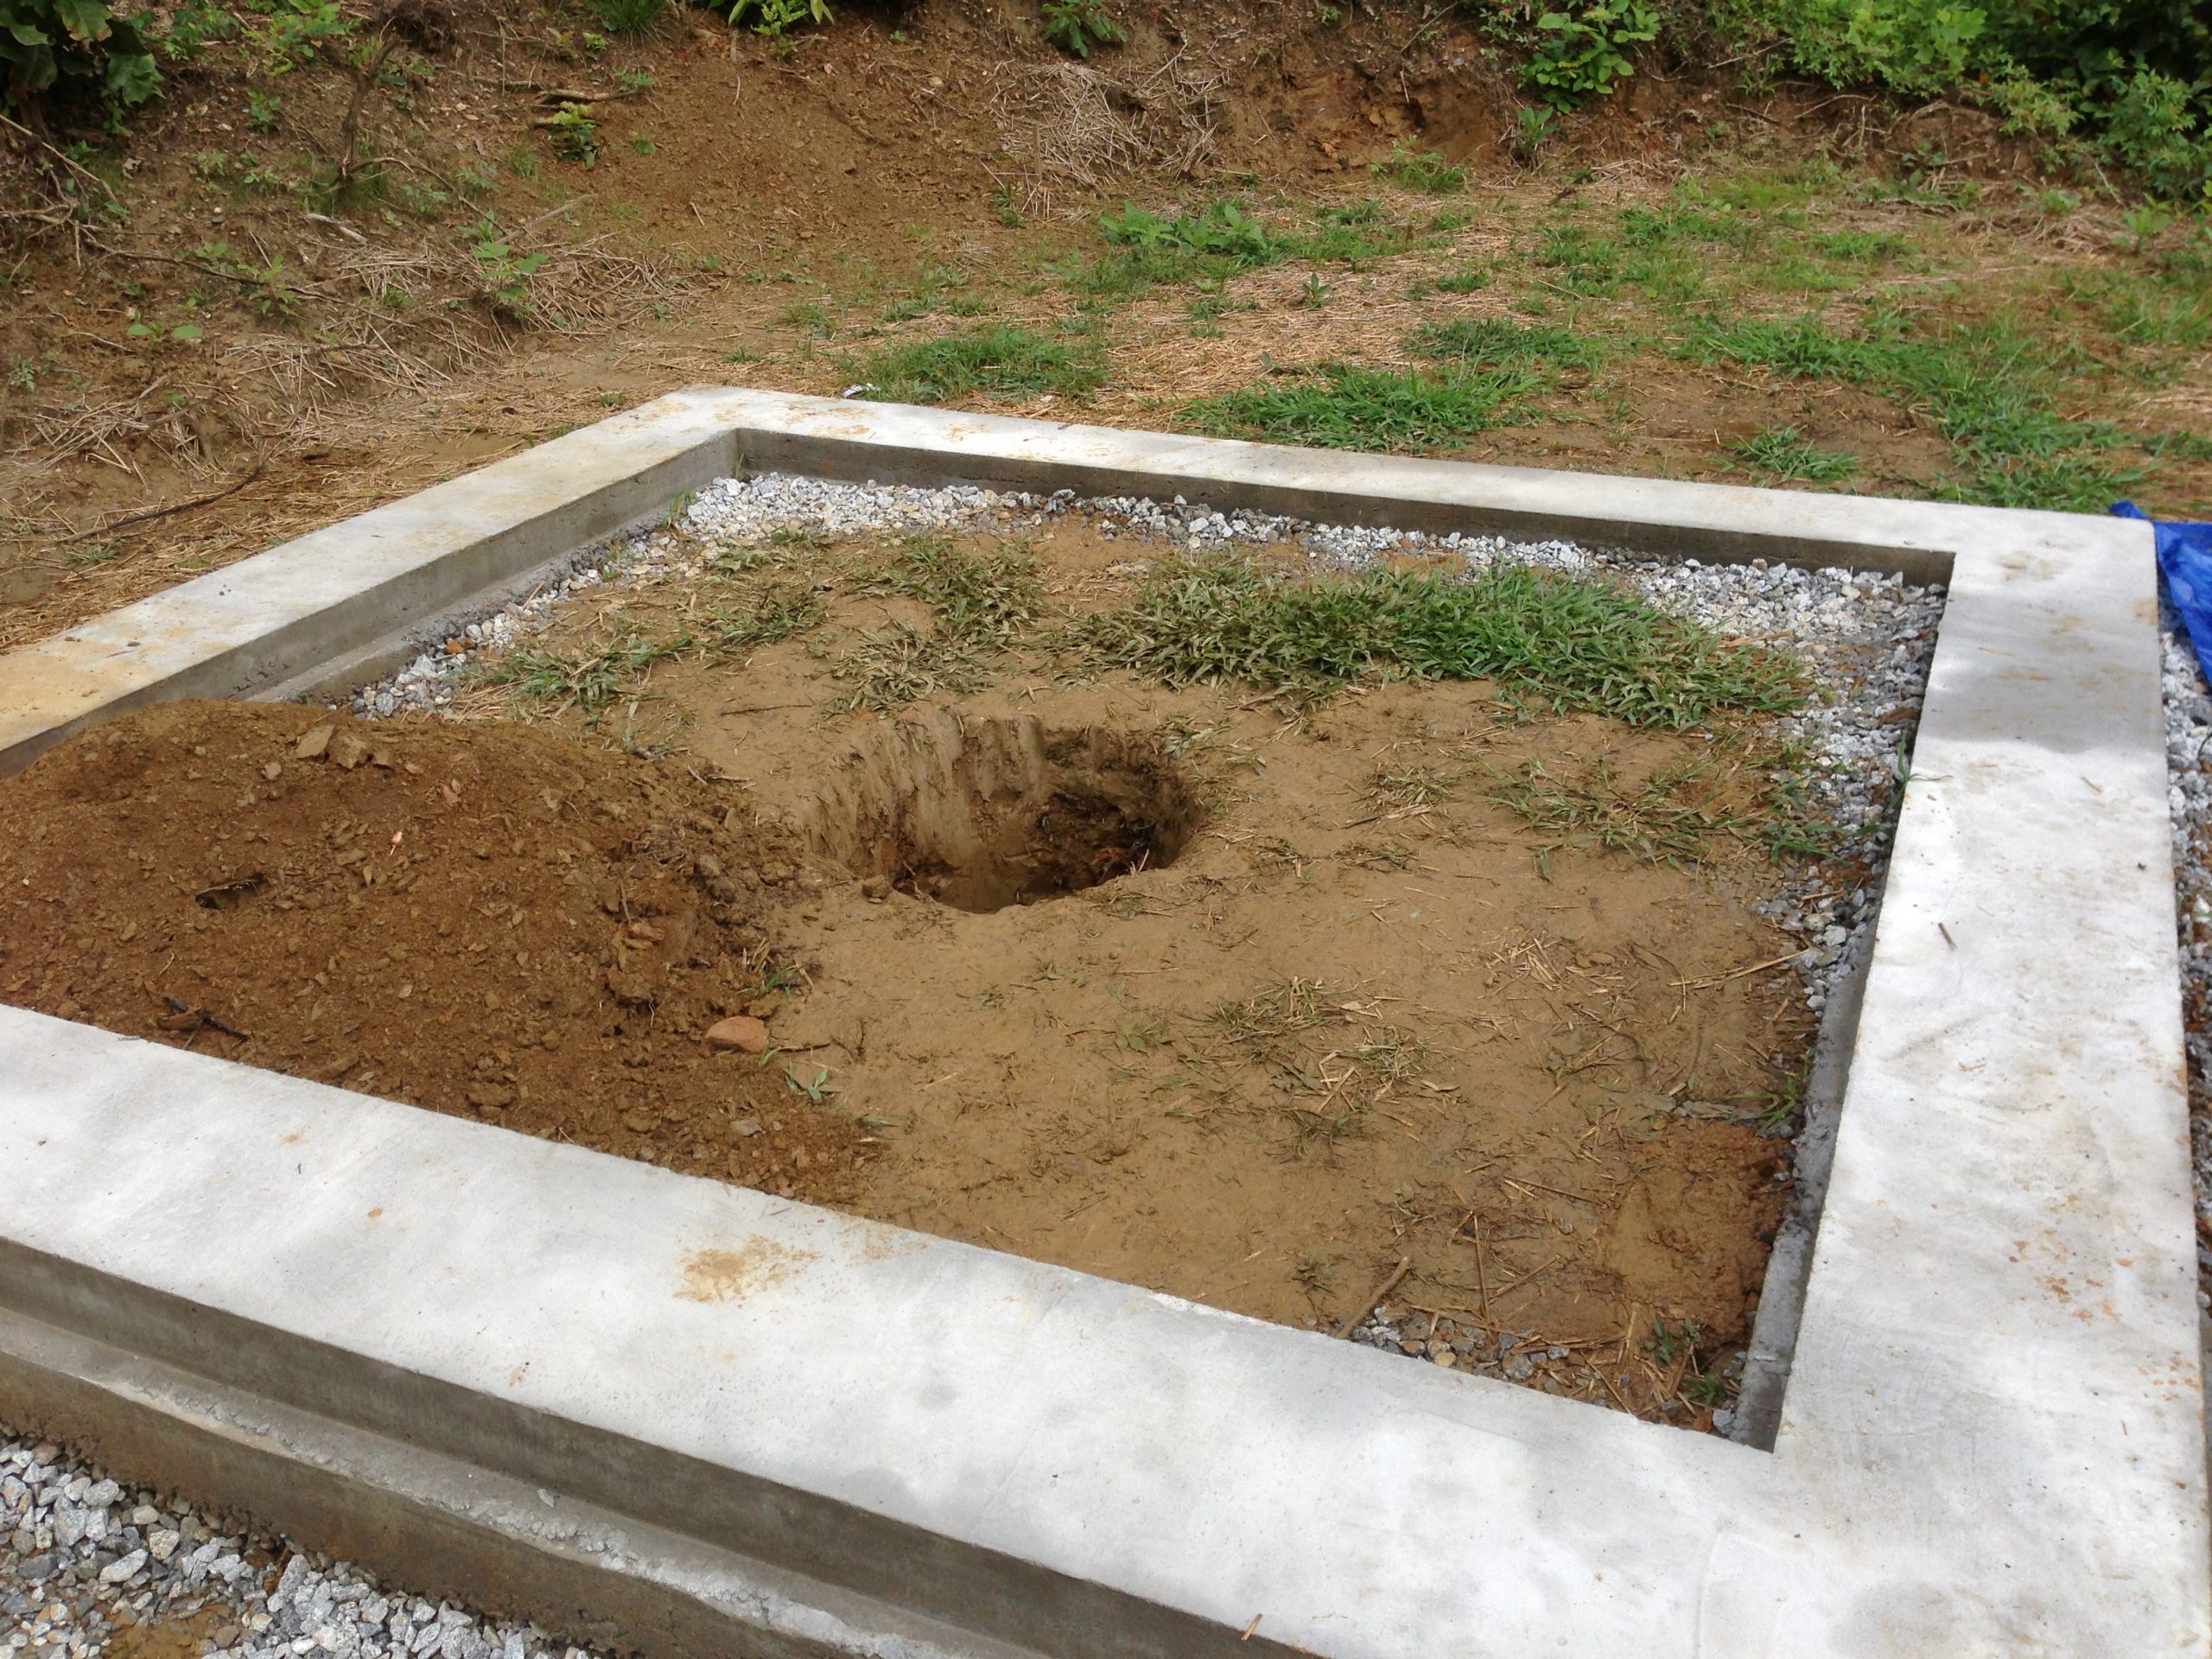
With the foundation finished, we started digging the pier hole—about 48” deep. Our soil was mostly slate, which meant a lot of chipping and prying. It wasn’t fun, but we eventually got there using a mix of tools and a lot of persistence.

A better look into the abyss. This hole ended up right around 48” deep—enough to anchor the steel pier solidly. You can see how much of the wall is slate. It was stubborn stuff, but we managed to get a nice clean bore.
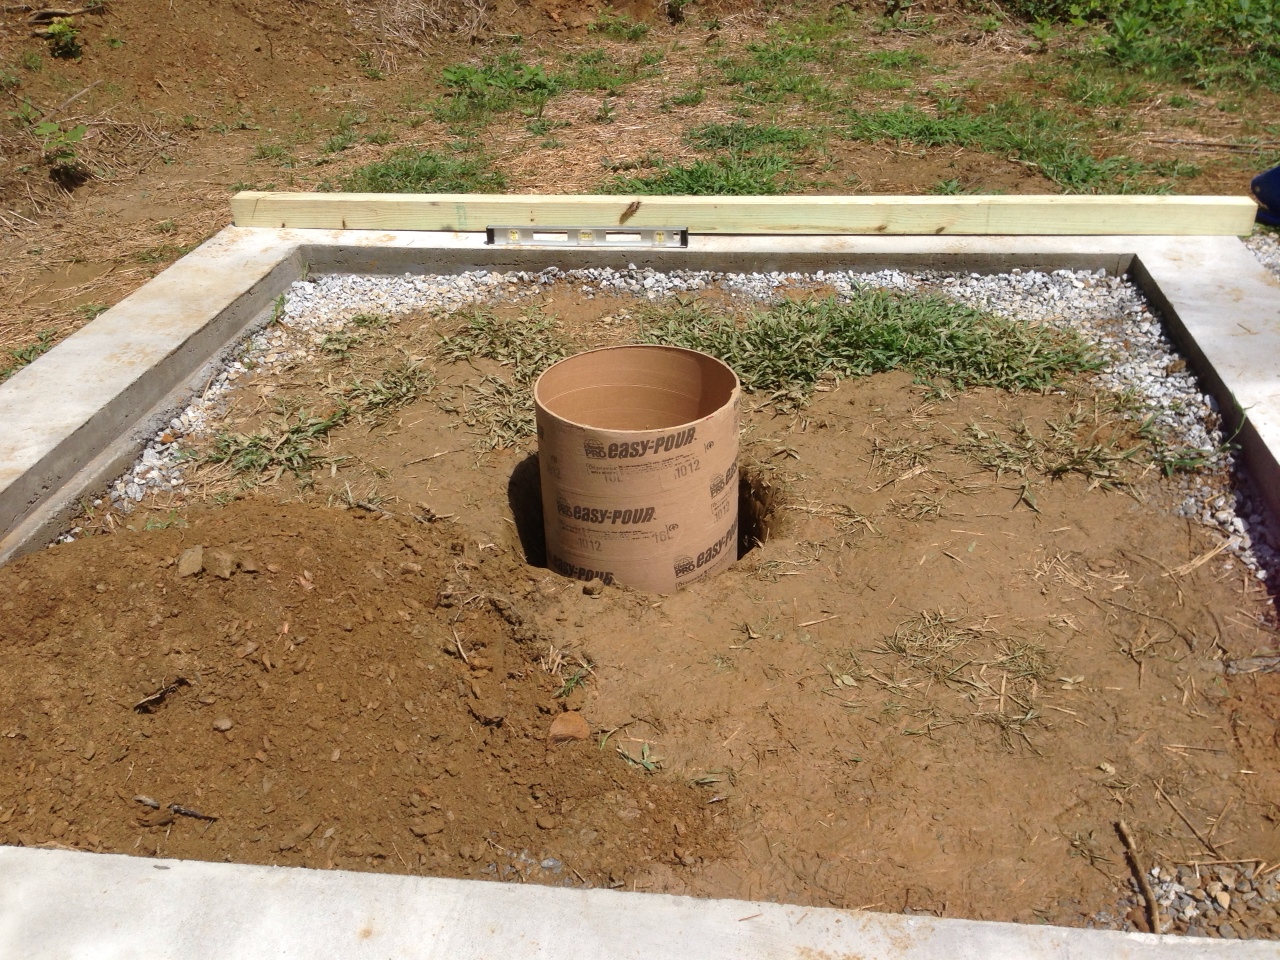
Here’s the 14” Sonotube in position. I cut it to bring the top of the concrete pier flush with the floor once built. This size Sonotube wasn’t easy to find—definitely a specialty item from a concrete supplier, not your average big box hardware store.
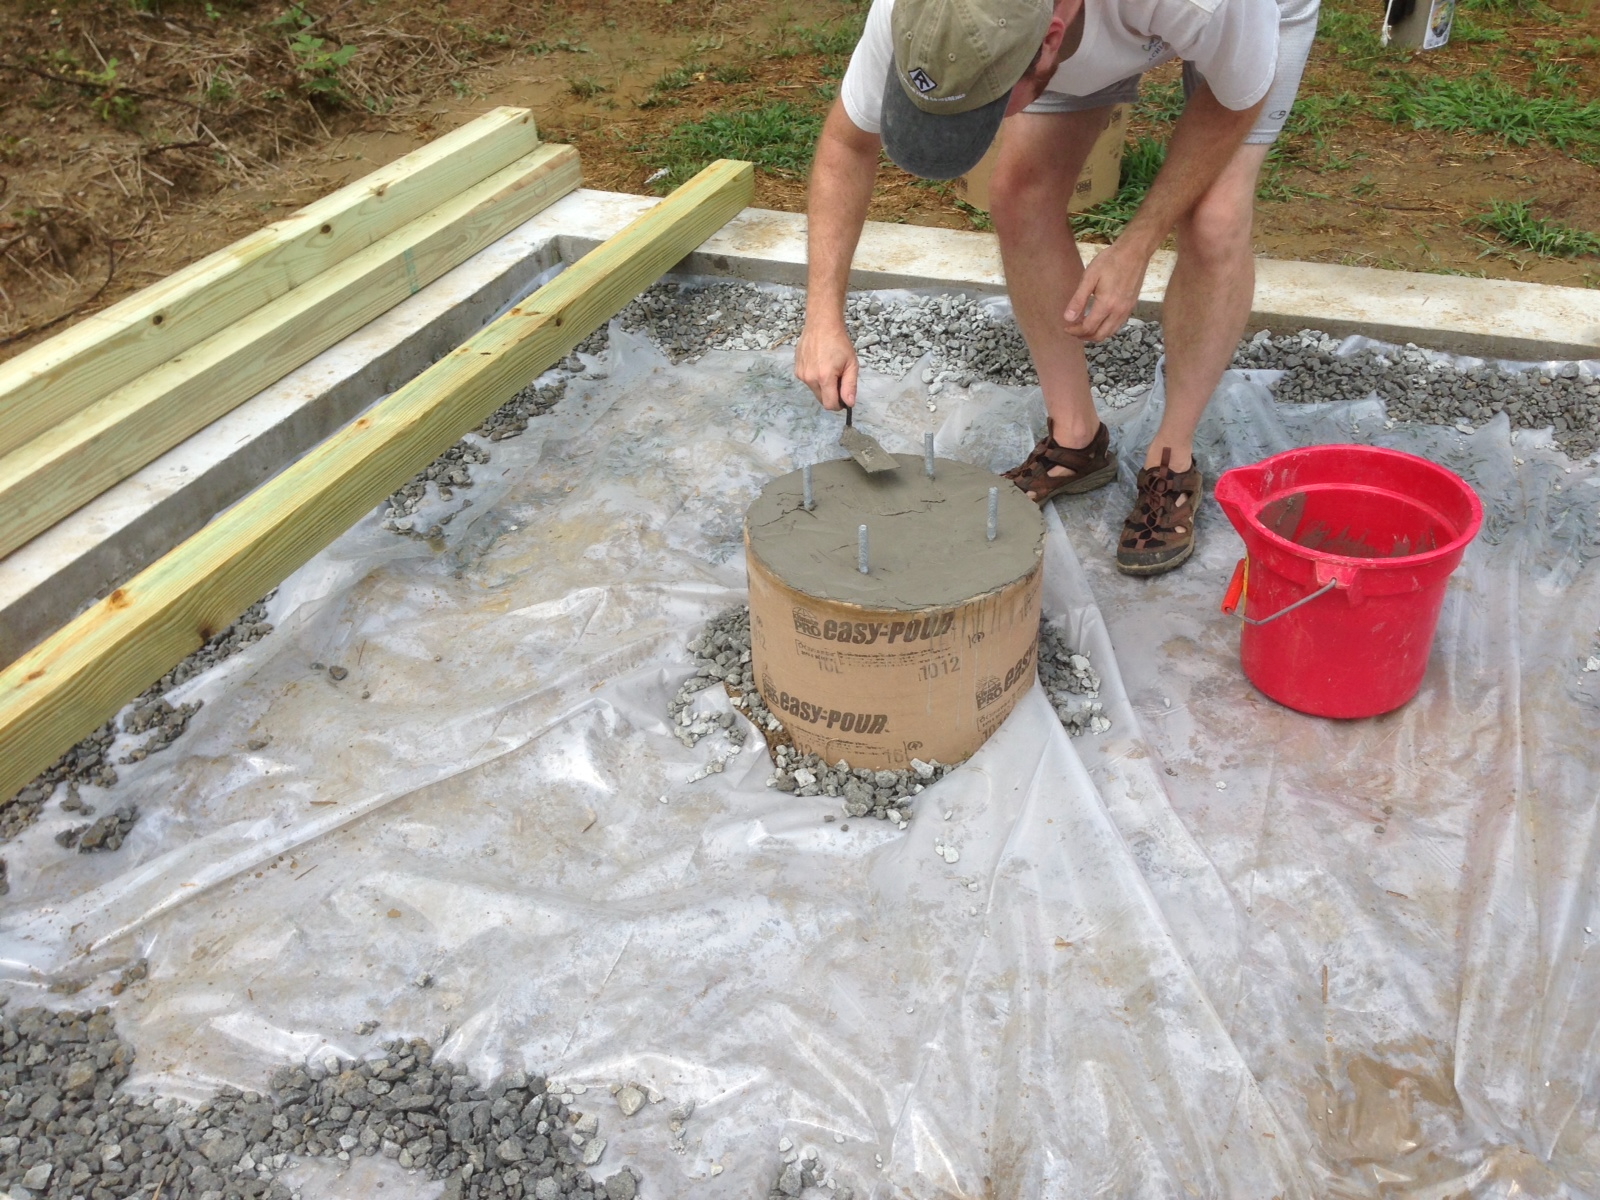
Pour complete! Here I’m troweling the top smooth while the J-bolts are held in place by a plywood template matching the base of the SkyShed pier. Once cured, this concrete pier will support over 200 pounds of scope and mount. You’ll also notice plastic sheeting and gravel around the base — this was added as a moisture barrier since there wouldn’t be much airflow under the floor once it was in place, and Georgia summers are notoriously humid.
With the perimeter foundation and pier fully cured, it was time to turn our attention to the floor structure. Following the SkyShed plans, we laid out a series of 4×4 pressure-treated beams across the concrete foundation to serve as the base for the wooden floor. This approach not only raises the floor a few inches off the ground — helping deter moisture and unwelcome critters — but also provides solid support and airflow underneath. Before setting the beams in place, we added a layer of plastic sheeting and gravel inside the foundation footprint to act as a moisture barrier, which was especially important in Georgia’s humid summer climate.
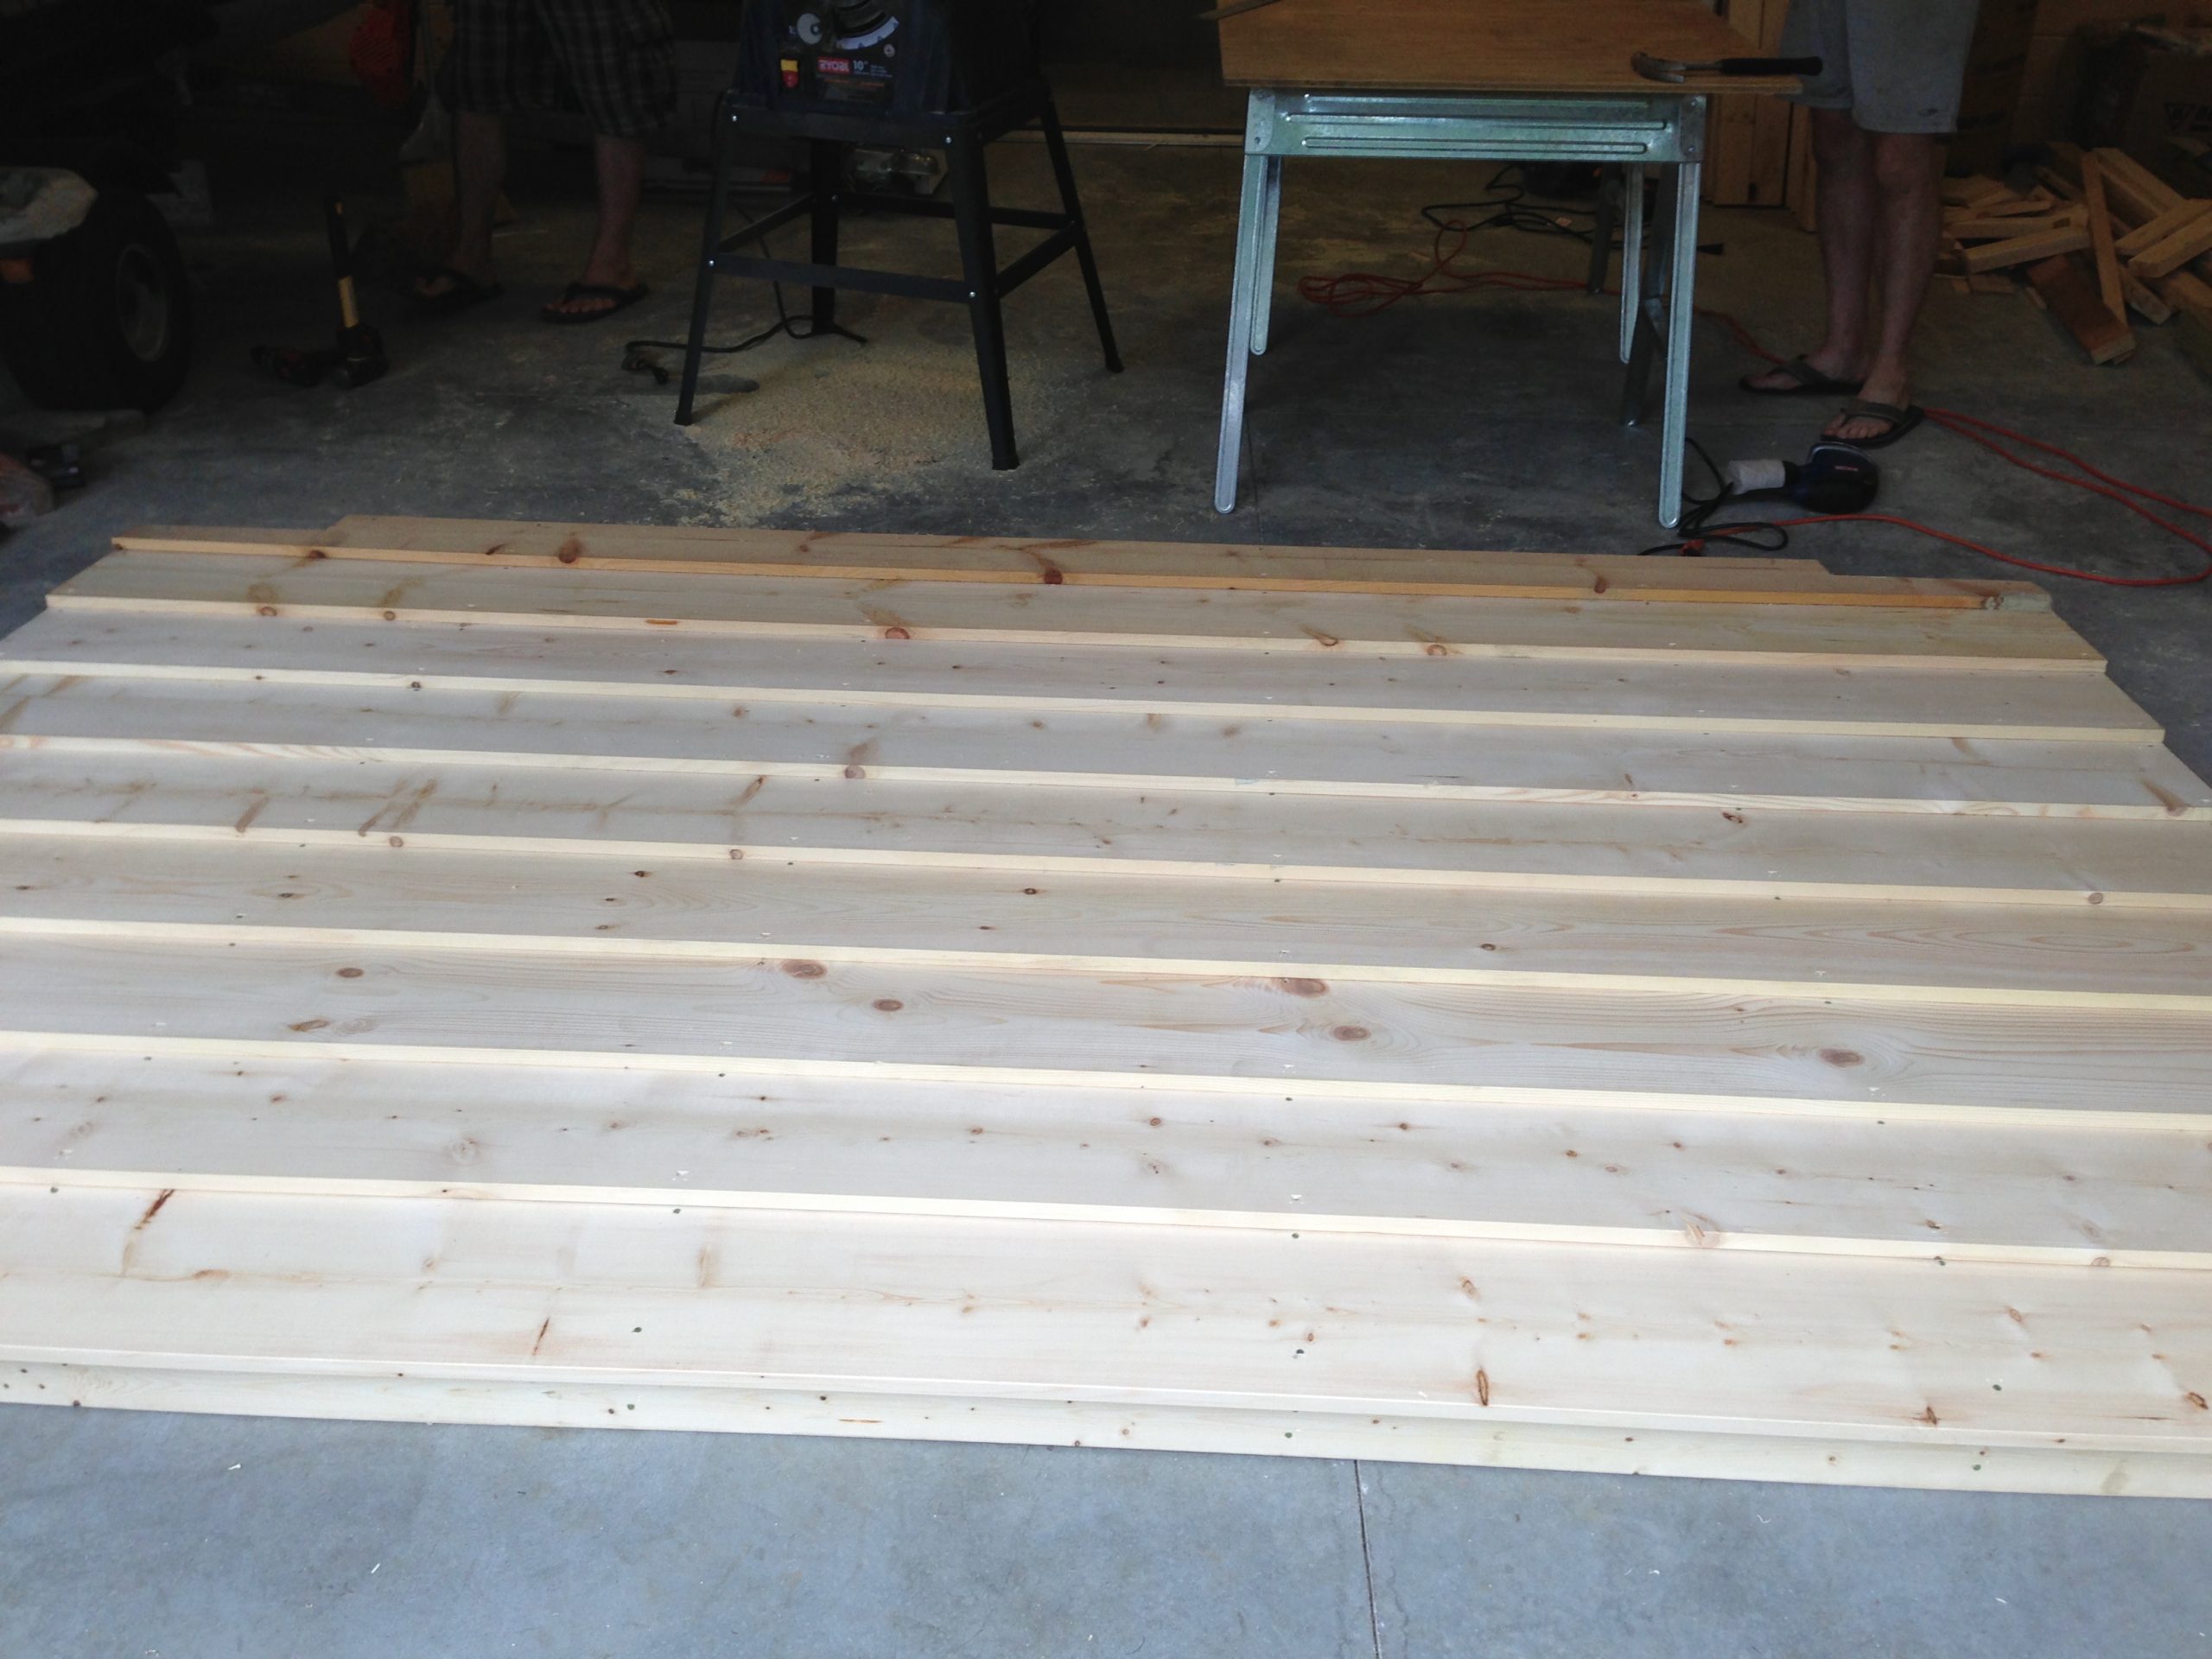
The 4x4s were evenly spaced and leveled with minimal effort since they rested on the already level perimeter foundation. For added stability, we placed paver stones beneath the center of each beam and shimmed where needed with asphalt shingles. Once the base was in place, the 1×10 tongue-and-groove floorboards went down quickly. Several boards were attached with screws rather than nails to allow future access underneath for wiring or maintenance.
In hindsight, I probably would have just used OSB sheathing for the floor. While the 1×10 boards looked great and offered flexibility, they also cost significantly more and expanded and contracted with seasonal humidity. OSB would have been a cheaper and simpler choice — and probably just as effective.
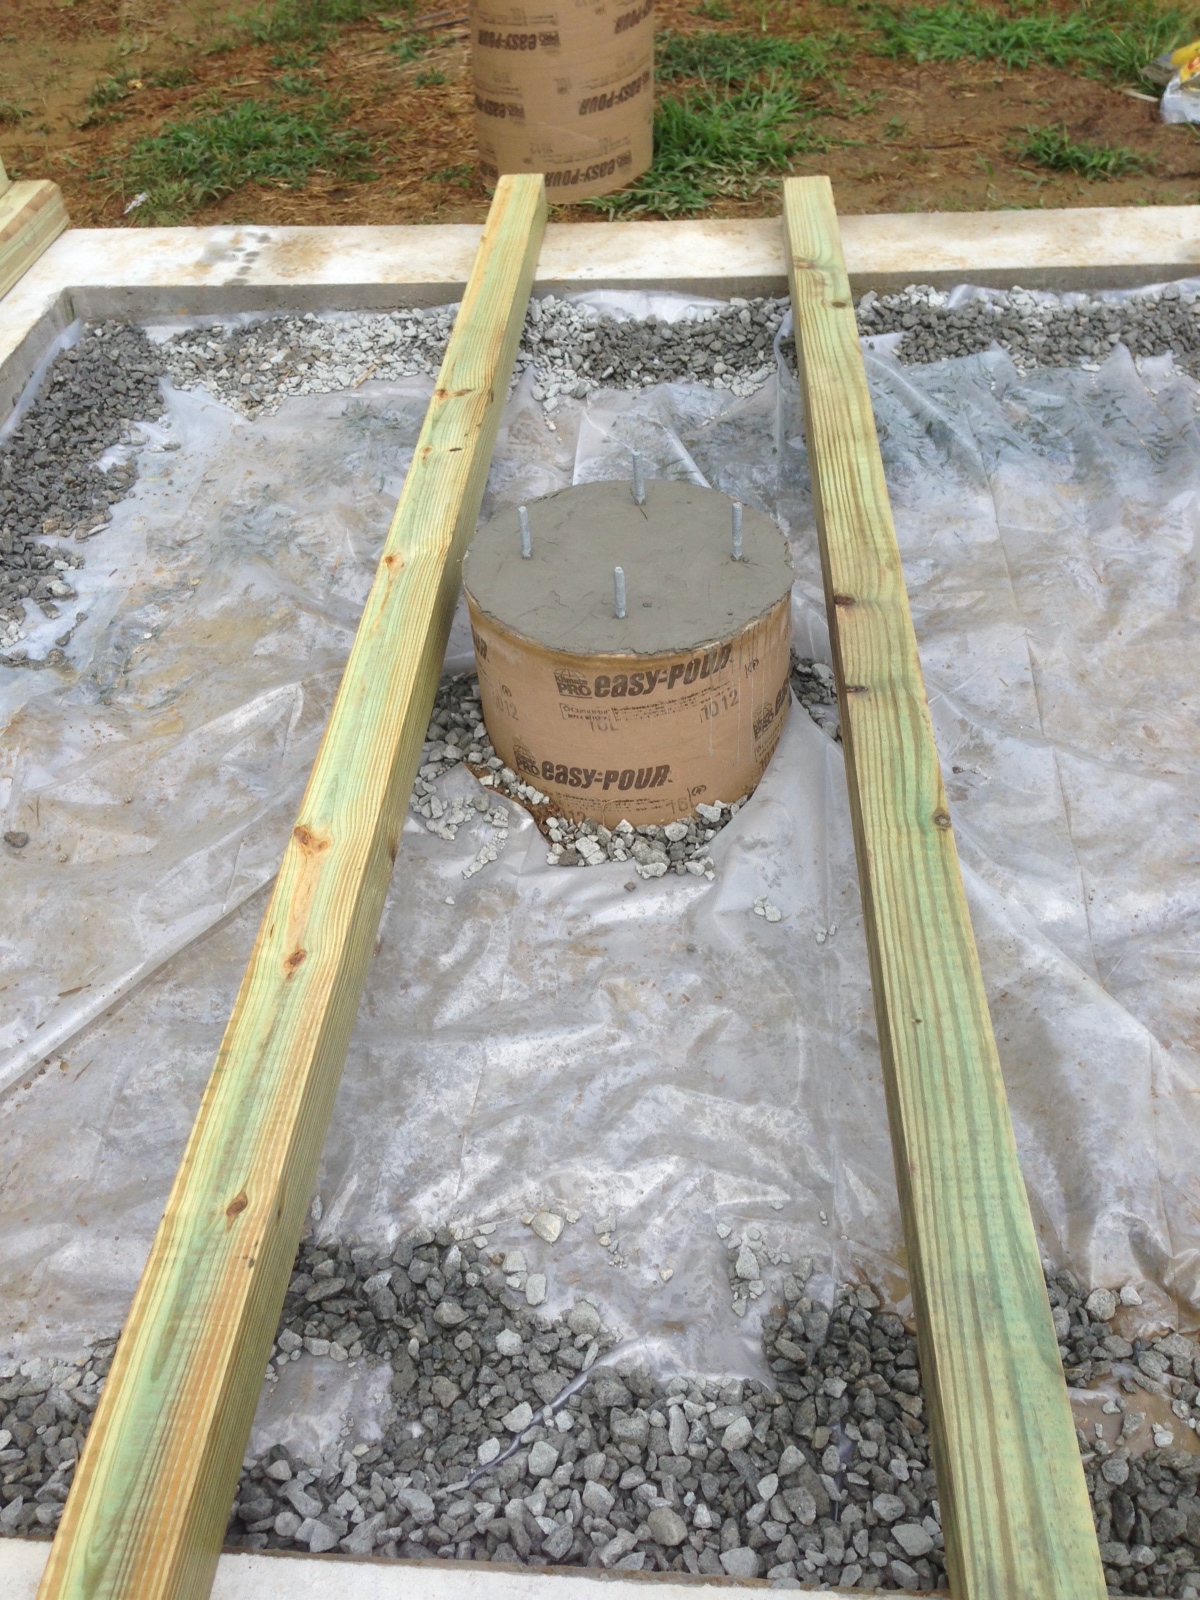
With the pier now fully set, we began laying out the 4×4 beams that would support the floor. The plastic and gravel beneath were there mainly to reduce ground moisture, since once the floor was in place, there wouldn’t be much airflow. Georgia humidity is no joke.
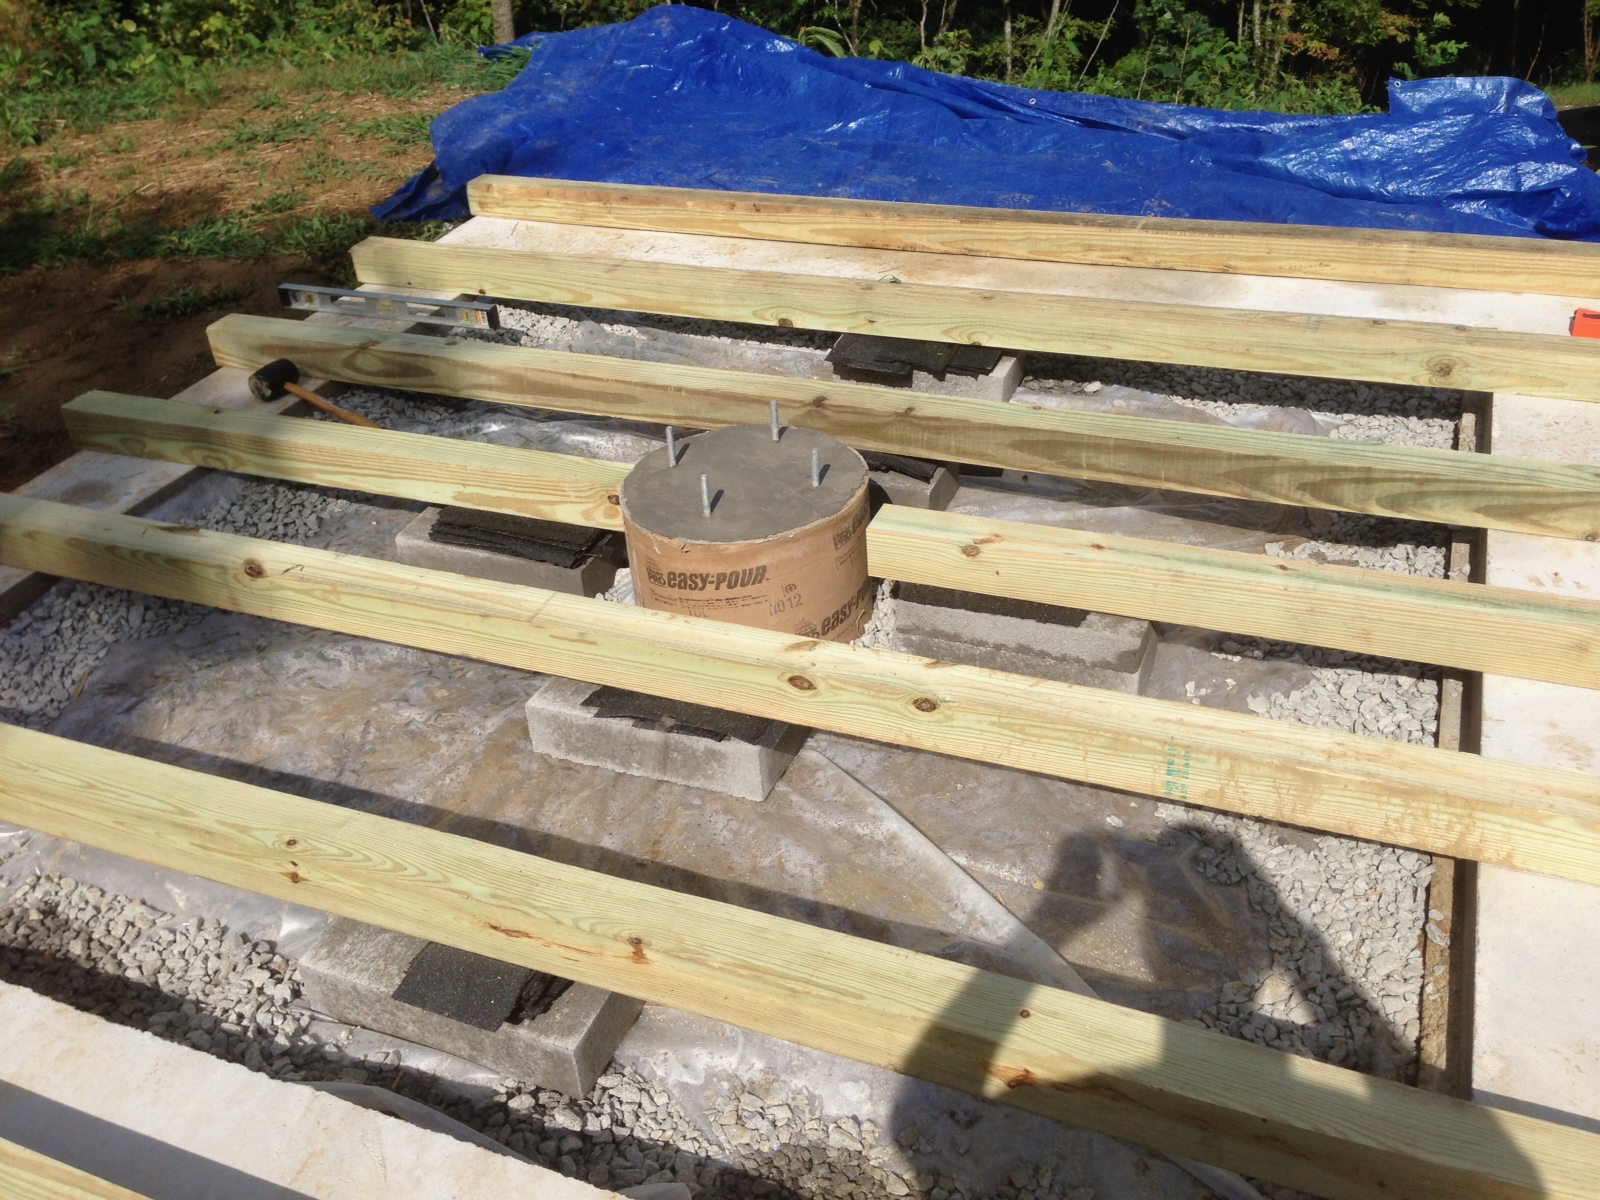
All the 4×4 beams were laid out and spaced evenly to support the 10’x10’ floor. Each one rested on concrete pavers for added support, shimmed with bits of roofing shingles to keep everything level. You can also see the blue tarp we kept on standby—this was Georgia in the summer, and thunderstorms came out of nowhere.
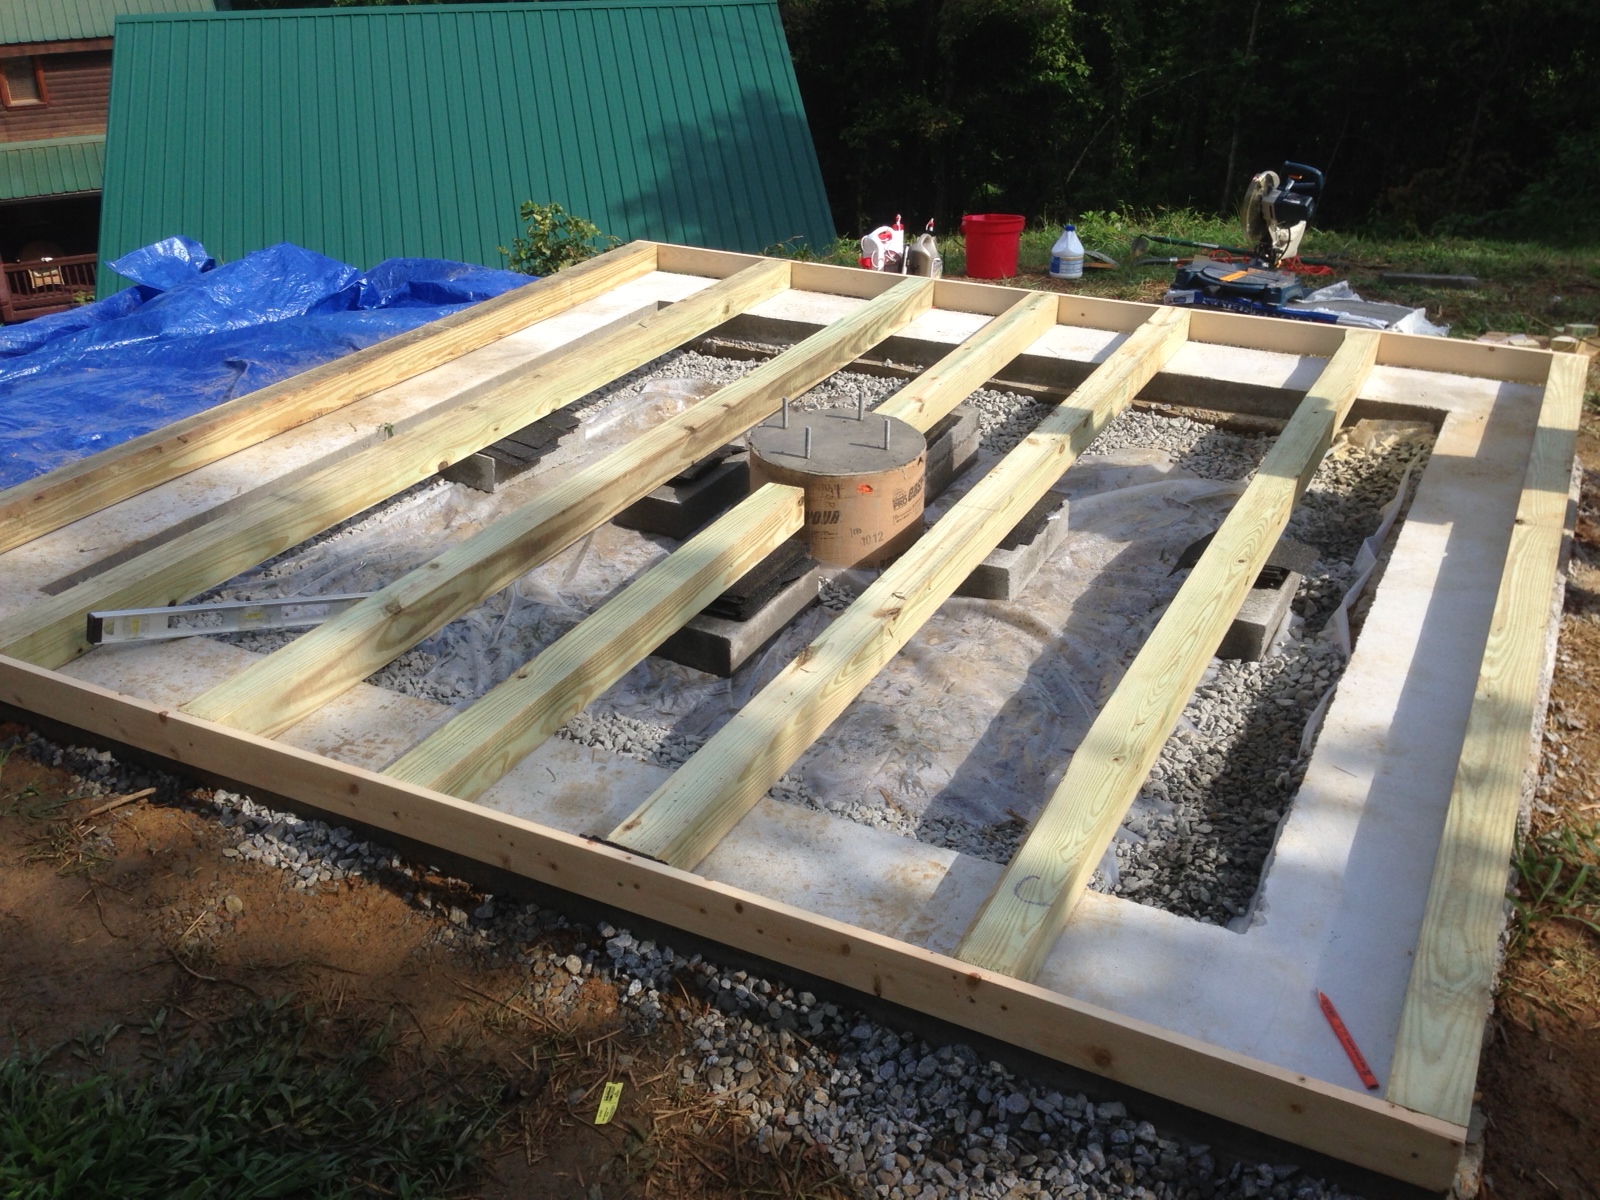
With the 4x4s leveled and supported, I added the outer boards to complete the frame and enclose the floor box. You can also see the pier perfectly centered in the middle of the layout. It was finally starting to look like an observatory floor instead of a construction zone.
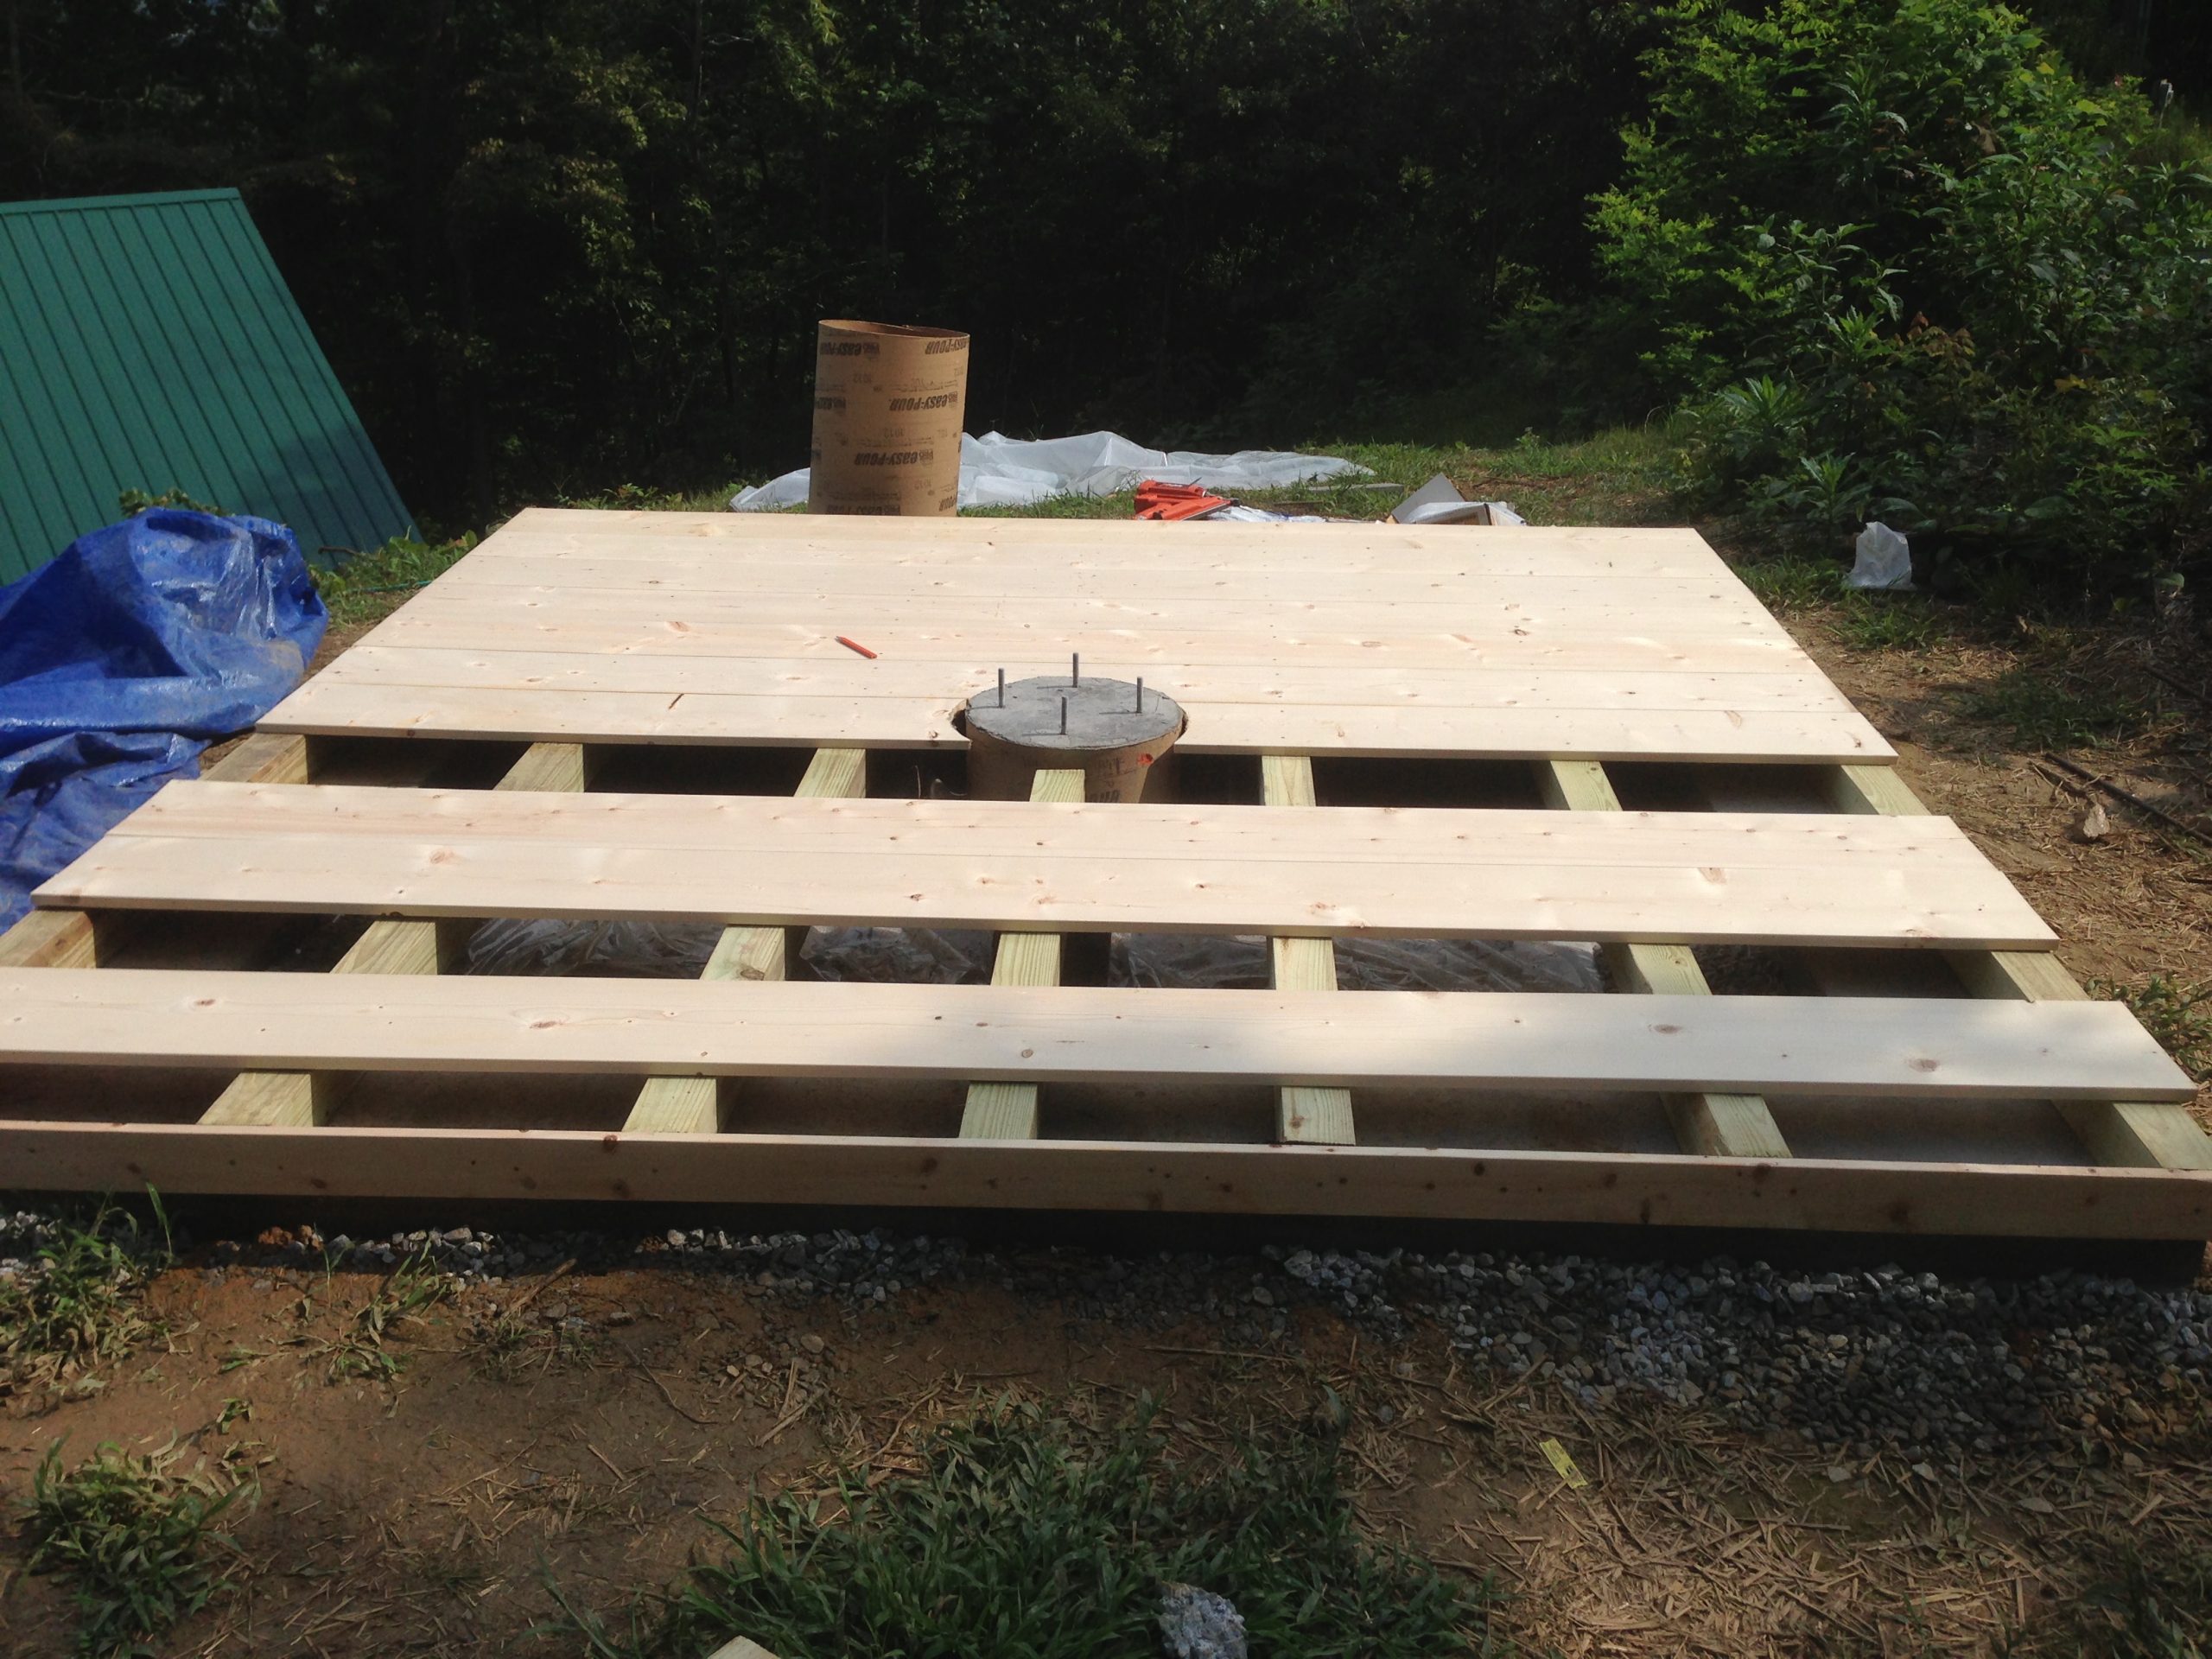
The 1×10 floorboards went down smoothly, cut to fit around the pier. This part came together fast, and while it looked great when finished, I still think OSB would’ve been cheaper, easier, and more stable long-term. But hey, it was satisfying watching a real floor take shape.
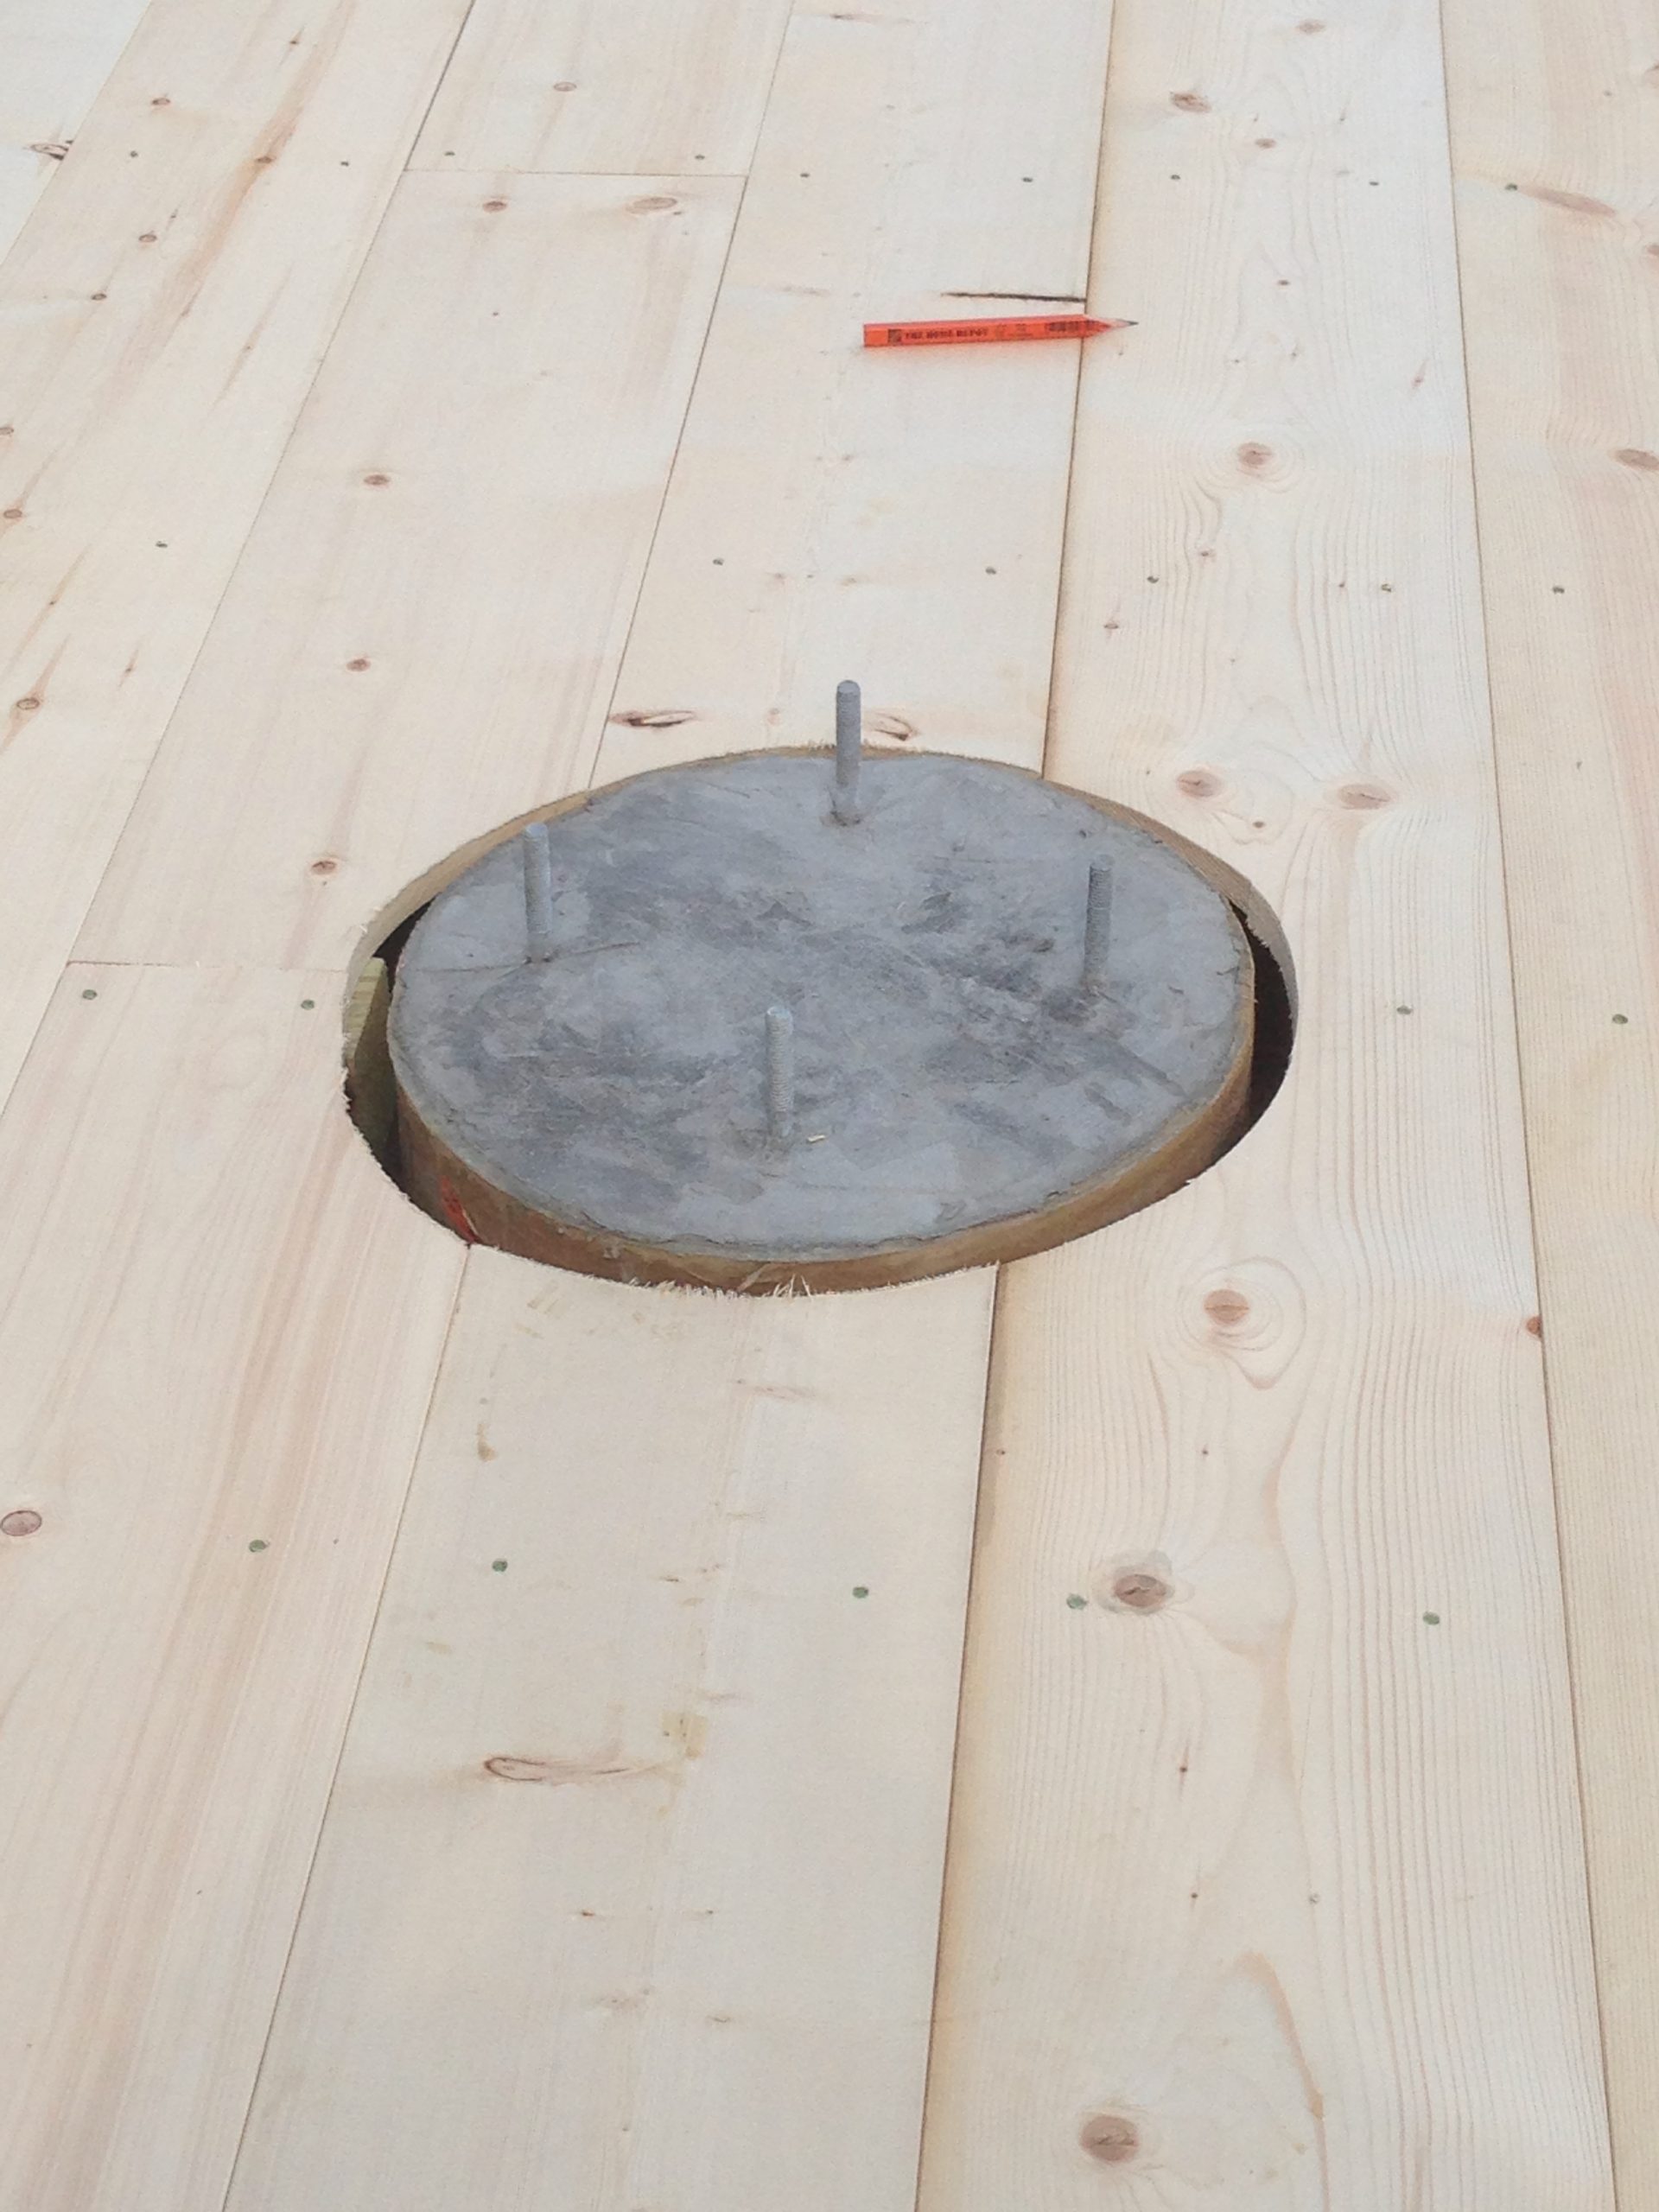
A close-up of the finished floor cutout around the concrete pier. Pretty satisfying fit—and yes, the pencil was intentional. That thing made more appearances than some of my tools.
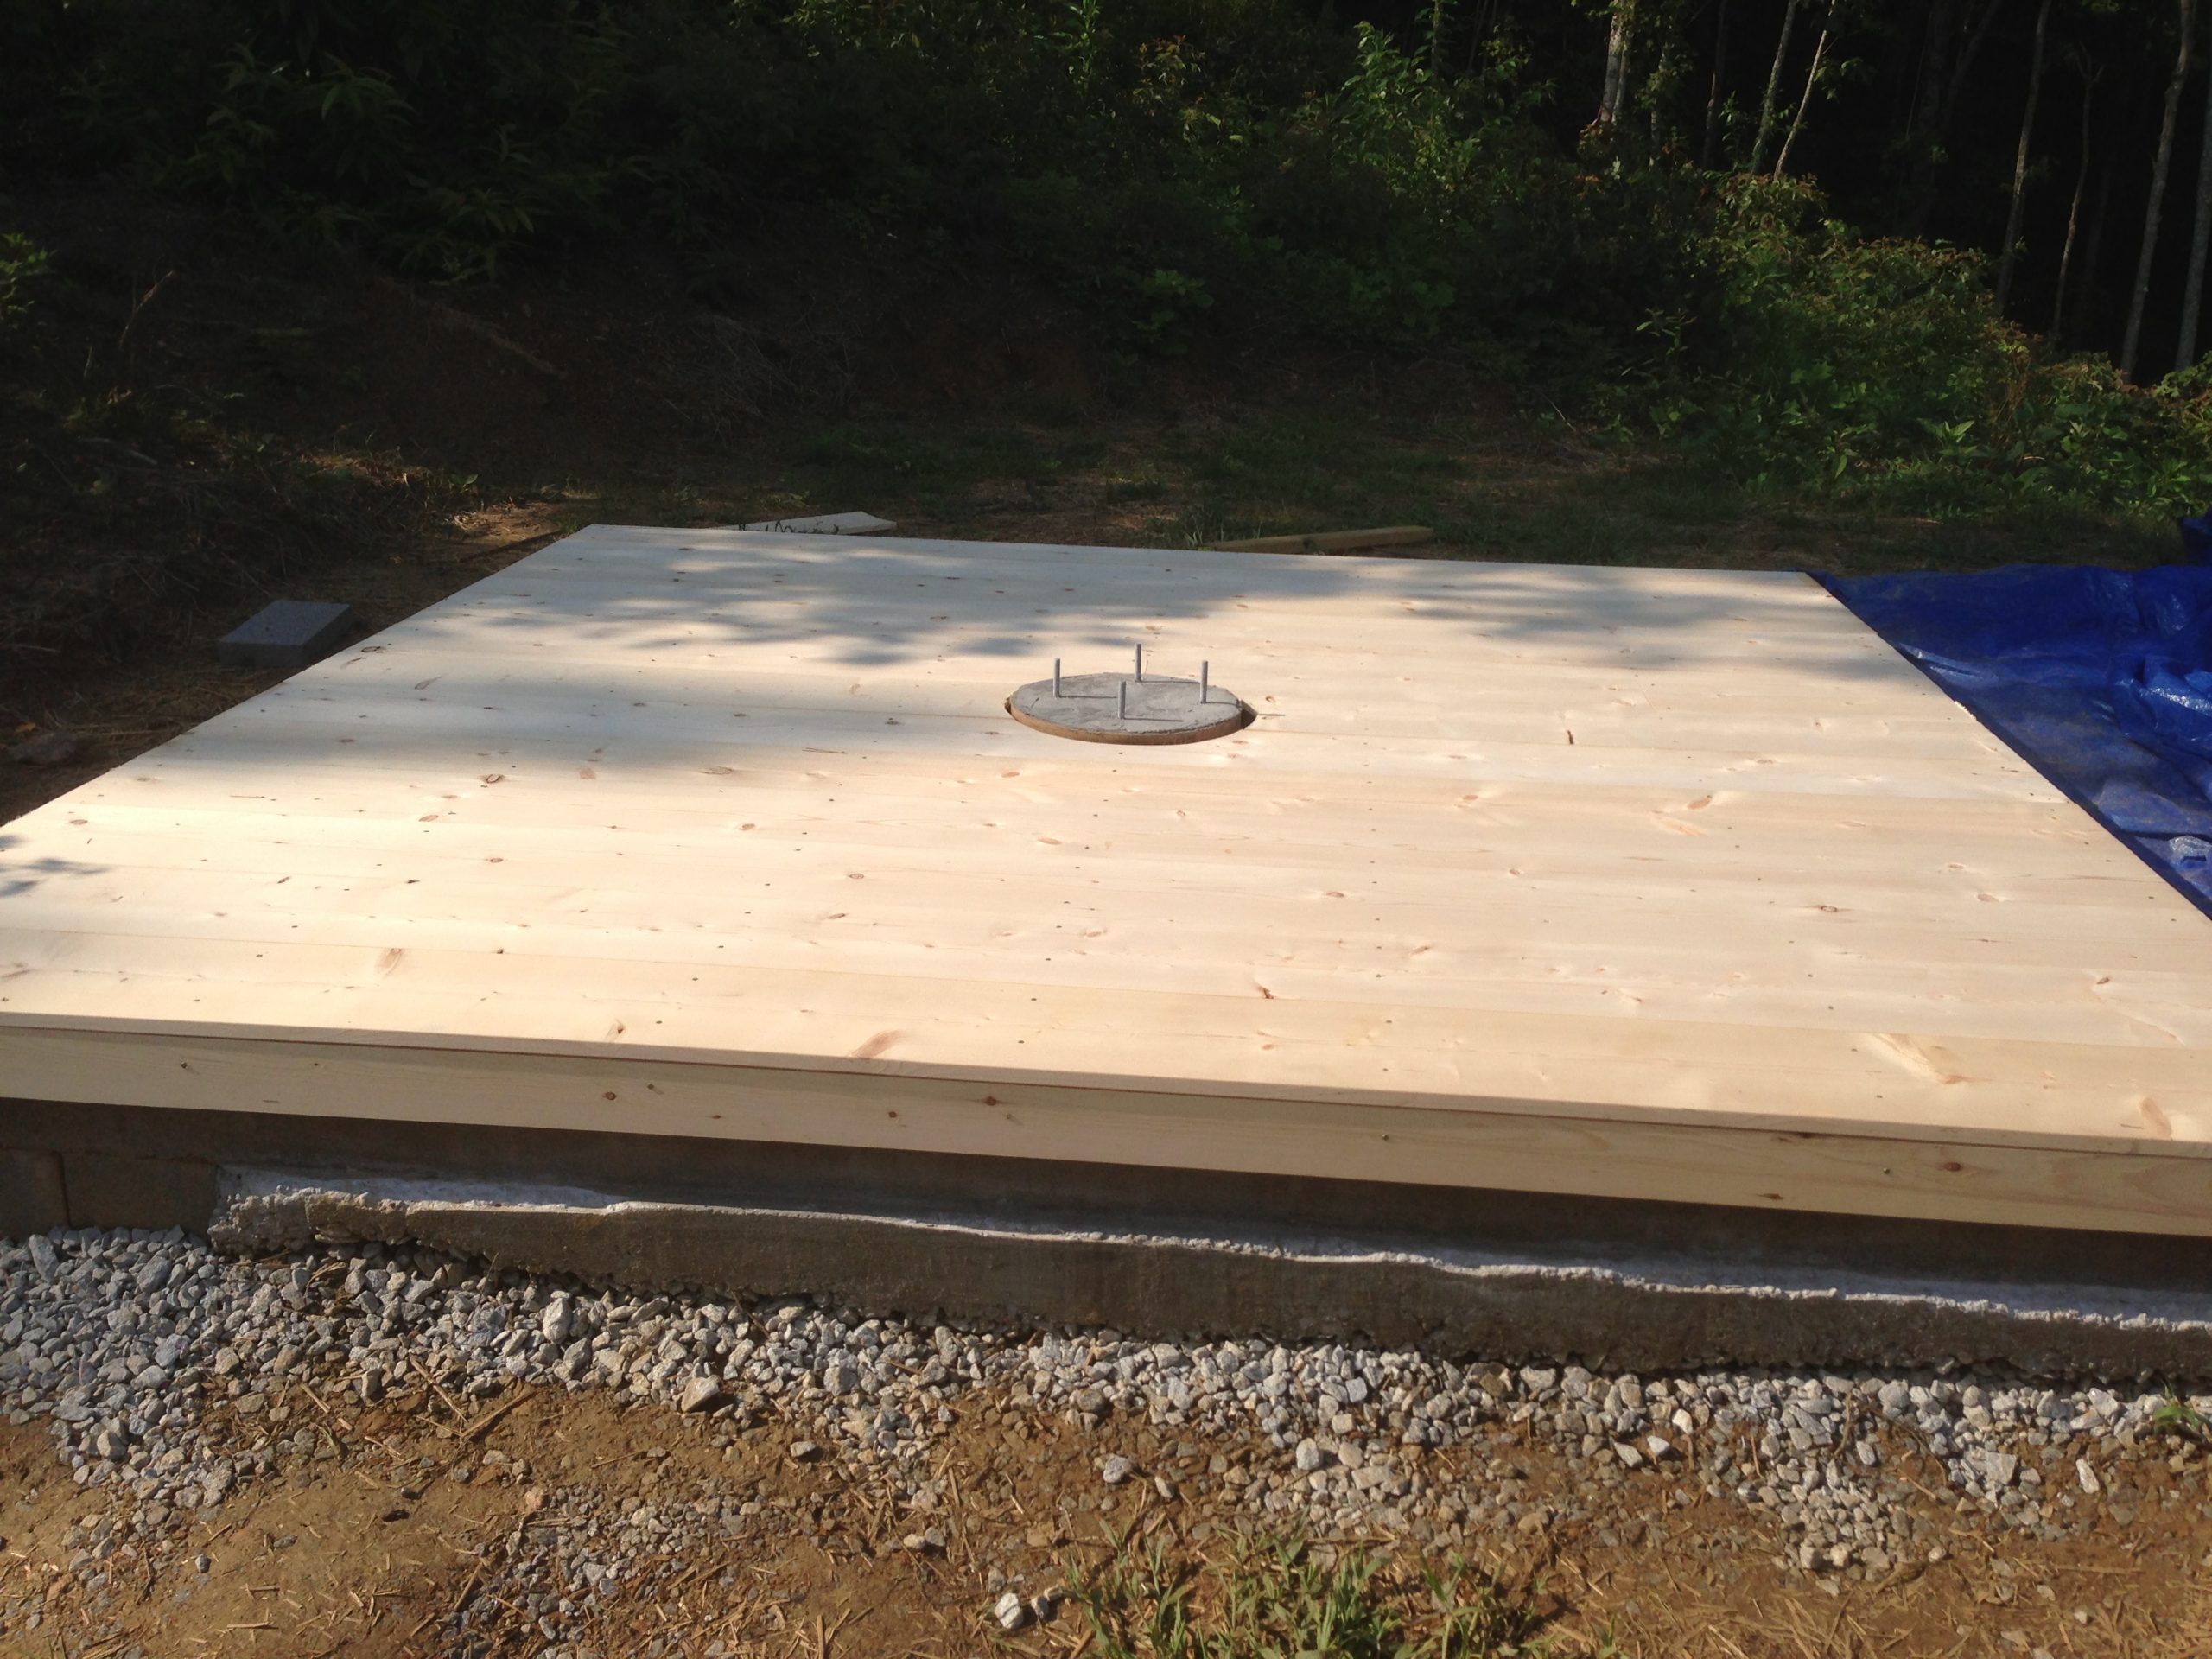
The finished floor, fully installed and trimmed out. It’s just a floor at this point—but a solid, level, and well-supported one that set the stage for everything to come.
With the floor complete and the pier in place, it was time to build the walls. I spent a weekend in the garage constructing the four wall panels using the SkyShed plans—such as they were. The garage was about 100 feet downhill from the observatory site, so while it was nice to have my tools and shelter from the weather, hauling those finished panels uphill later was… less fun.
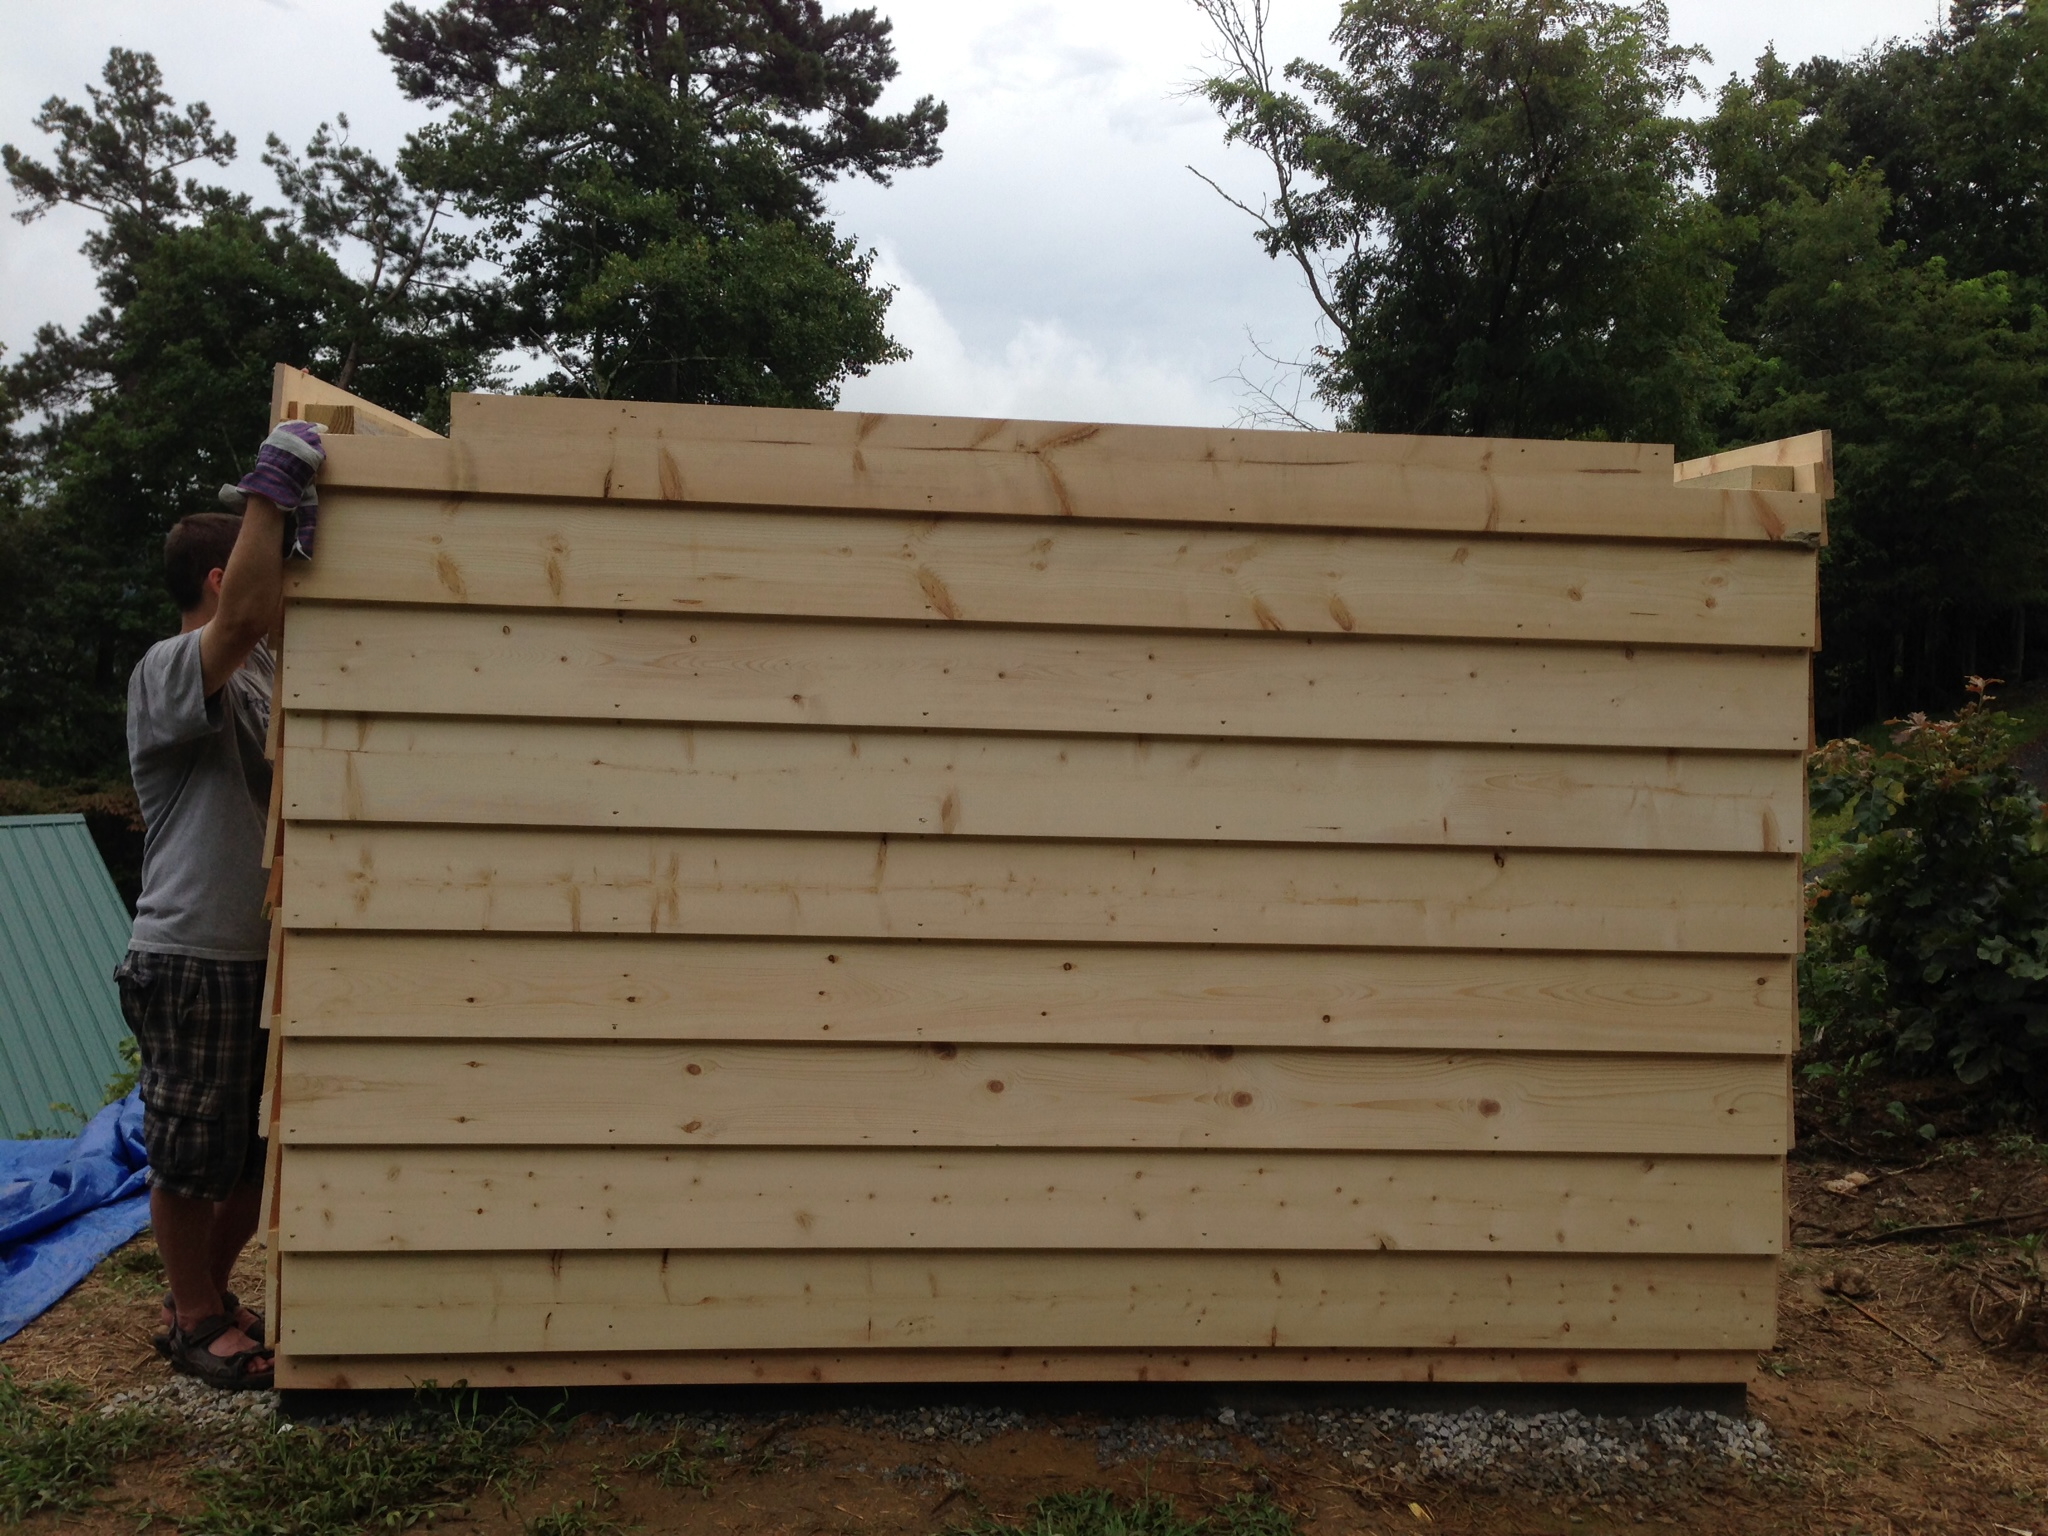
Each wall was a little different in size and layout, so it wasn’t just a cookie-cutter process. This part of the build turned out to be the most challenging, mostly due to weight and maneuverability. The east and west walls—especially the ones that carried the 4×4 supports for the roll-off roof—were incredibly heavy. SkyShed recommends building the walls and setting them into place rather than framing them in place. We followed that advice, and while we did manage to get them up with just two people, I wouldn’t do it that way again. Three or four sets of hands would’ve made a world of difference.
The walls were screwed into the 4×4 subfloor beams, and then secured to each other with steel brackets. If I were trying to cut costs, I might’ve framed the walls and used OSB with siding over top—but the overlapping wood boards we used fit the space well. They’re common on houses in the area and helped the observatory blend into its North Georgia surroundings a bit more naturally. Despite the weight and wrestling, the walls came together well—and it was finally starting to look like a real structure.
The first of the four walls—this one is the north wall, built in the garage for convenience (and to stay out of the Georgia humidity). You can see the notched cutouts at the top where the inset roll-off roof rails will eventually slot in. This was per the SkyShed design, though honestly, having the rails inset turned out to be more trouble than it was worth. We’ll get into that a bit more when we get to the roof section.
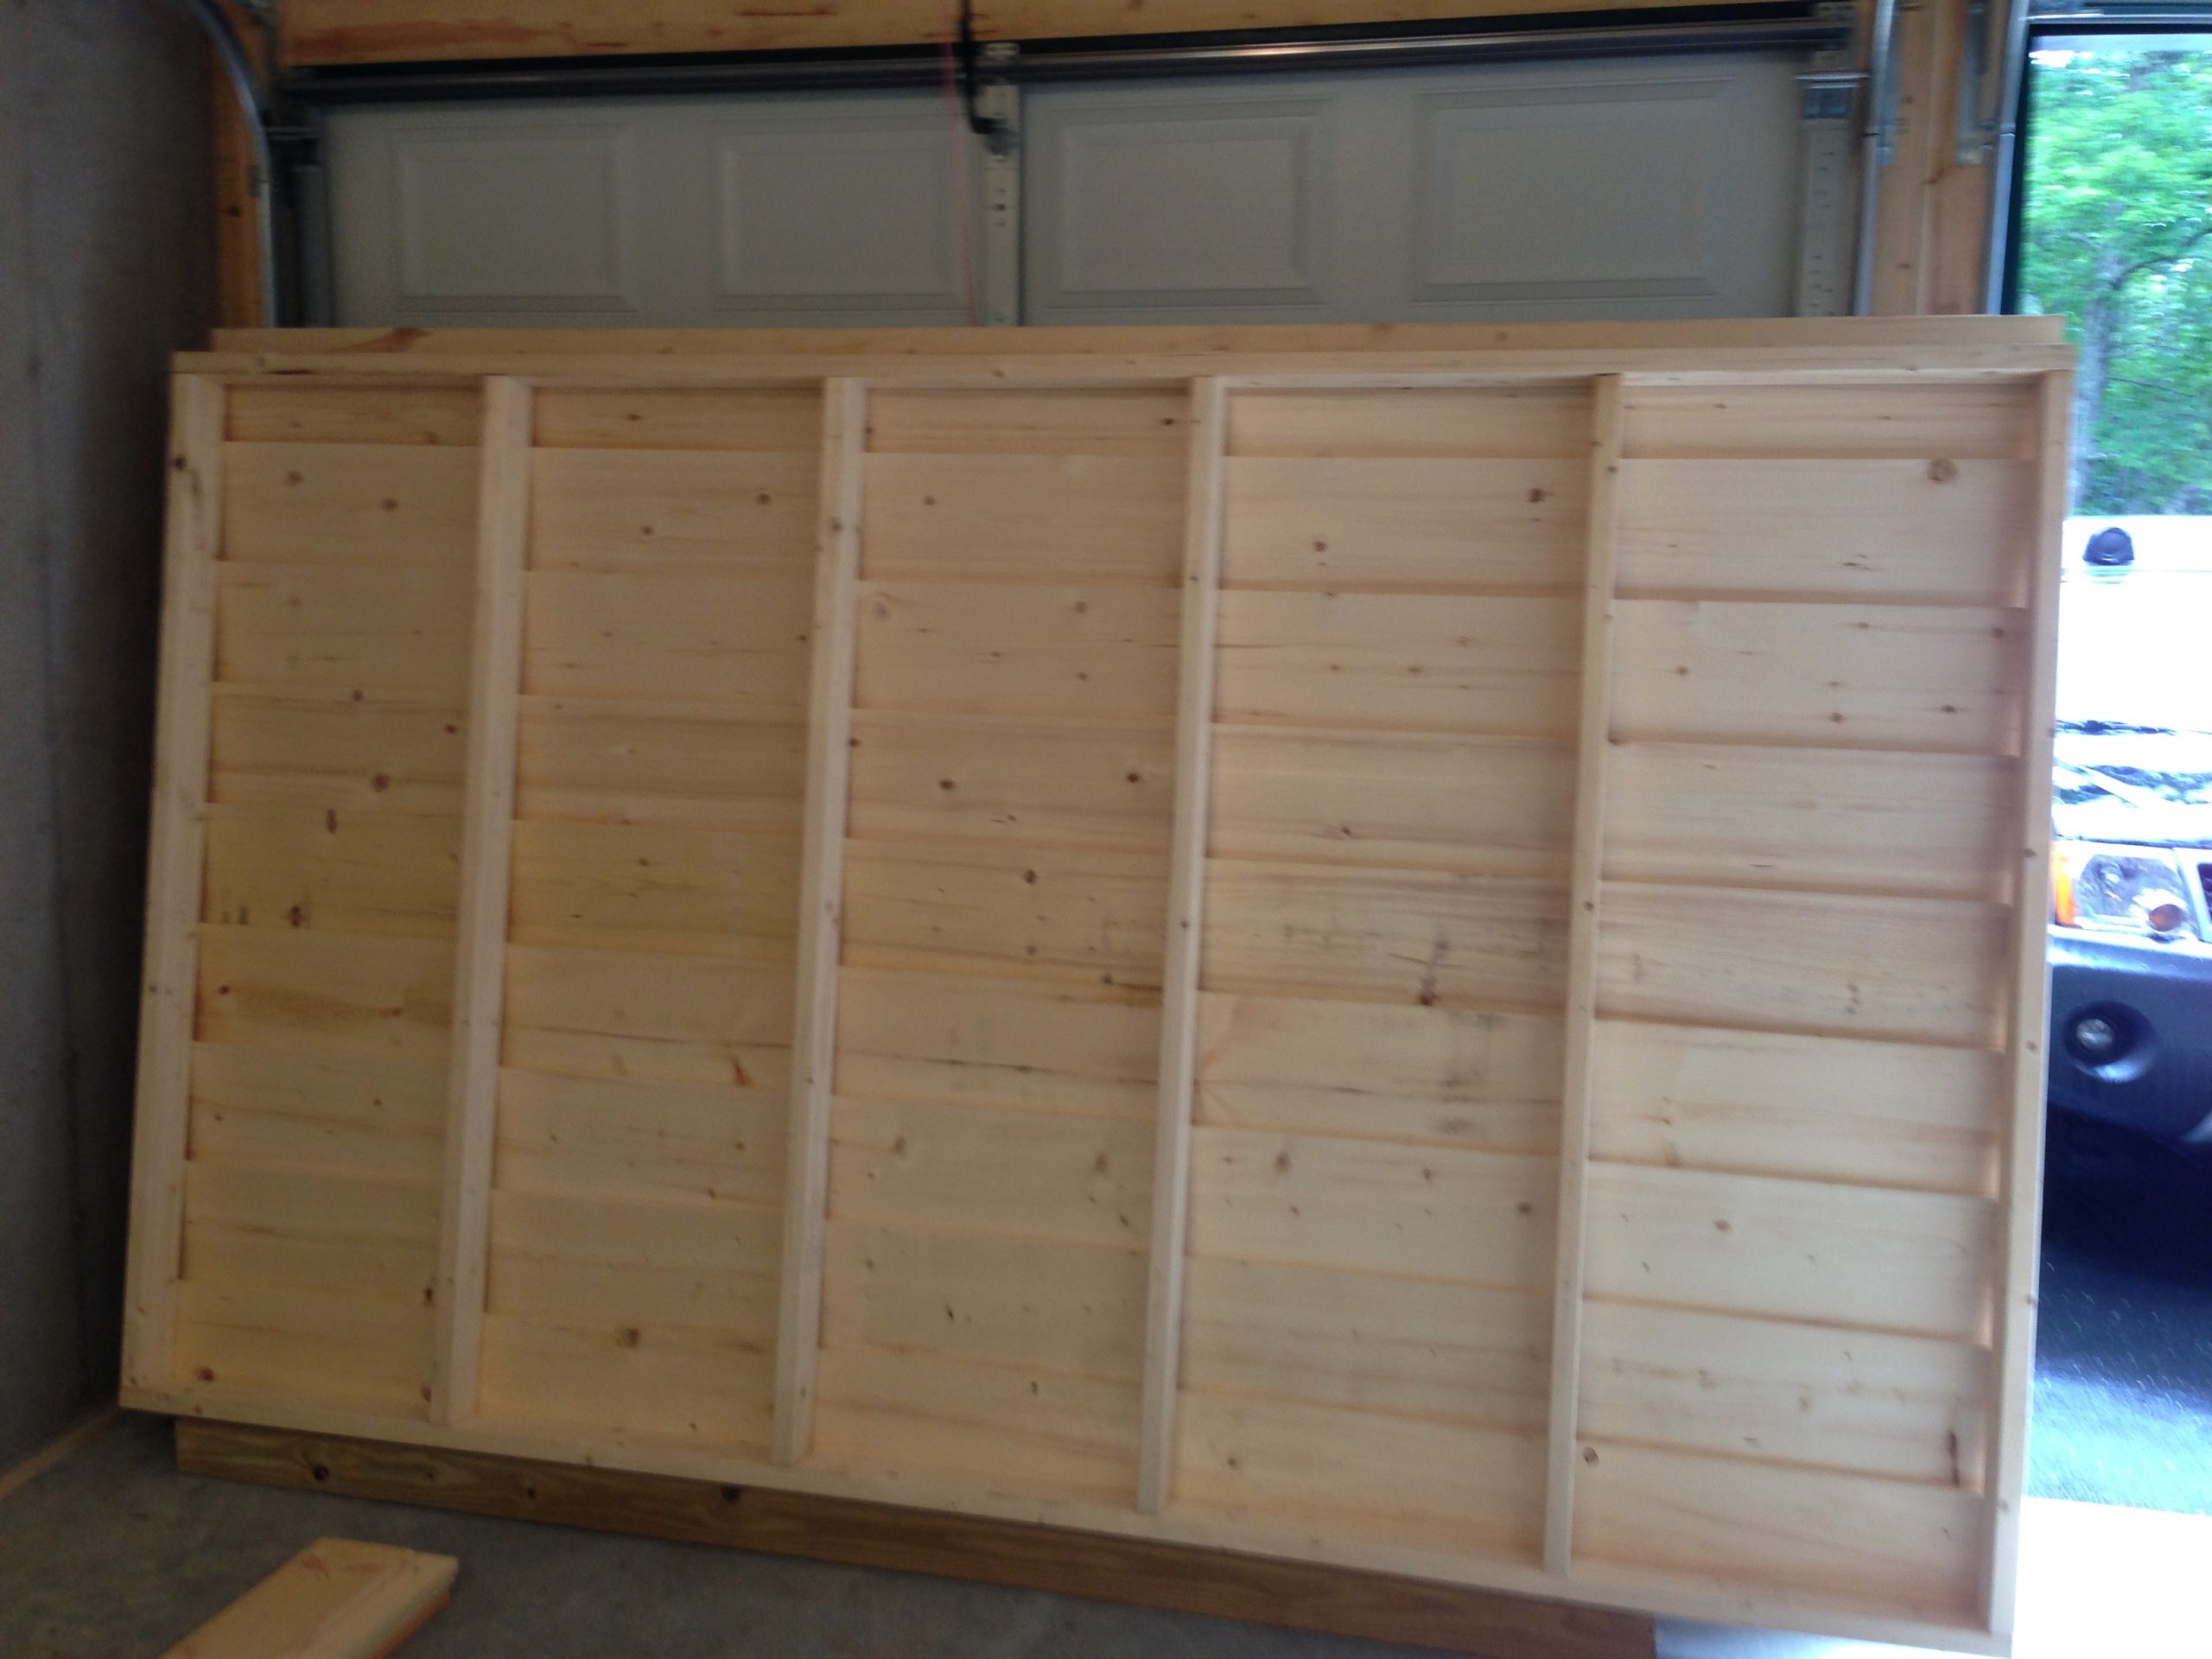
Here’s the south wall, flipped around to show the interior framing. Like the other walls, it was built in the garage before the long uphill haul to the site. You can see how each wall segment has its own quirks—nothing modular or prefab here, just real wood, real effort, and a lot of screws and nails.
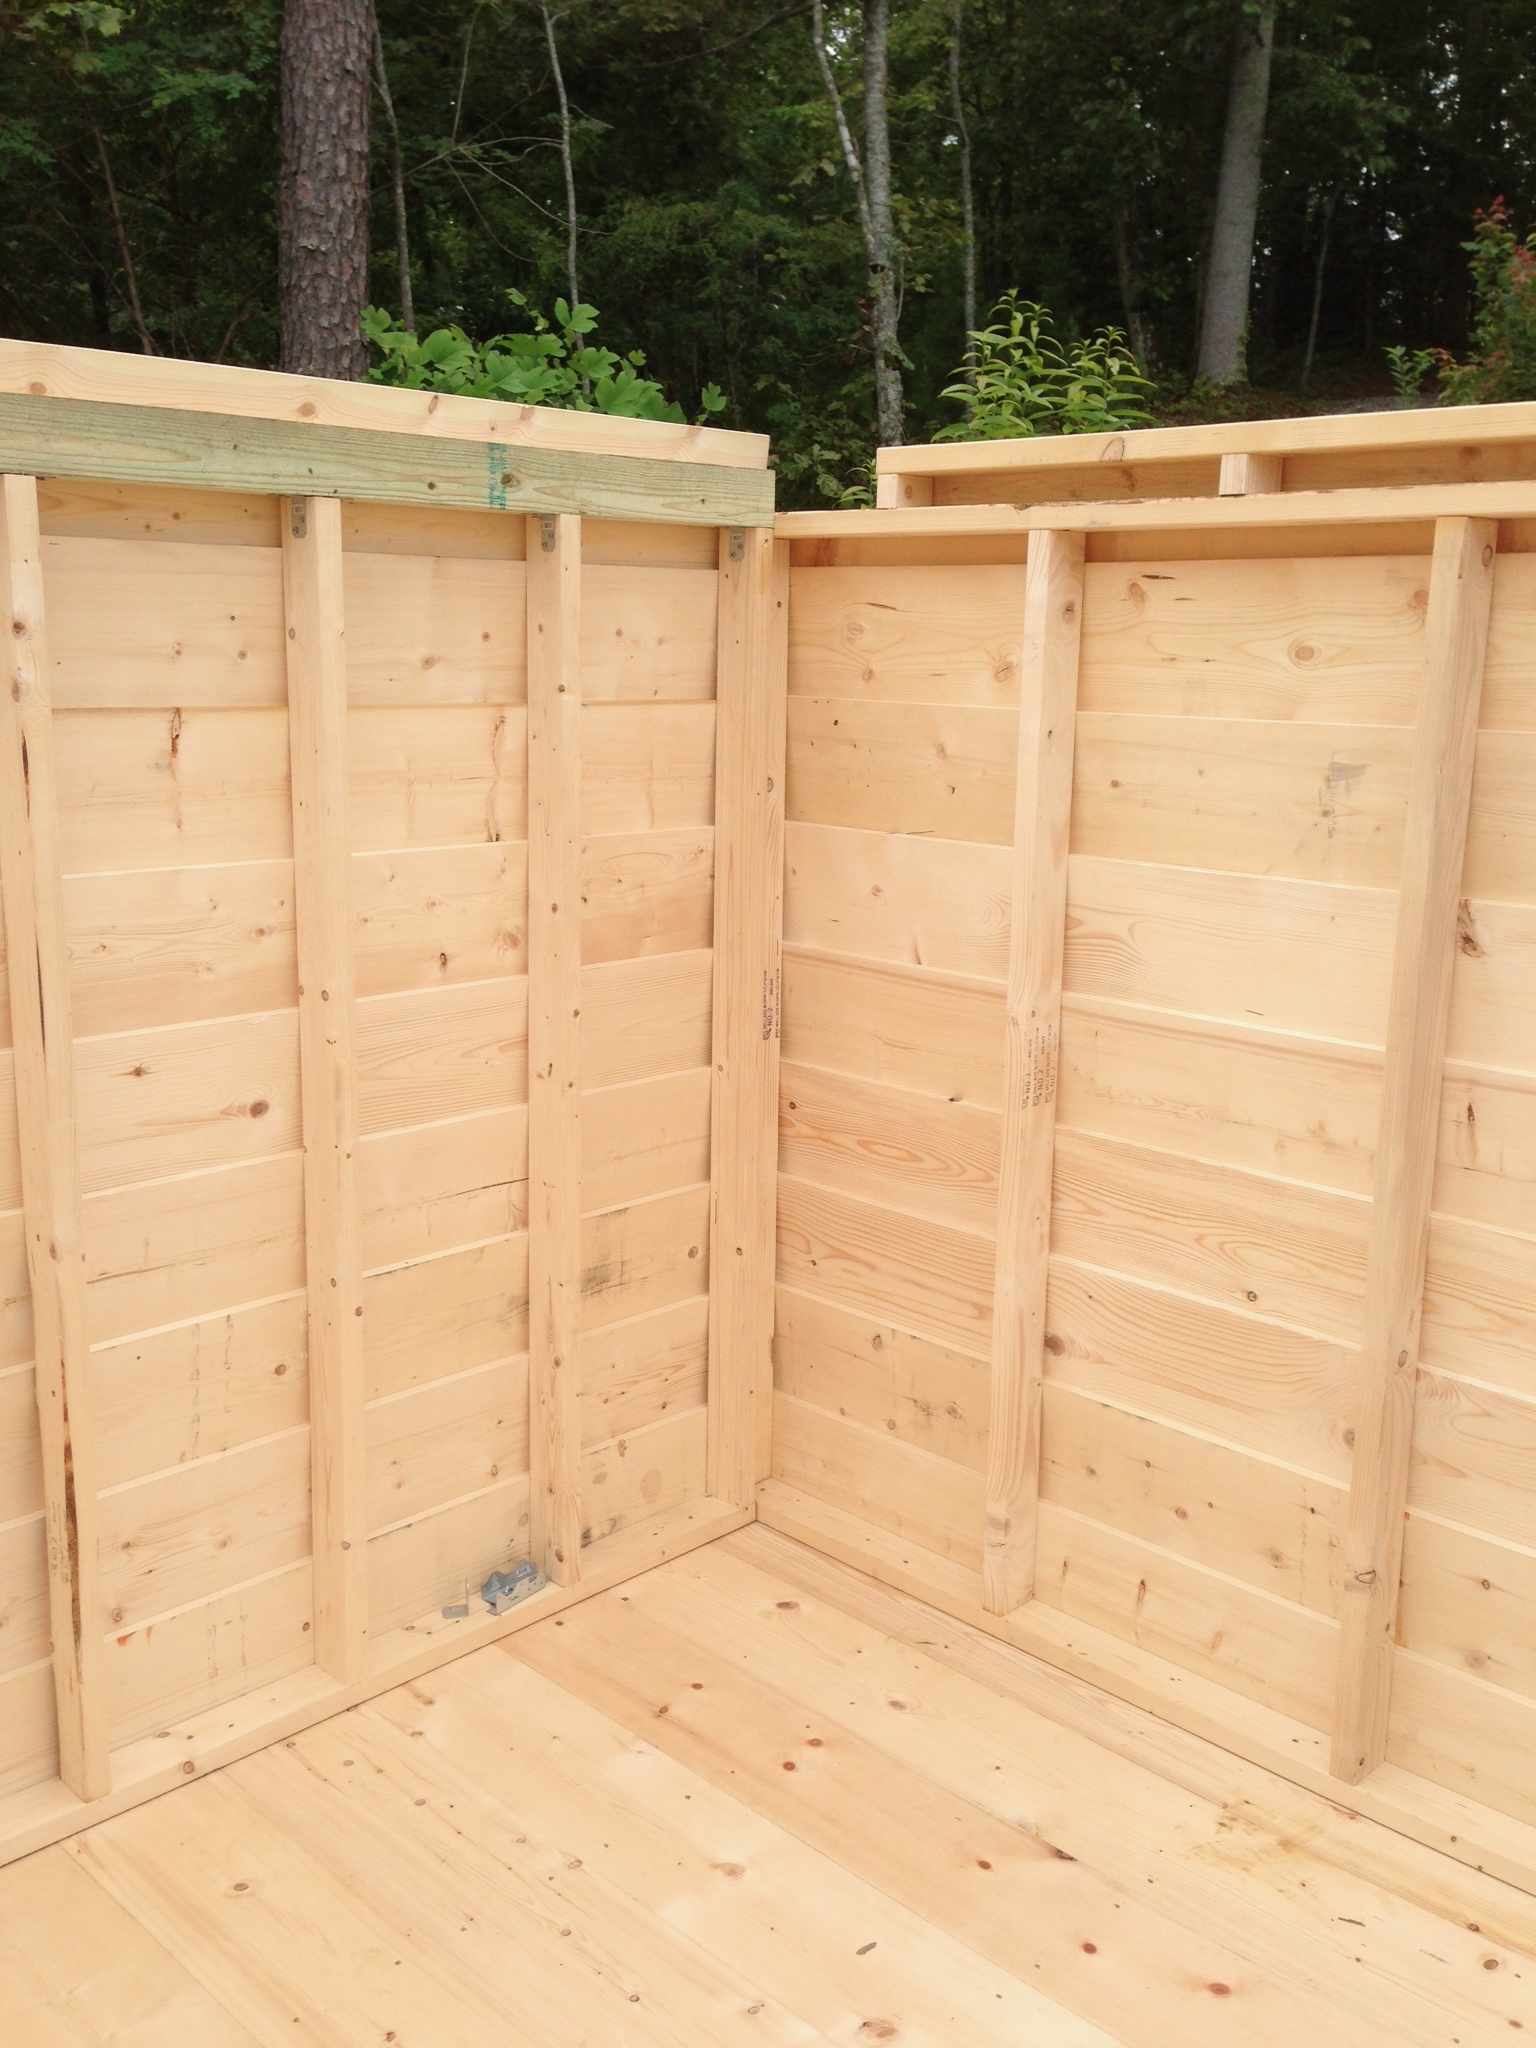
The first two wall panels are up! The overlapping boards may not be the cheapest or lightest option, but they fit right in with the local cabin aesthetic—and they sure look sharp here. The joints between walls were joined with steel brackets once everything was aligned.
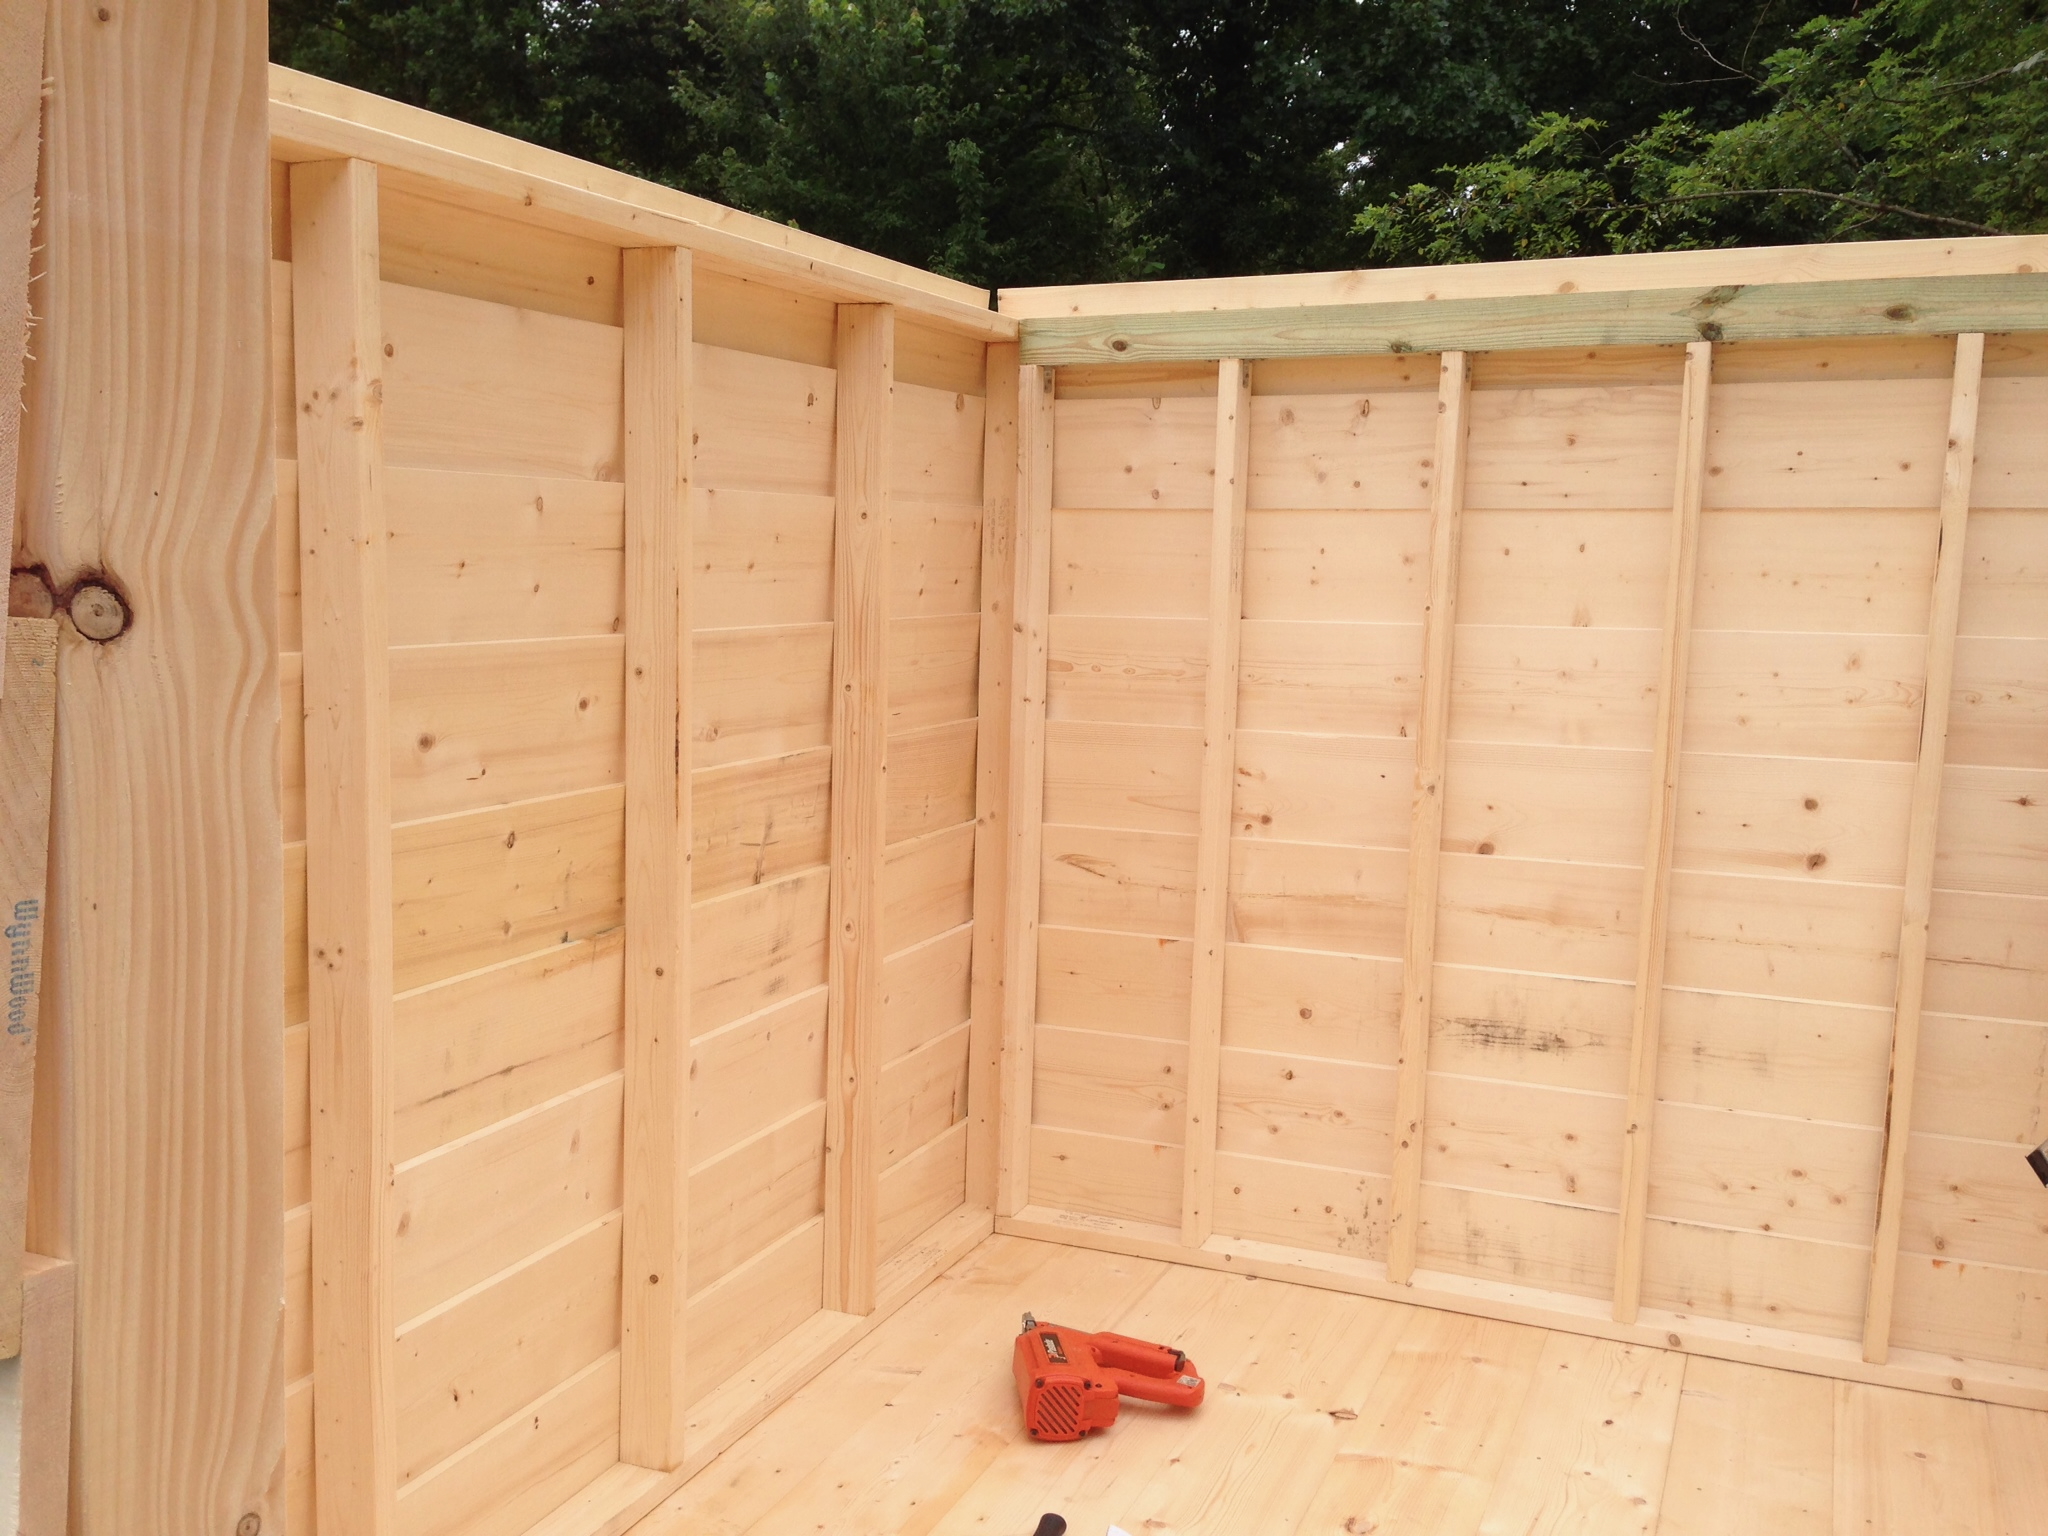
Here’s a look at the wall framing from the inside, showing how the overlapping boards created a surprisingly tight and clean structure. The 4×4 beam visible at the top is part of the roll-off roof support system and is secured to the wall framing, not the floor. Once all the wall segments were placed, they were joined together with metal brackets for added stability.
The north wall going up, with its distinctive notch-outs at the top corners. These notches allowed the roll-off roof beams to connect through the wall to the outer rails. Per SkyShed’s design, the rails were inset into the observatory rather than mounted externally—a choice that looked cleaner but ultimately proved a bit awkward in practice. More on that when we get to the roof section.
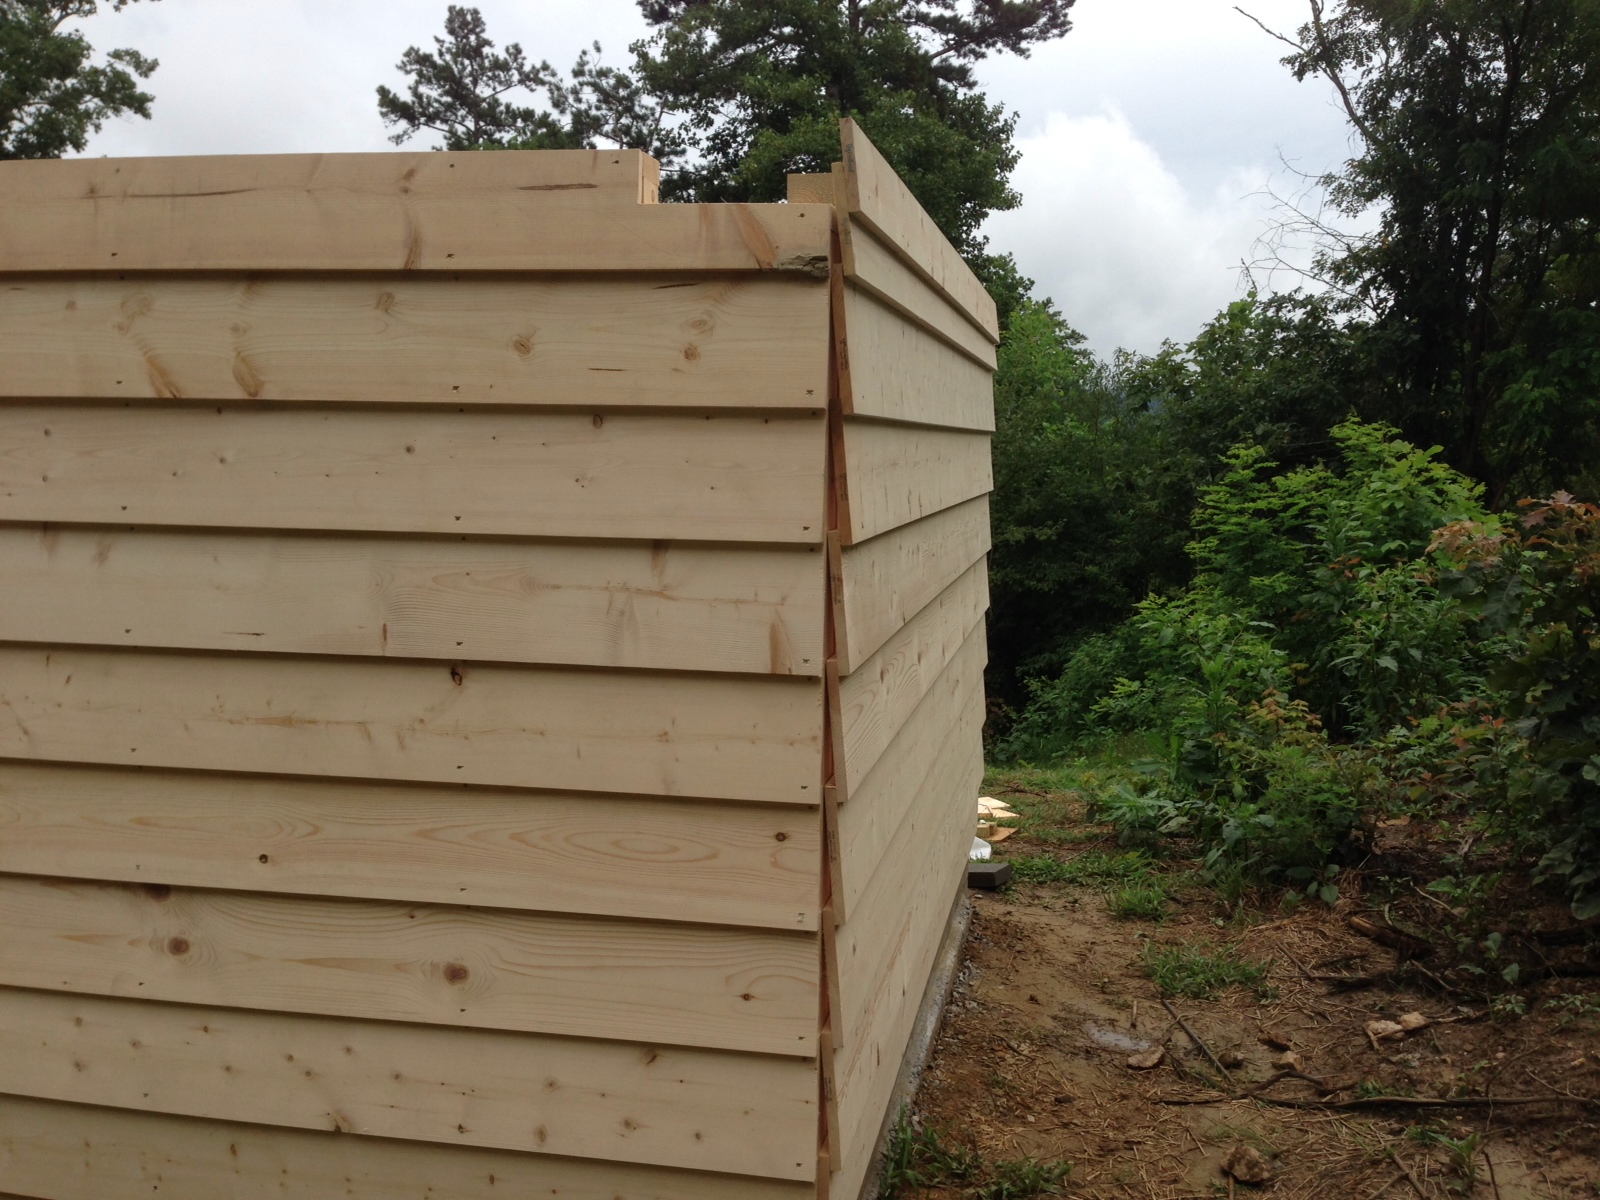
With the north wall now installed, the box is starting to take shape. You can see how the overlapping horizontal boards give the structure a traditional cabin-like feel—fitting for the area and more forgiving than plywood seams, even if they added some cost and effort. Still, plywood would have been easier and cheaper.
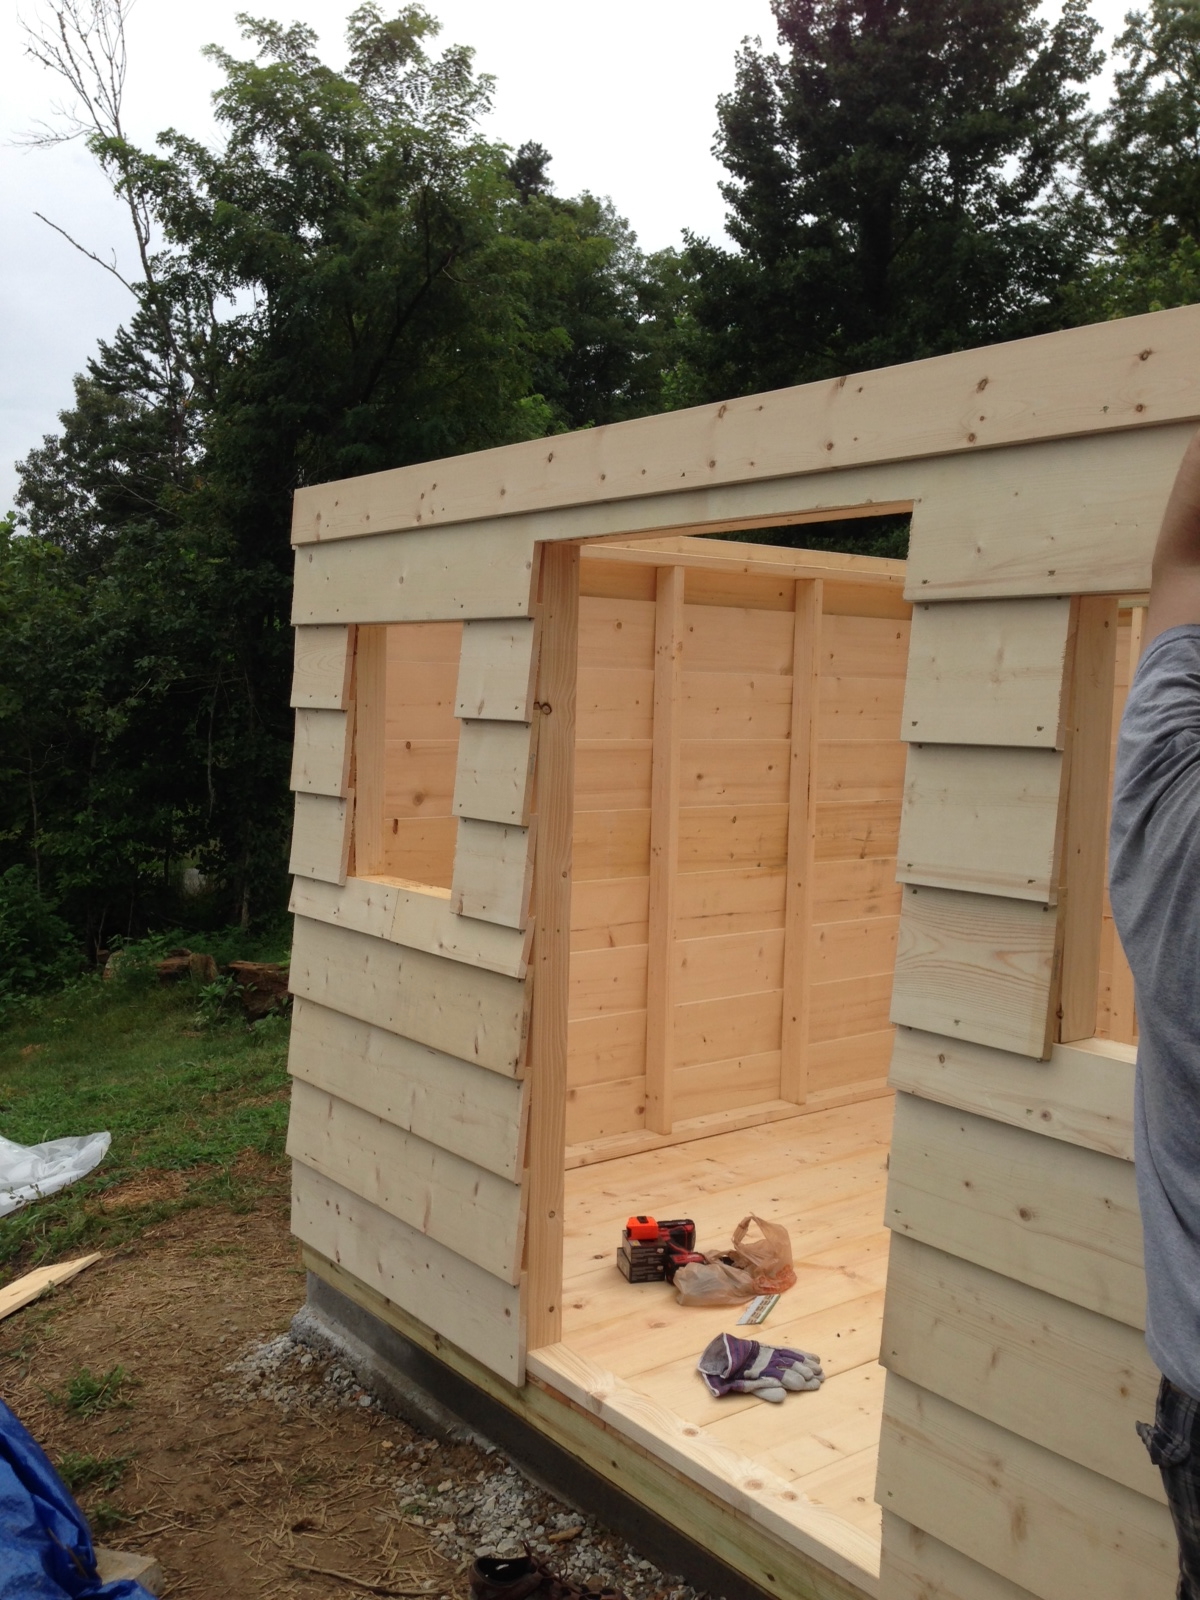
The final and most complex wall is in place—this is the front of the observatory and includes the entry door and window openings. This panel was the most challenging to build due to the required framing around the cutouts and the need for precision in aligning everything. The view inside shows how far things have come since those first floor beams.
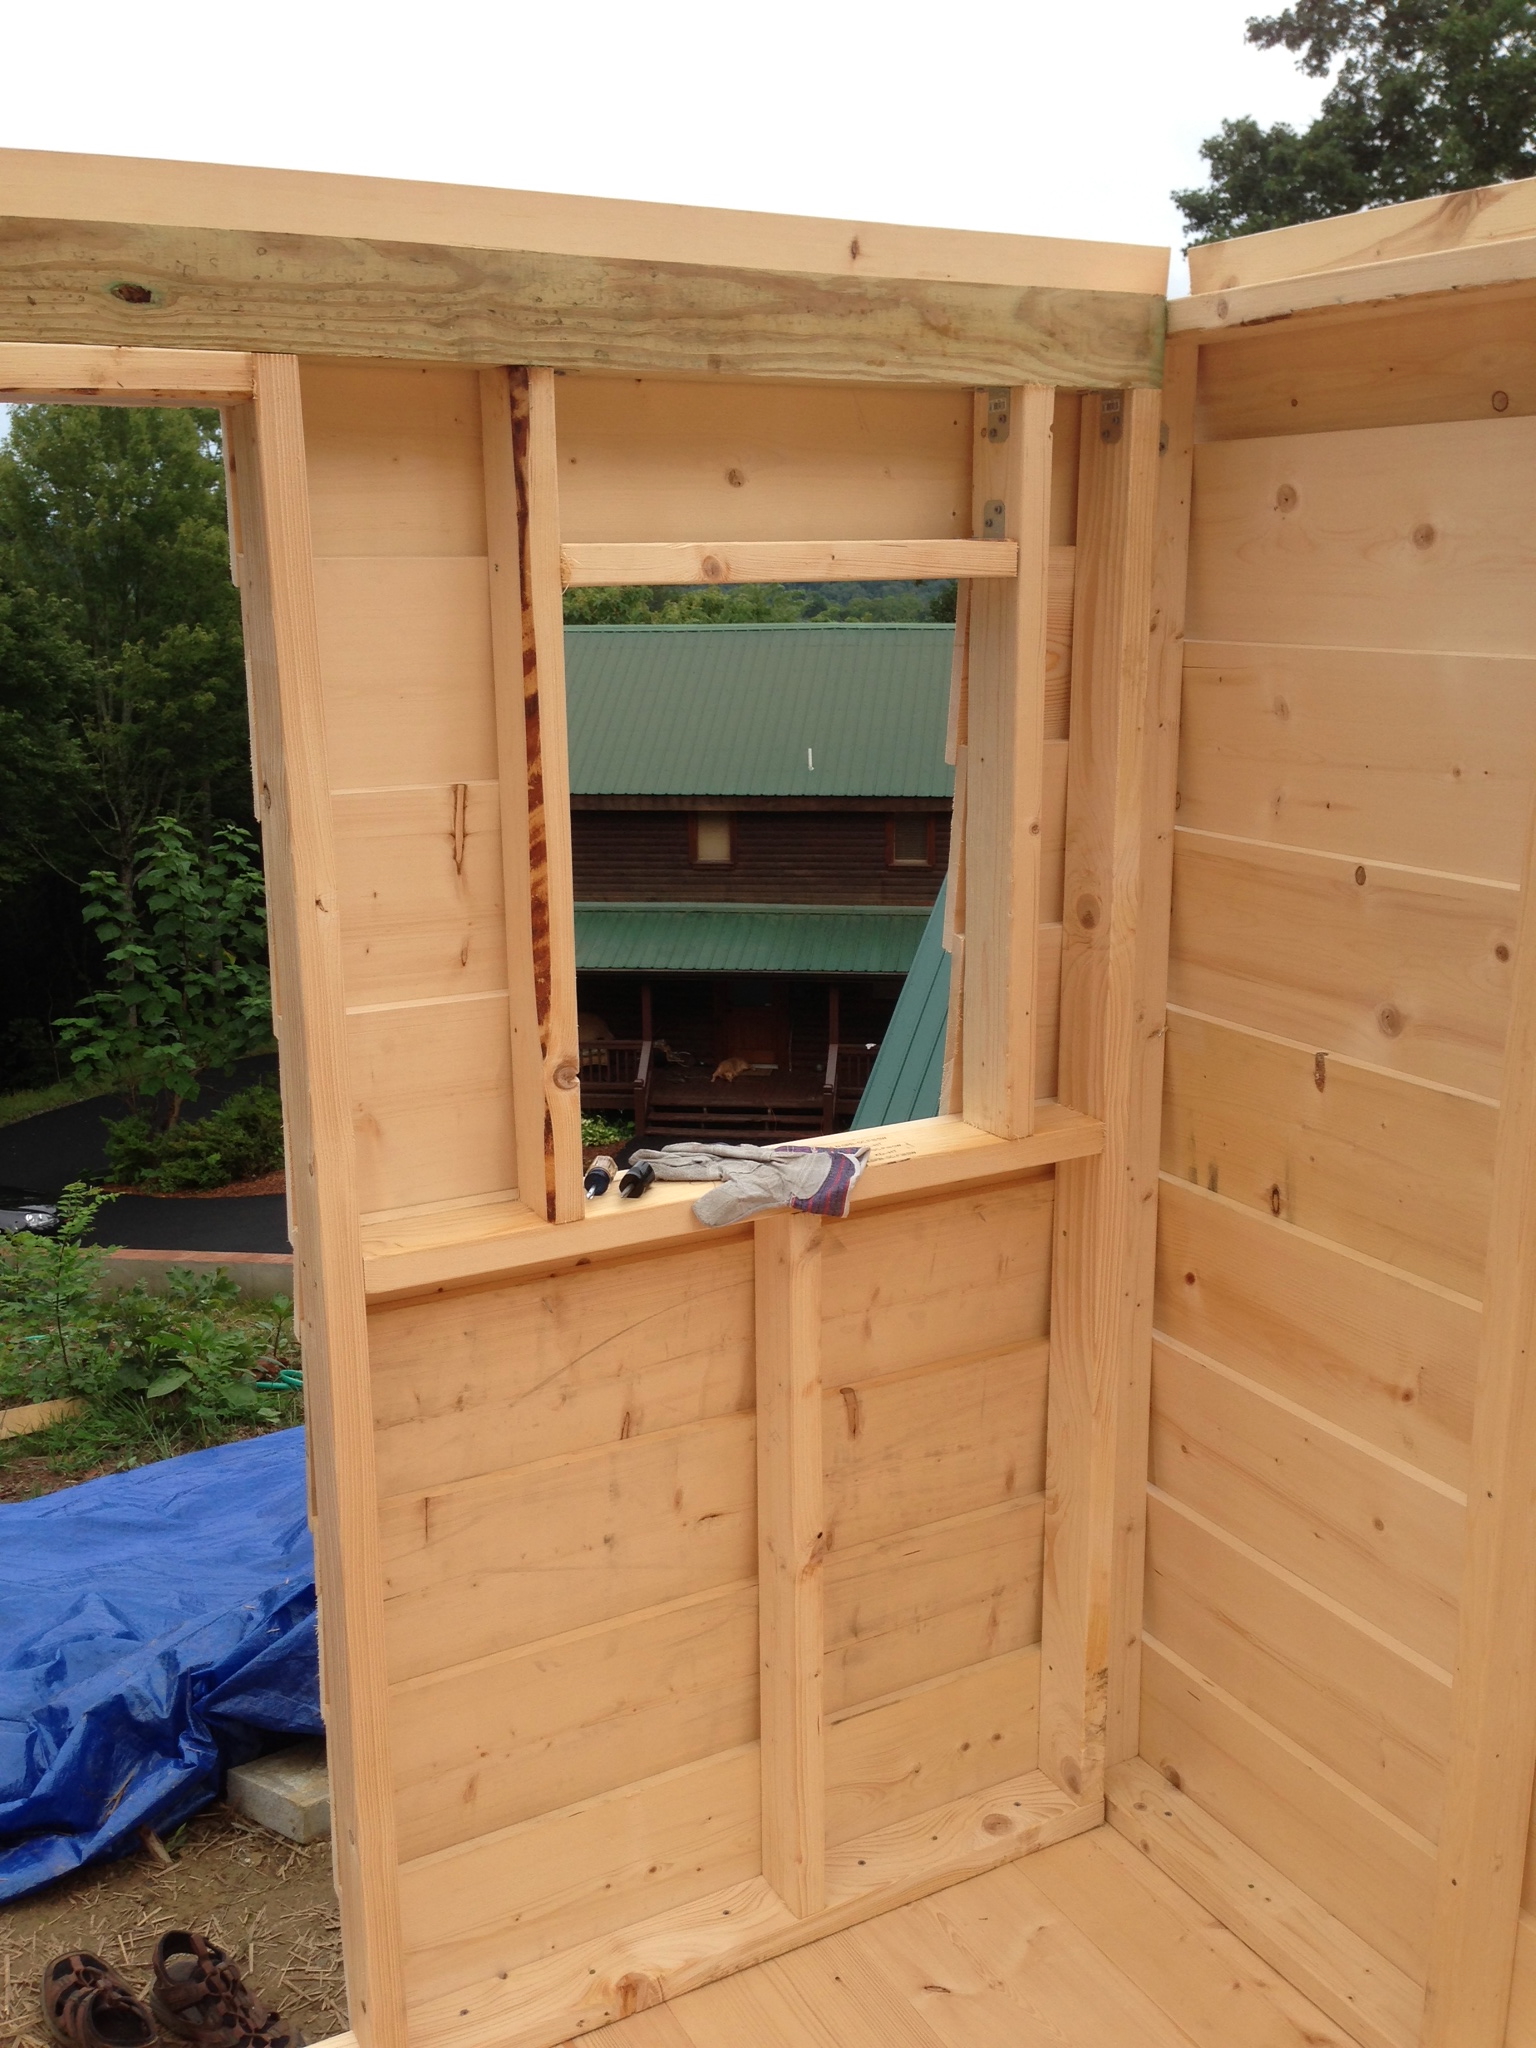
Here’s a closer look at the framing around the window on the east wall. It gives a sense of how much more complex this wall was, with multiple intersecting elements. The gloves and tools resting on the sill say it all—this was definitely the wall that took the most patience and effort.
This shot shows the cleaner framing sections before electrical or insulation, highlighting the simplicity of the structure. The green-treated top plates for the roll-off rails are visible here, with clear evidence of how the inset rail design ties into the framing. You can also see some early scuff marks—signs of a workspace in full swing.
The roll-off roof was constructed using the standard SkyShed design, with a few custom modifications to suit the needs of this particular build. The roof is comprised of the roll-off rail box that the roof sits and rides on, the gables, the roof support braces/trusses, and the green metal roofing panels. The roof is built per the SkyShed plans, and while it’s a straightforward design overall, there are a few parts that require extra care. It’s especially important to use a sufficient number of high-quality garage door rollers to support the weight of the roof—these components weren’t originally designed to carry horizontal weight like this, and using lightweight or bargain-grade rollers is asking for trouble. Go with the heaviest gauge rollers you can find.
I had the roof support jacks custom-fabricated locally rather than purchasing them through SkyShed, which saved money and allowed me to fine-tune them for my site. These jacks proved to be one of the most helpful components, making initial leveling much easier and allowing for future adjustments if the structure settles. The most challenging part of this stage was getting everything square and level—precision here is critical to ensure the roof rolls smoothly and reliably with each use. Once aligned, the roof support structure came together quickly and was reinforced with steel brackets for added strength.
For the rails, I used 2” industrial-grade steel garage door tracks, sourced from a local supplier as a custom order. Although many builders cite this as one of the more expensive parts of a SkyShed build, I found them relatively affordable—perhaps unusually so.
The toughest part of the roof construction was making the angled cuts for the gables and trusses. With a shallow roof pitch of just 22.5 degrees, these angles can be difficult to cut cleanly—even with a good miter saw. But once the cuts were done, the trusses went up without much trouble. I installed roofing paper beneath the metal panels to act as a moisture barrier, and thanks to some careful planning, I was able to avoid making any cuts in the metal roofing itself by overlapping the panels where needed. The finished roof not only provided a clean, finished look that matched the local aesthetic, but it also offered durable, long-term protection from the elements.
In hindsight, the inset rail design isn’t ideal. It does create a clean appearance without the gap between roof and walls seen in designs like Mesa Vista Observatory, but it places all the lateral stress of the roof onto the 4×4 beams holding the tracks. Over time, those pressure-treated beams can warp under load, potentially affecting both alignment and smooth operation. It worked, but it’s not how I’d do it again.
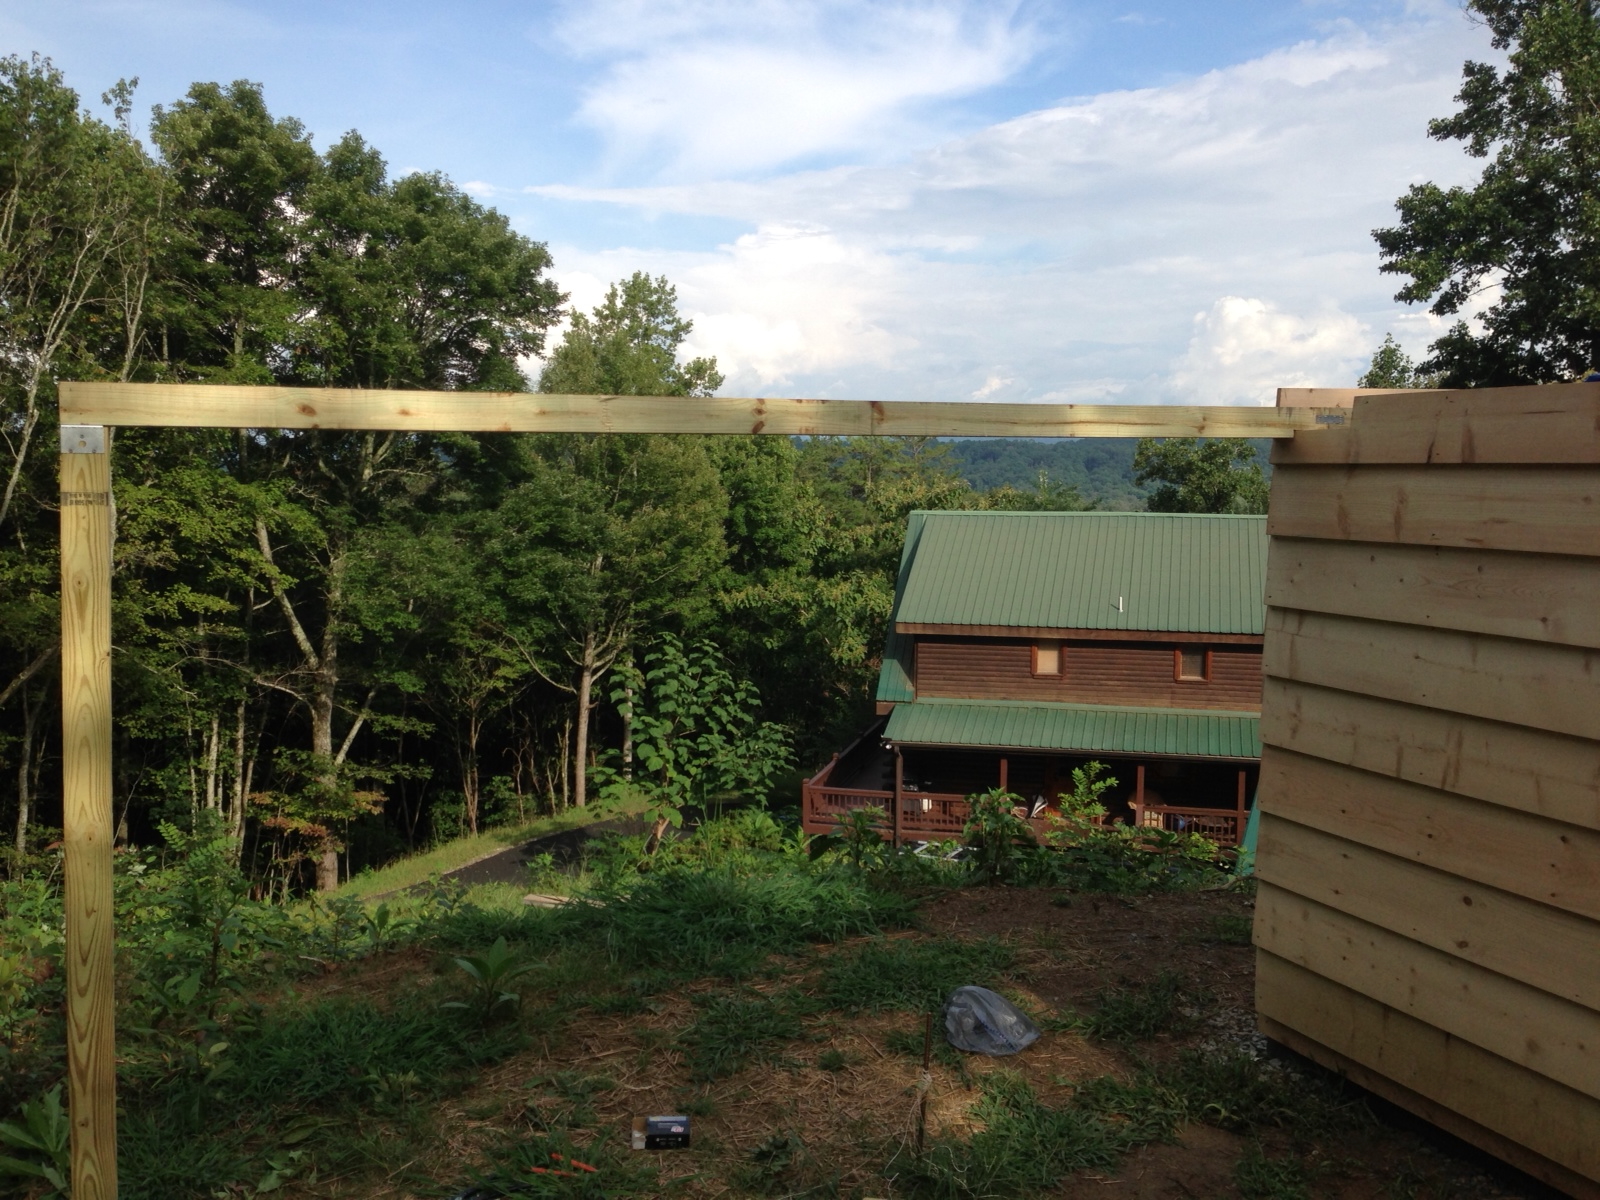
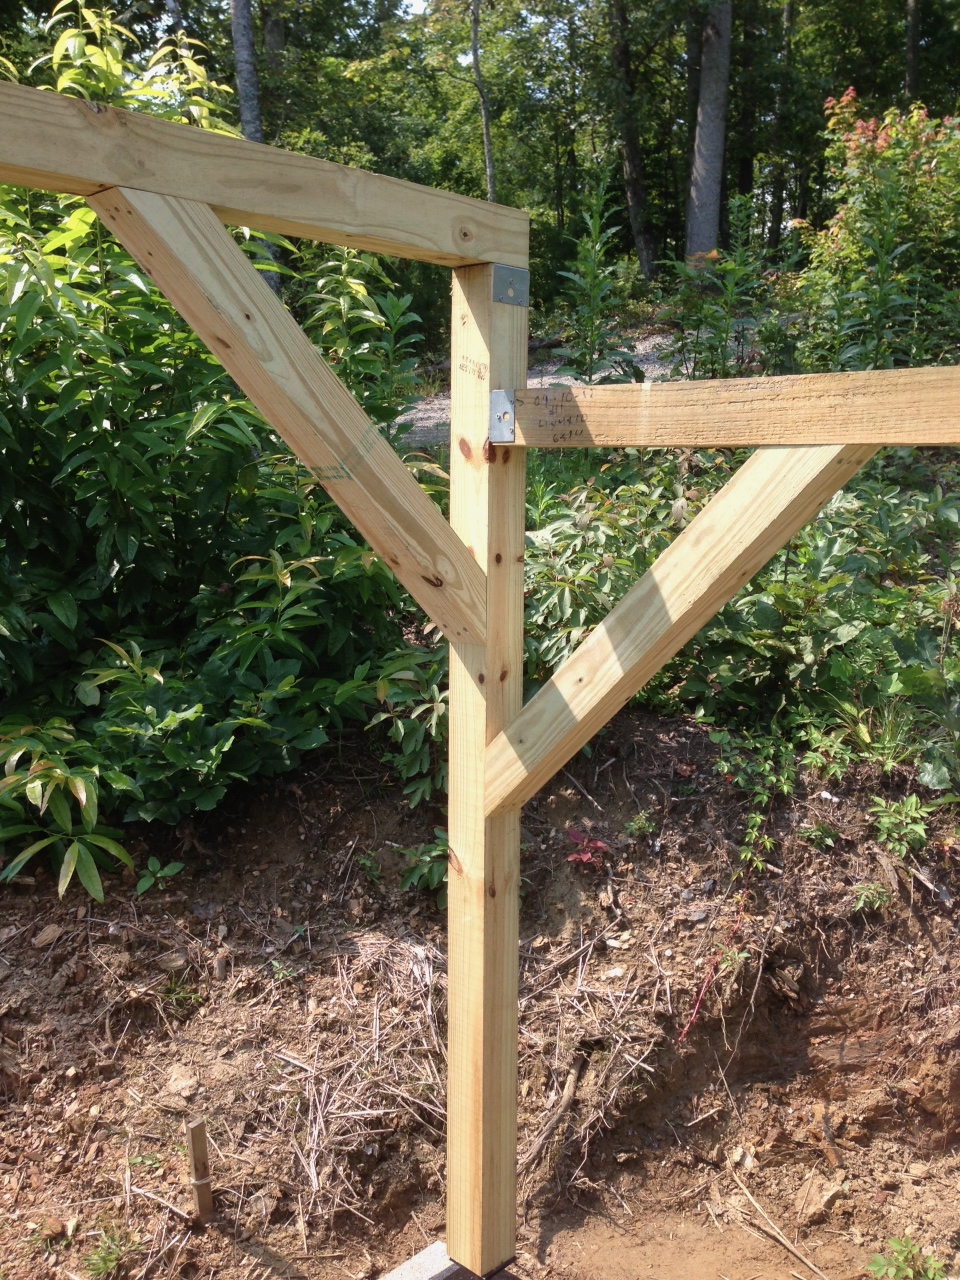
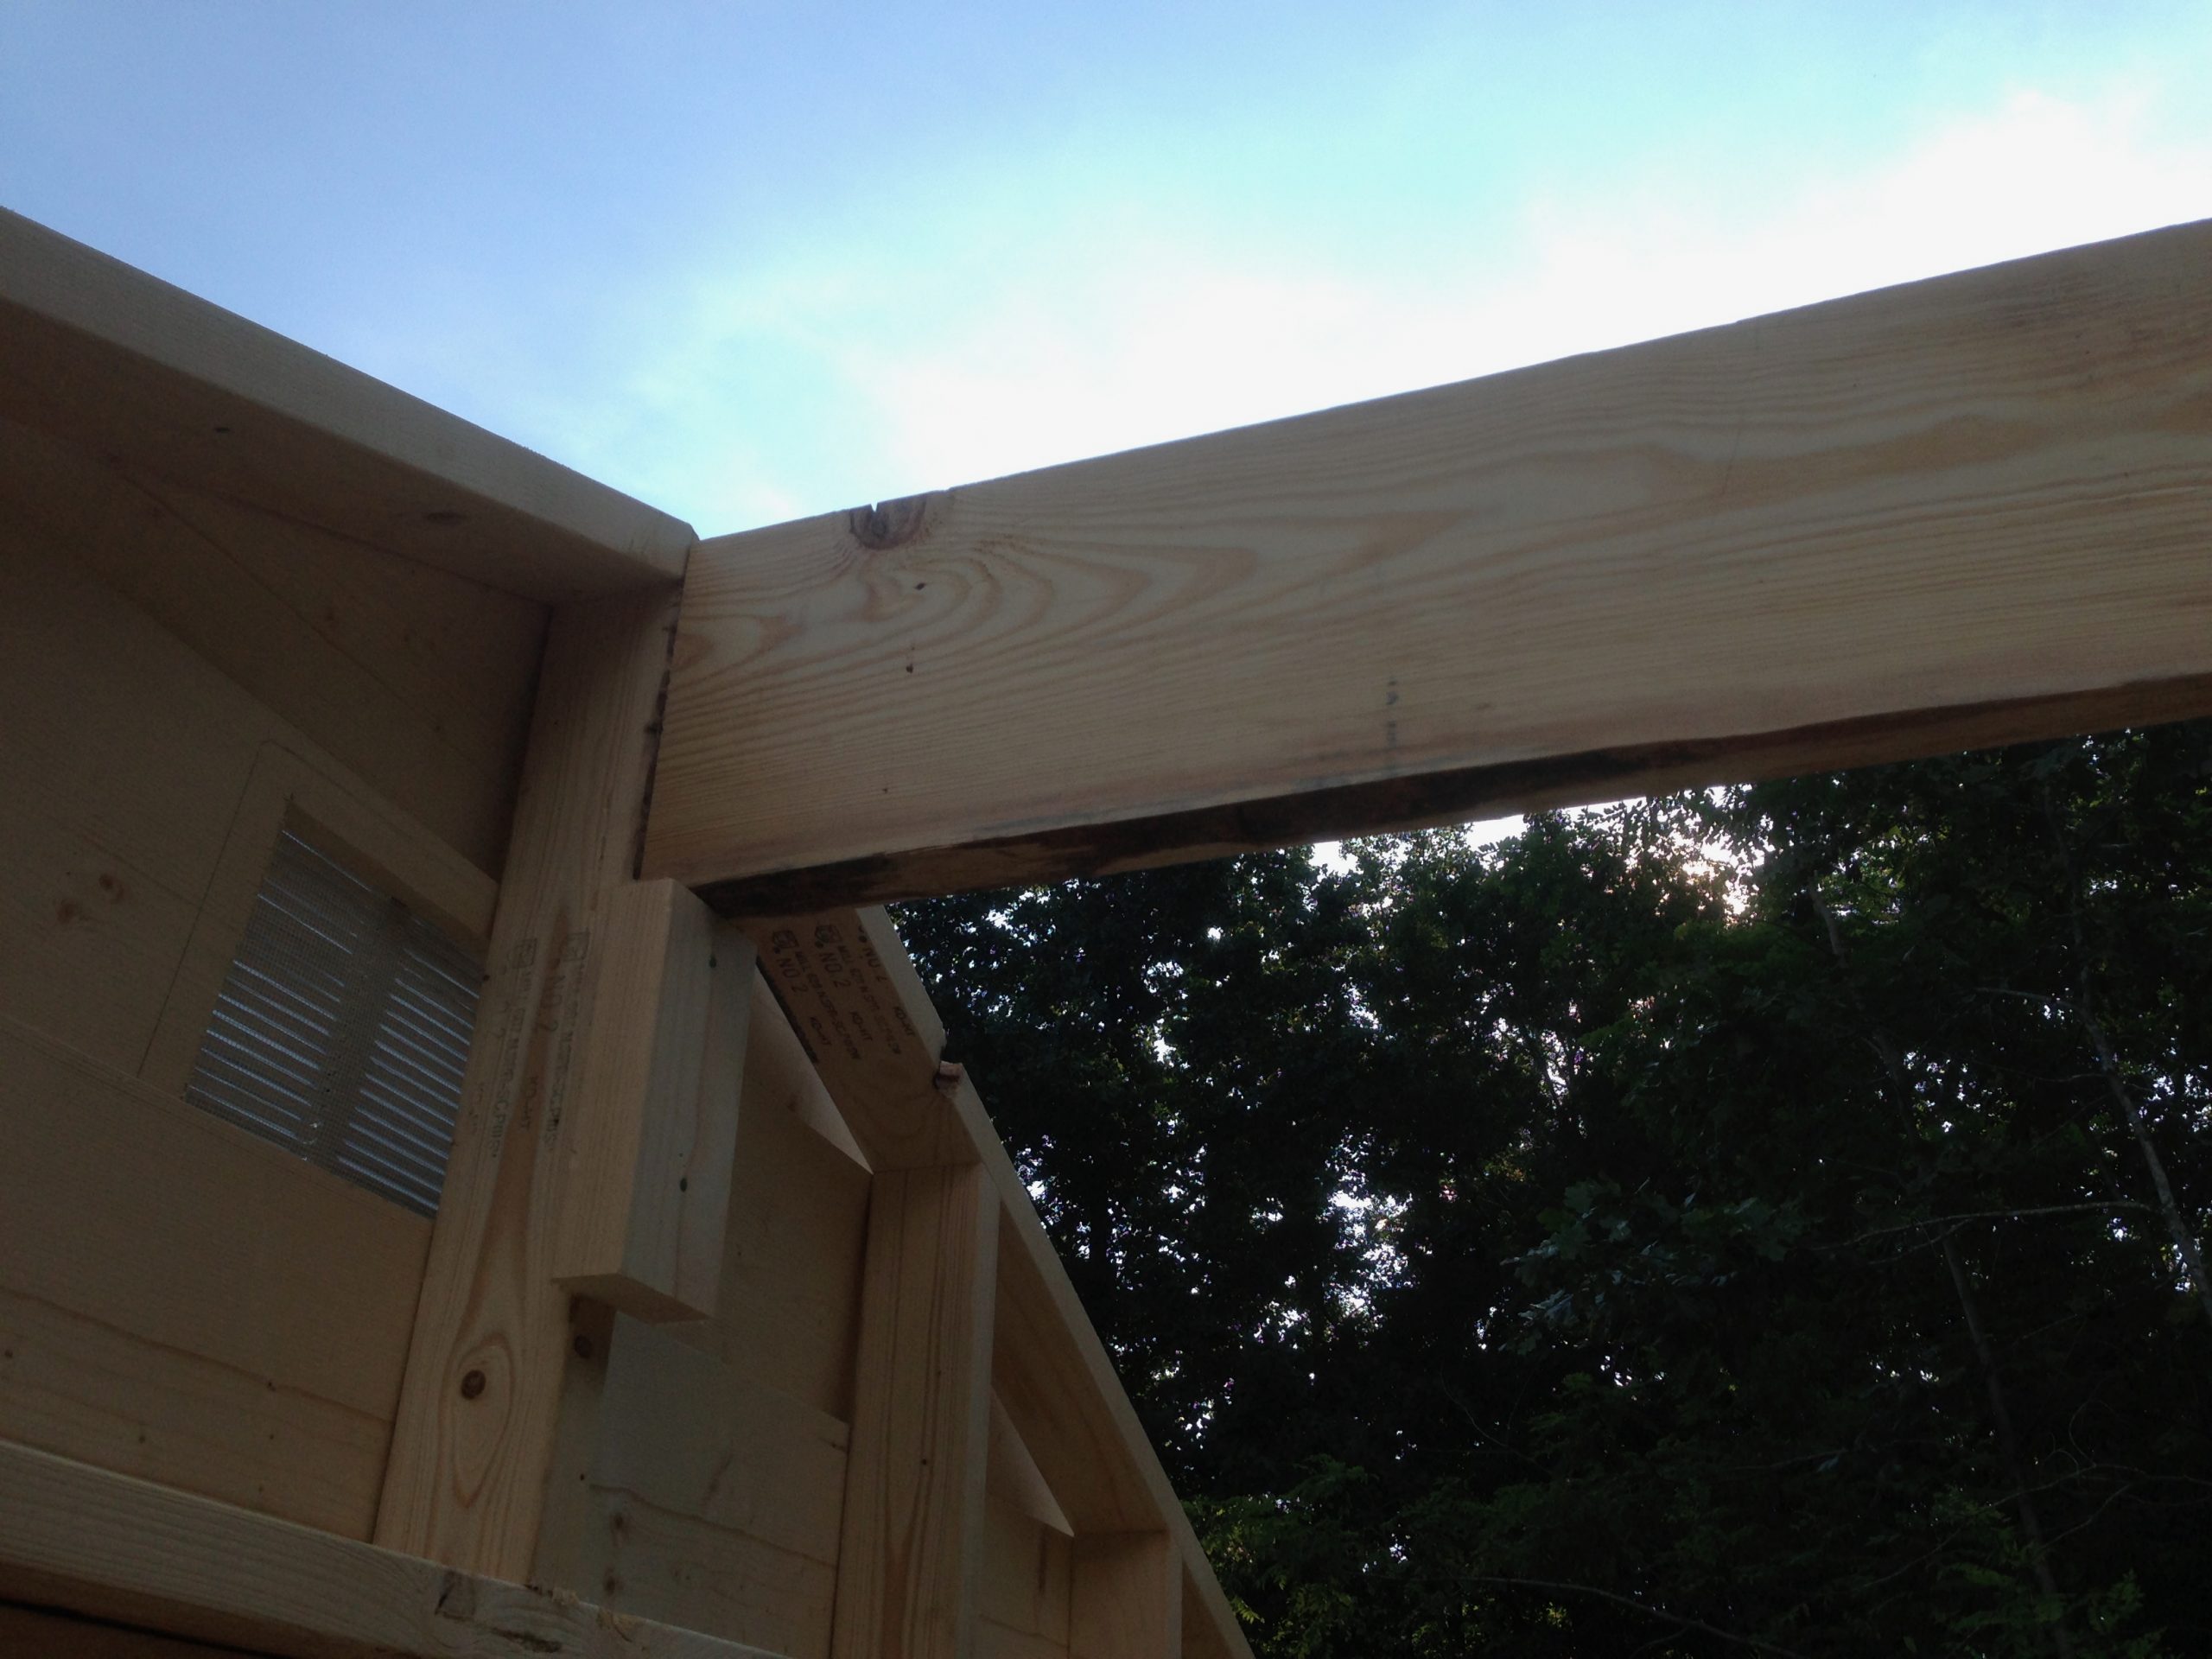
East runoff rail support installed – The eastern 4×4 beam and vertical support post are in place, secured with heavy-duty steel brackets. The horizontal beam is attached directly to the interior 4×4 of the observatory wall, forming the base for the inset roll-off rail. Getting this structure level was critical to ensure the roof would roll smoothly.
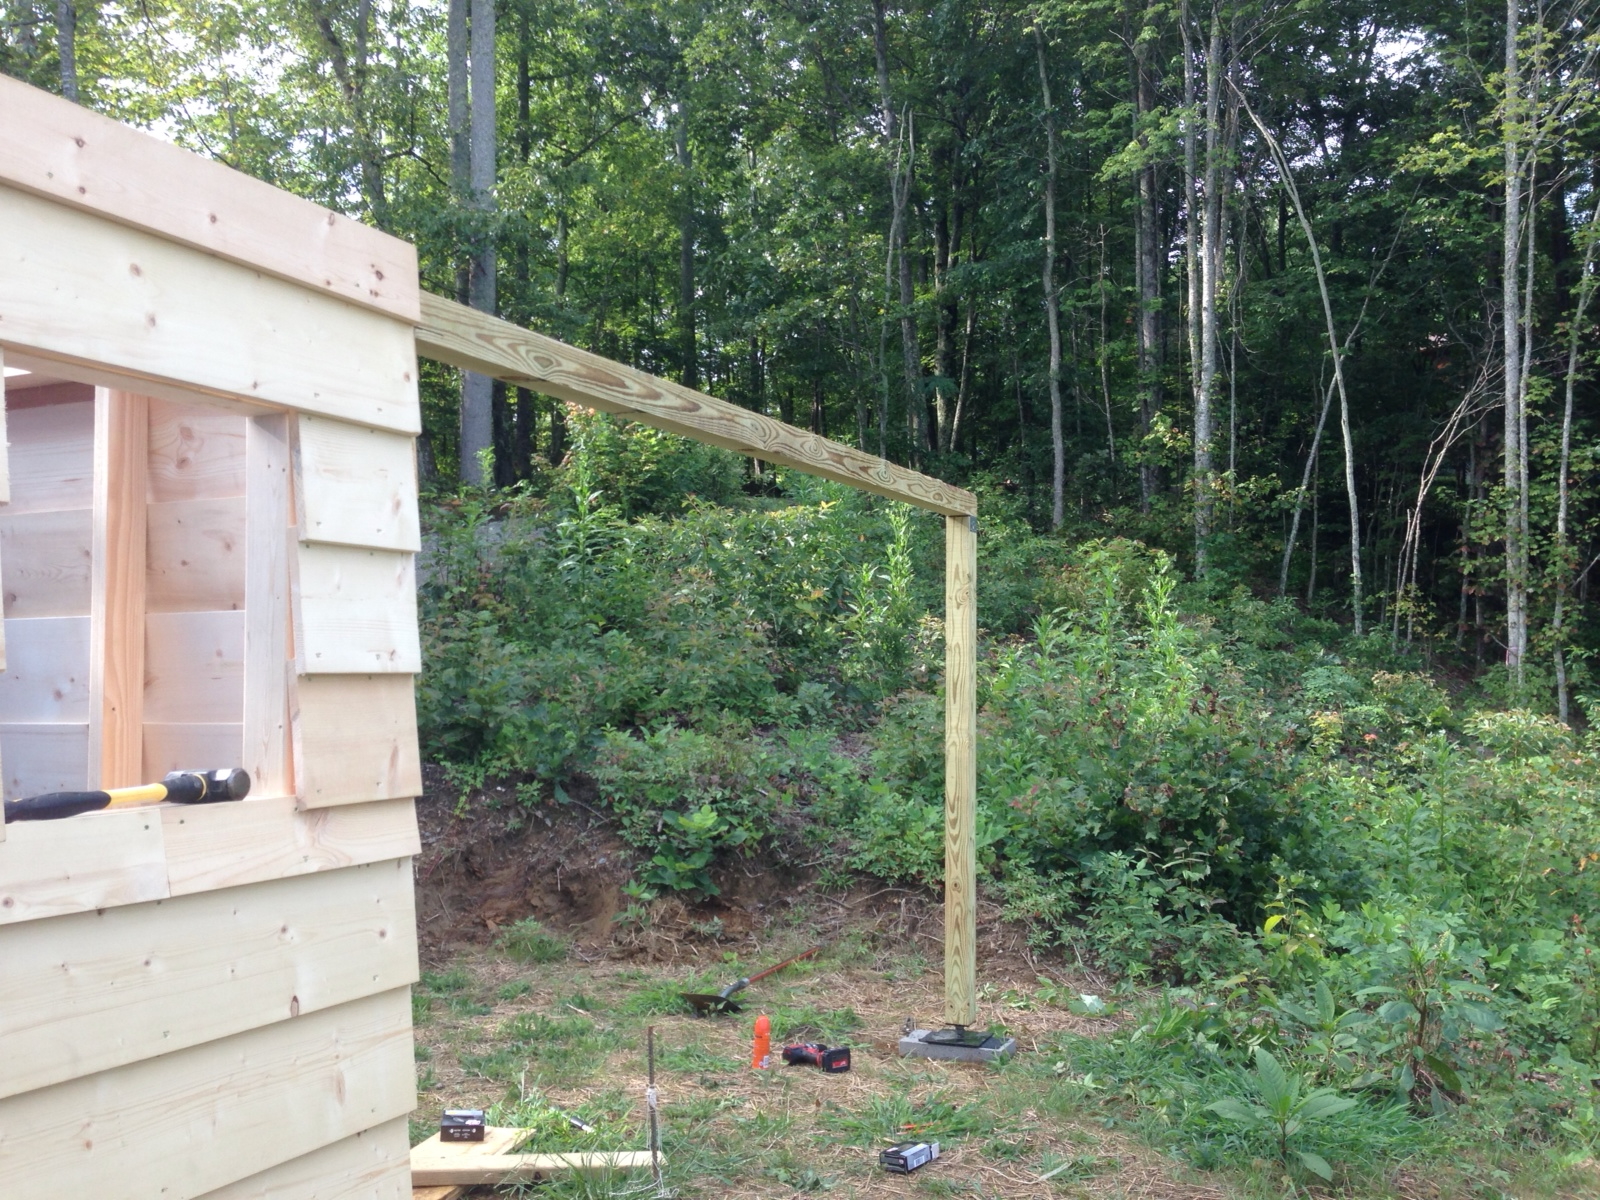
Leveling the east runoff rail – The east-side support post is now sitting on a custom-fabricated steel leveling jack, which rests on a concrete block for added stability. This adjustable jack made it much easier to fine-tune the height and angle of the beam, ensuring precise leveling critical for smooth roof travel.
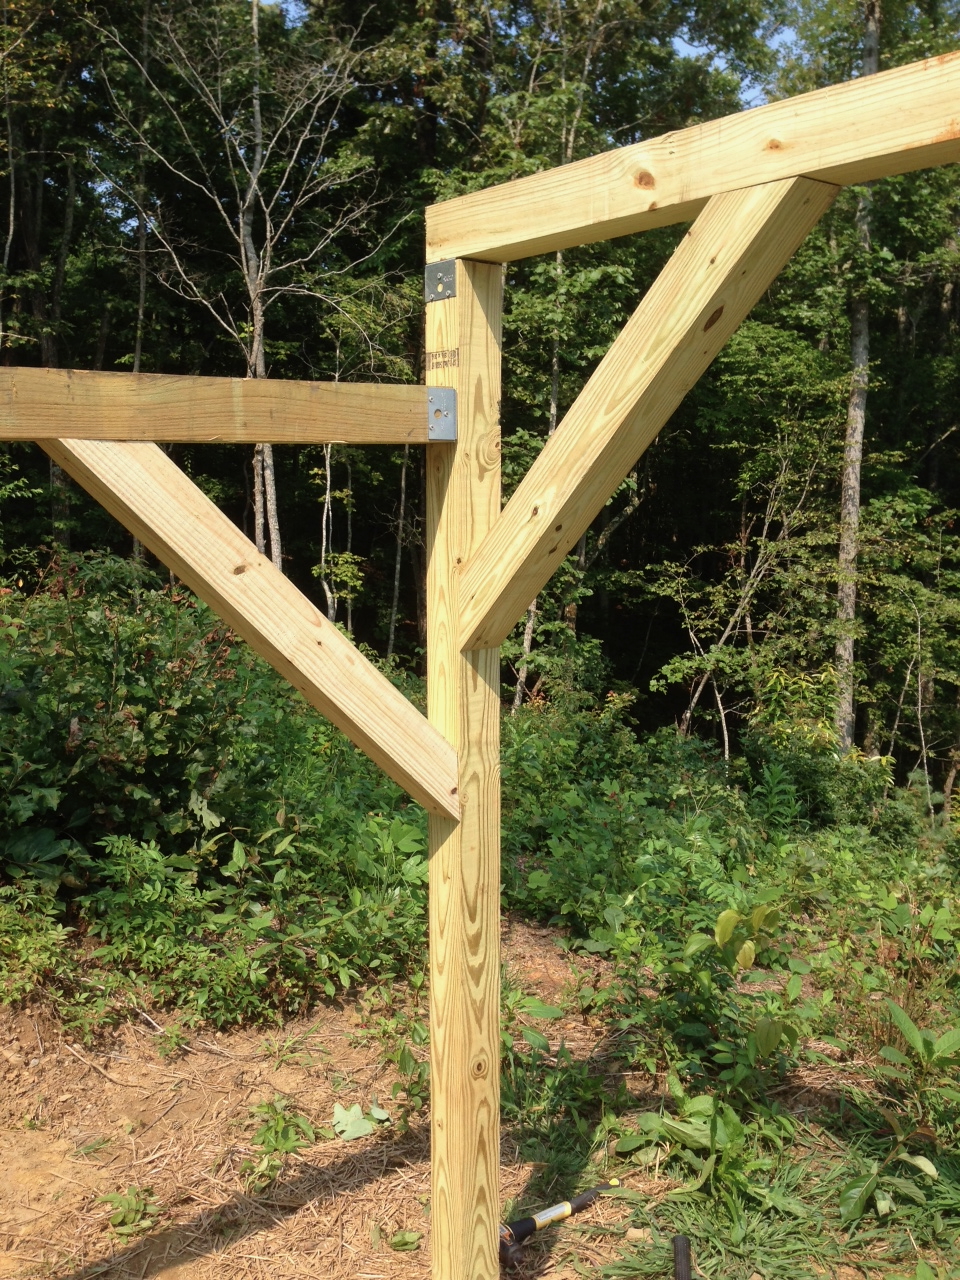
The east runoff support structure is fully braced with diagonal 4×4 cross members, notched and lag-bolted into place. Steel brackets at the joints add extra rigidity and help ensure the roof remains level and stable during operation.
The west runoff support gets the same treatment as the east side—4×4 diagonal cross braces notched and bolted into place, with steel brackets reinforcing all major joints. Getting both sides square and level was a time-consuming but crucial step to ensure smooth operation of the roof.
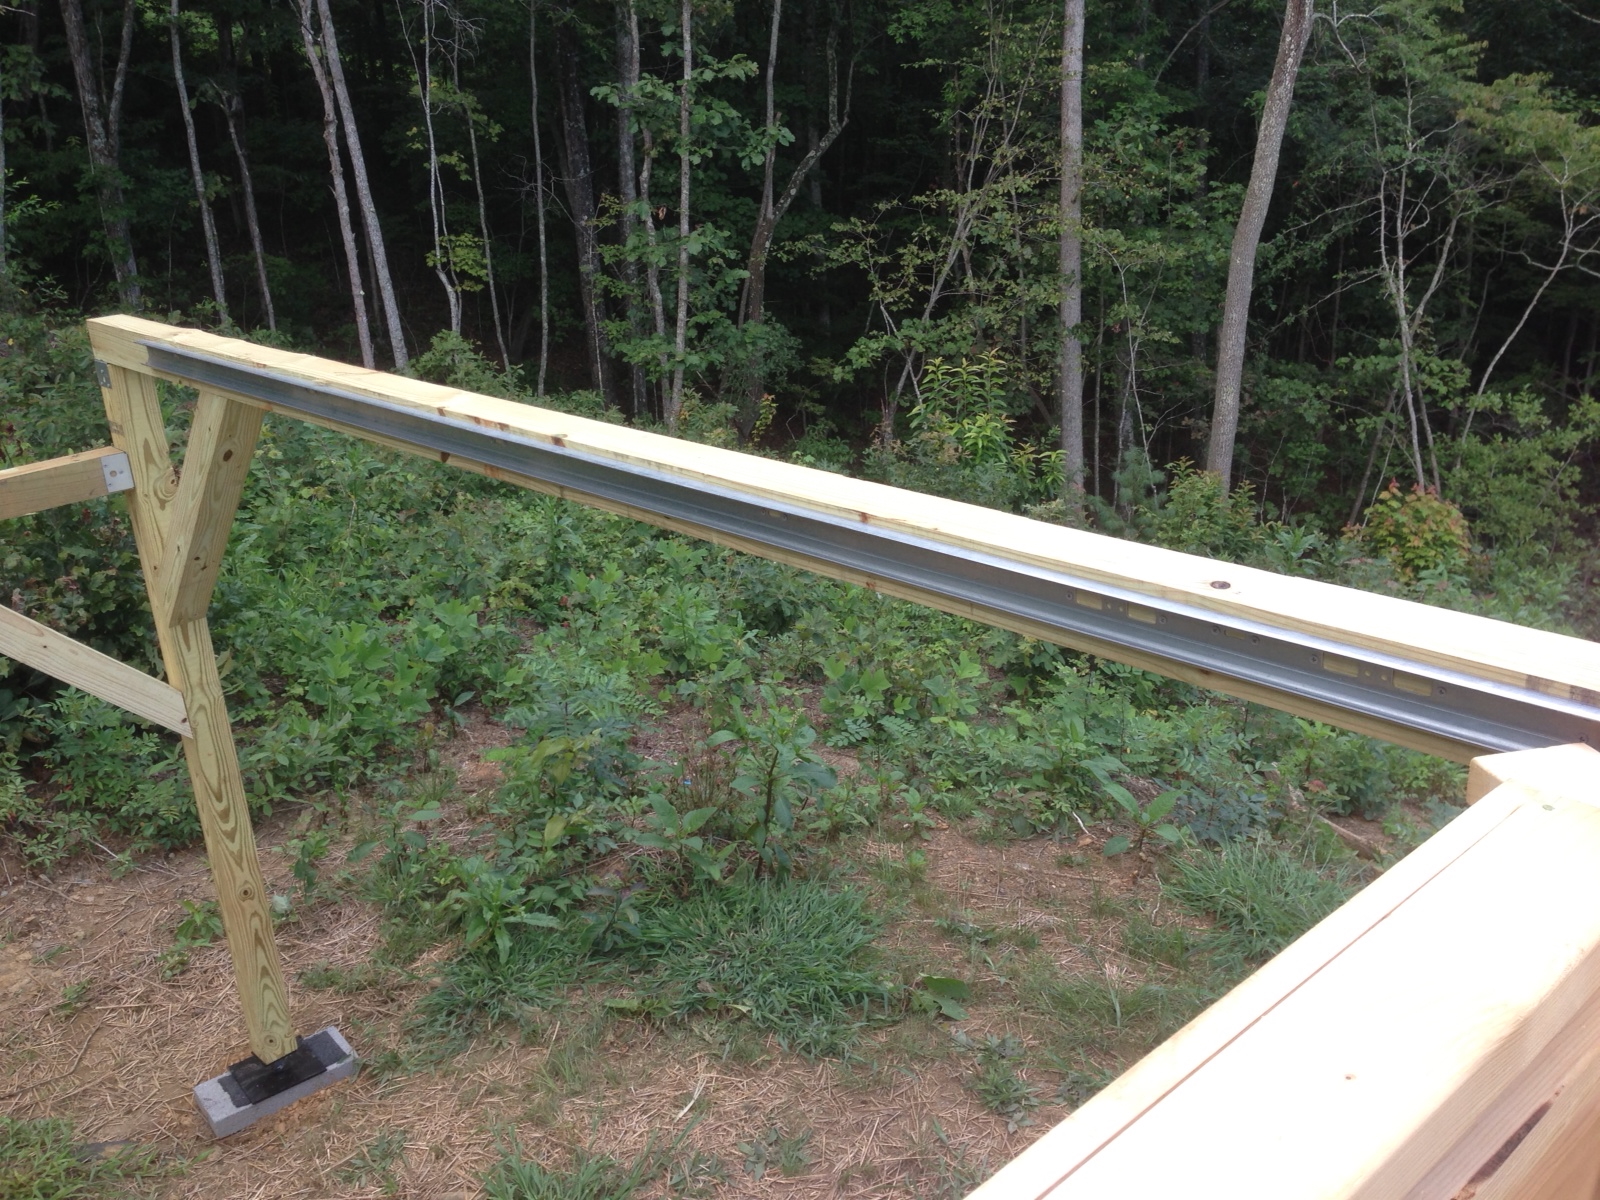
The east runoff rail fully installed, with the steel garage door track mounted flush to the inside face of the 4×4 beam. This inset design keeps the rail neatly tucked in but places lateral force directly on the beam—something I’d rethink in future builds.

West side roof support box completed, showing the 4×4 beam that rides inside the garage door track. The garage rollers are evenly spaced and bolted into the underside of the beam, allowing the roof to roll smoothly along the rail.
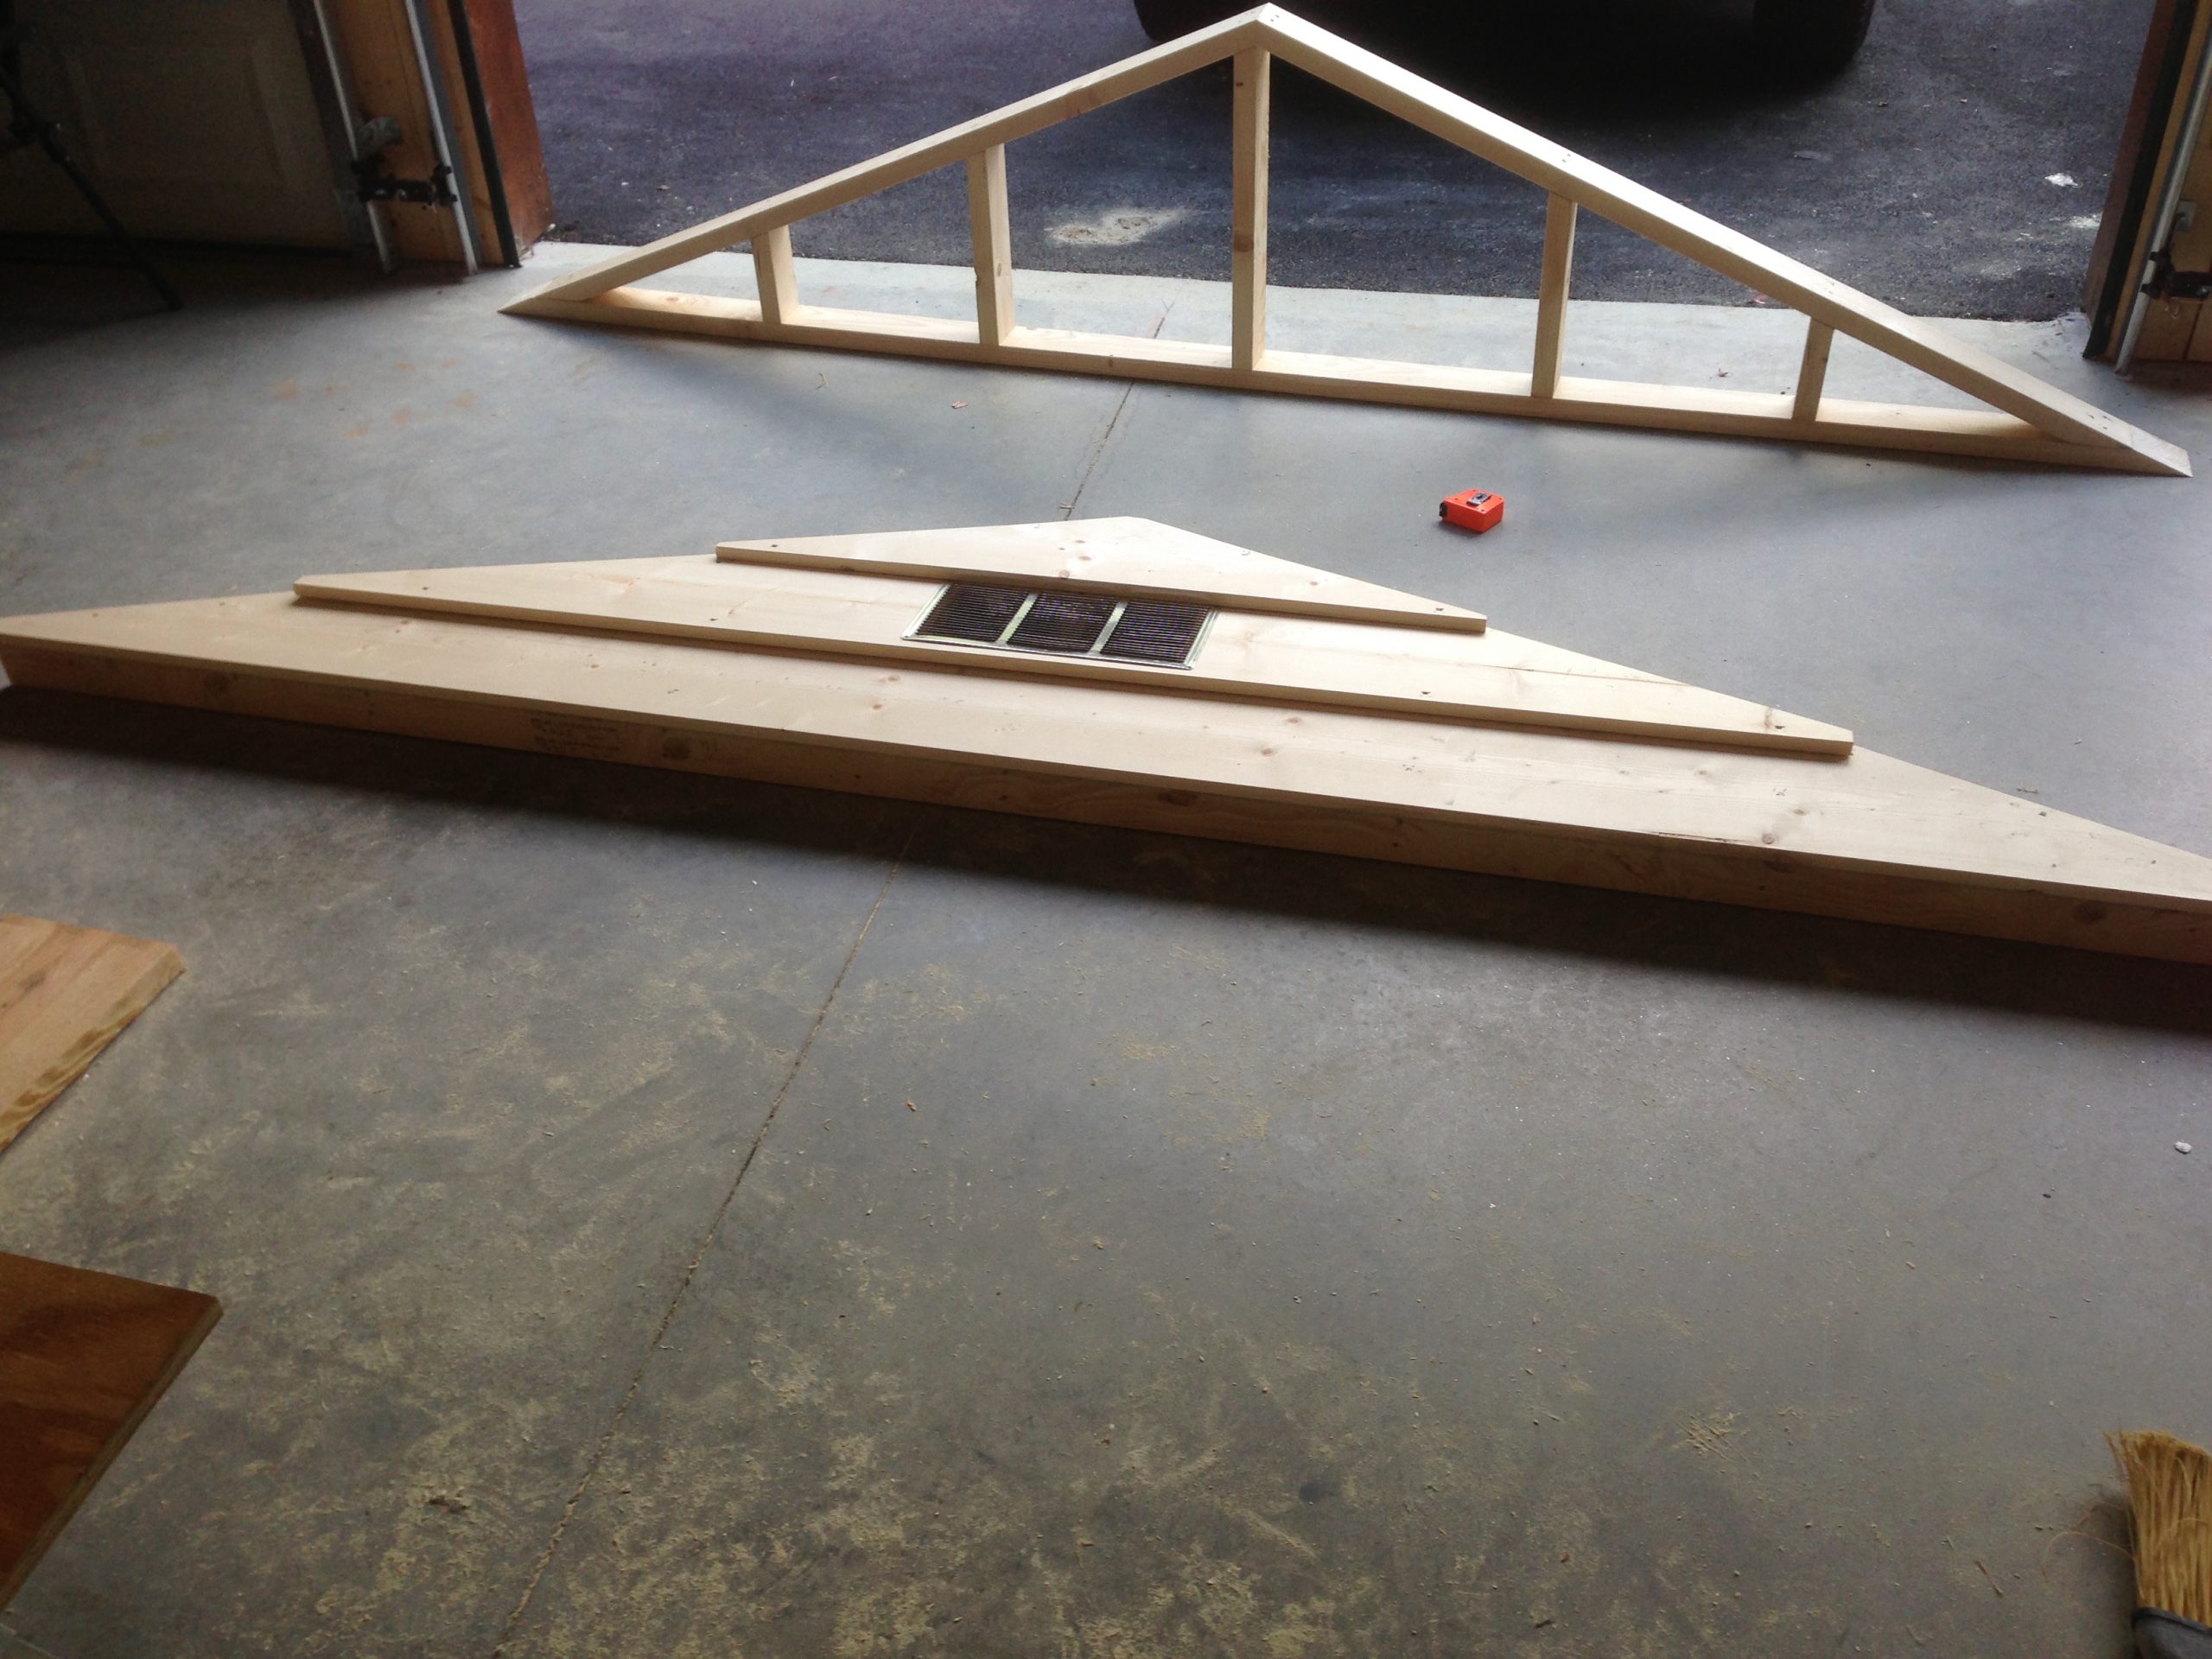
Both roof gables laid out in the garage—one fully finished with exterior sheathing, vent, and trim details, and the other still awaiting final assembly.
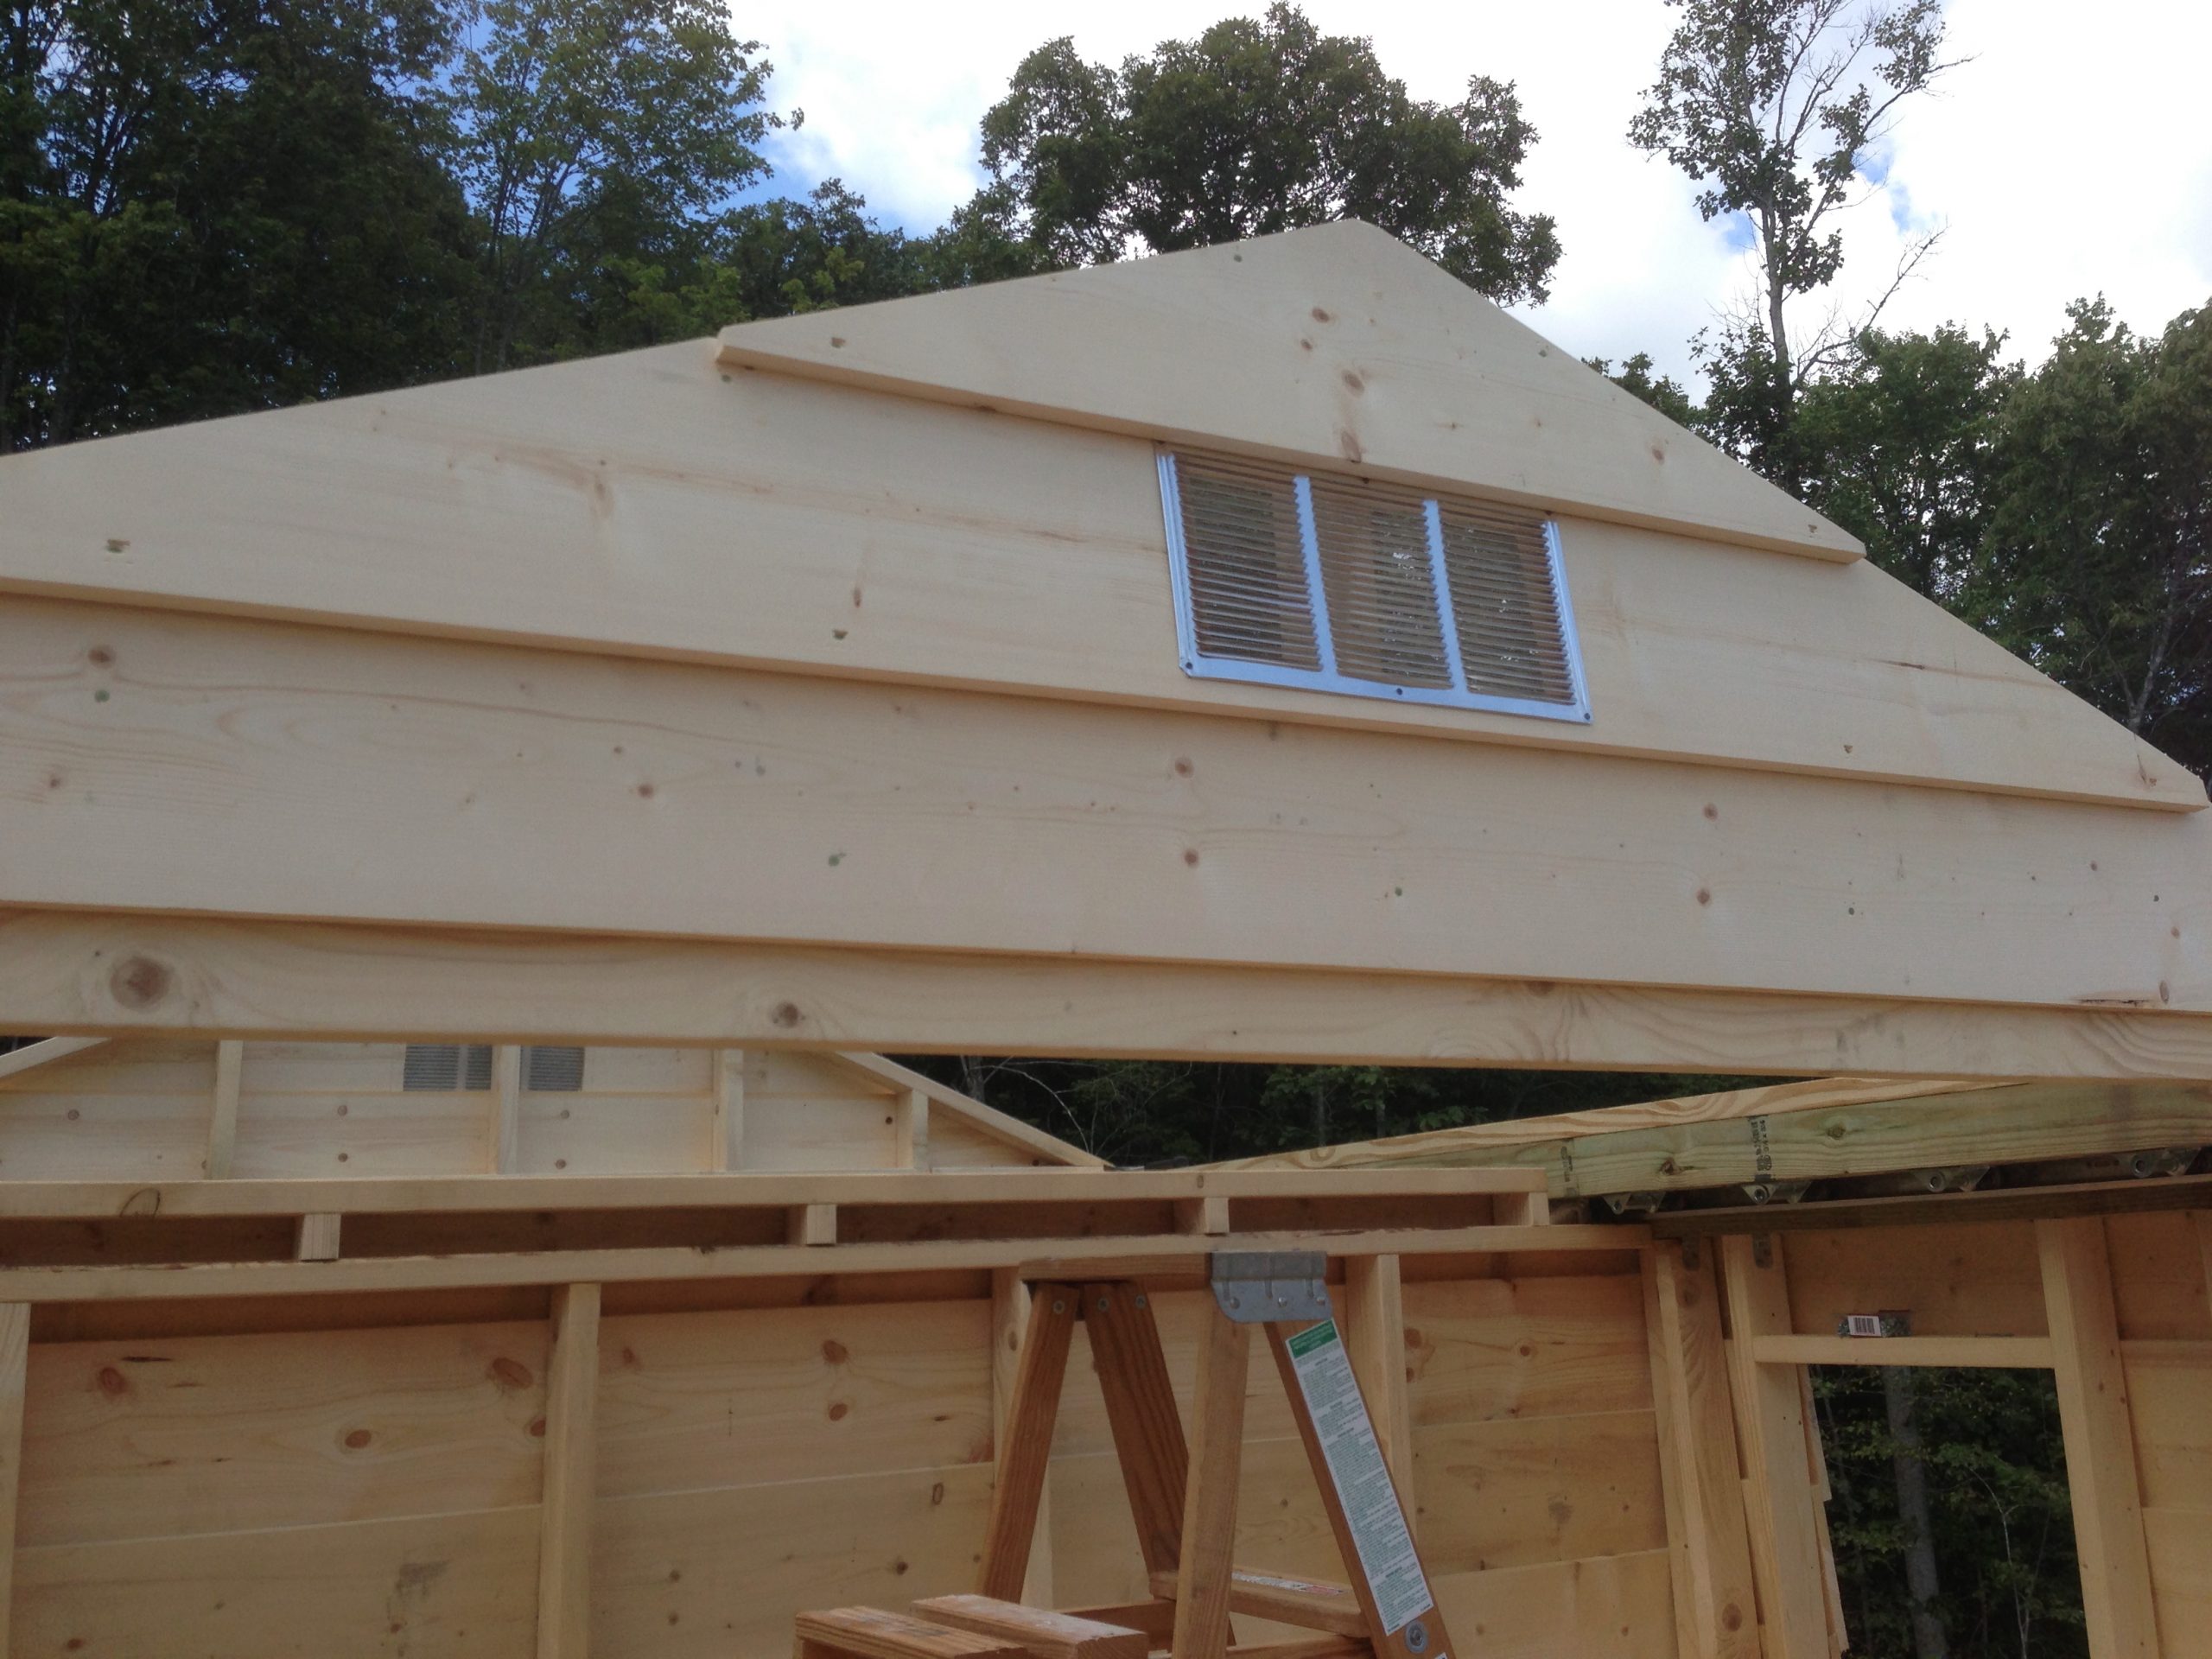
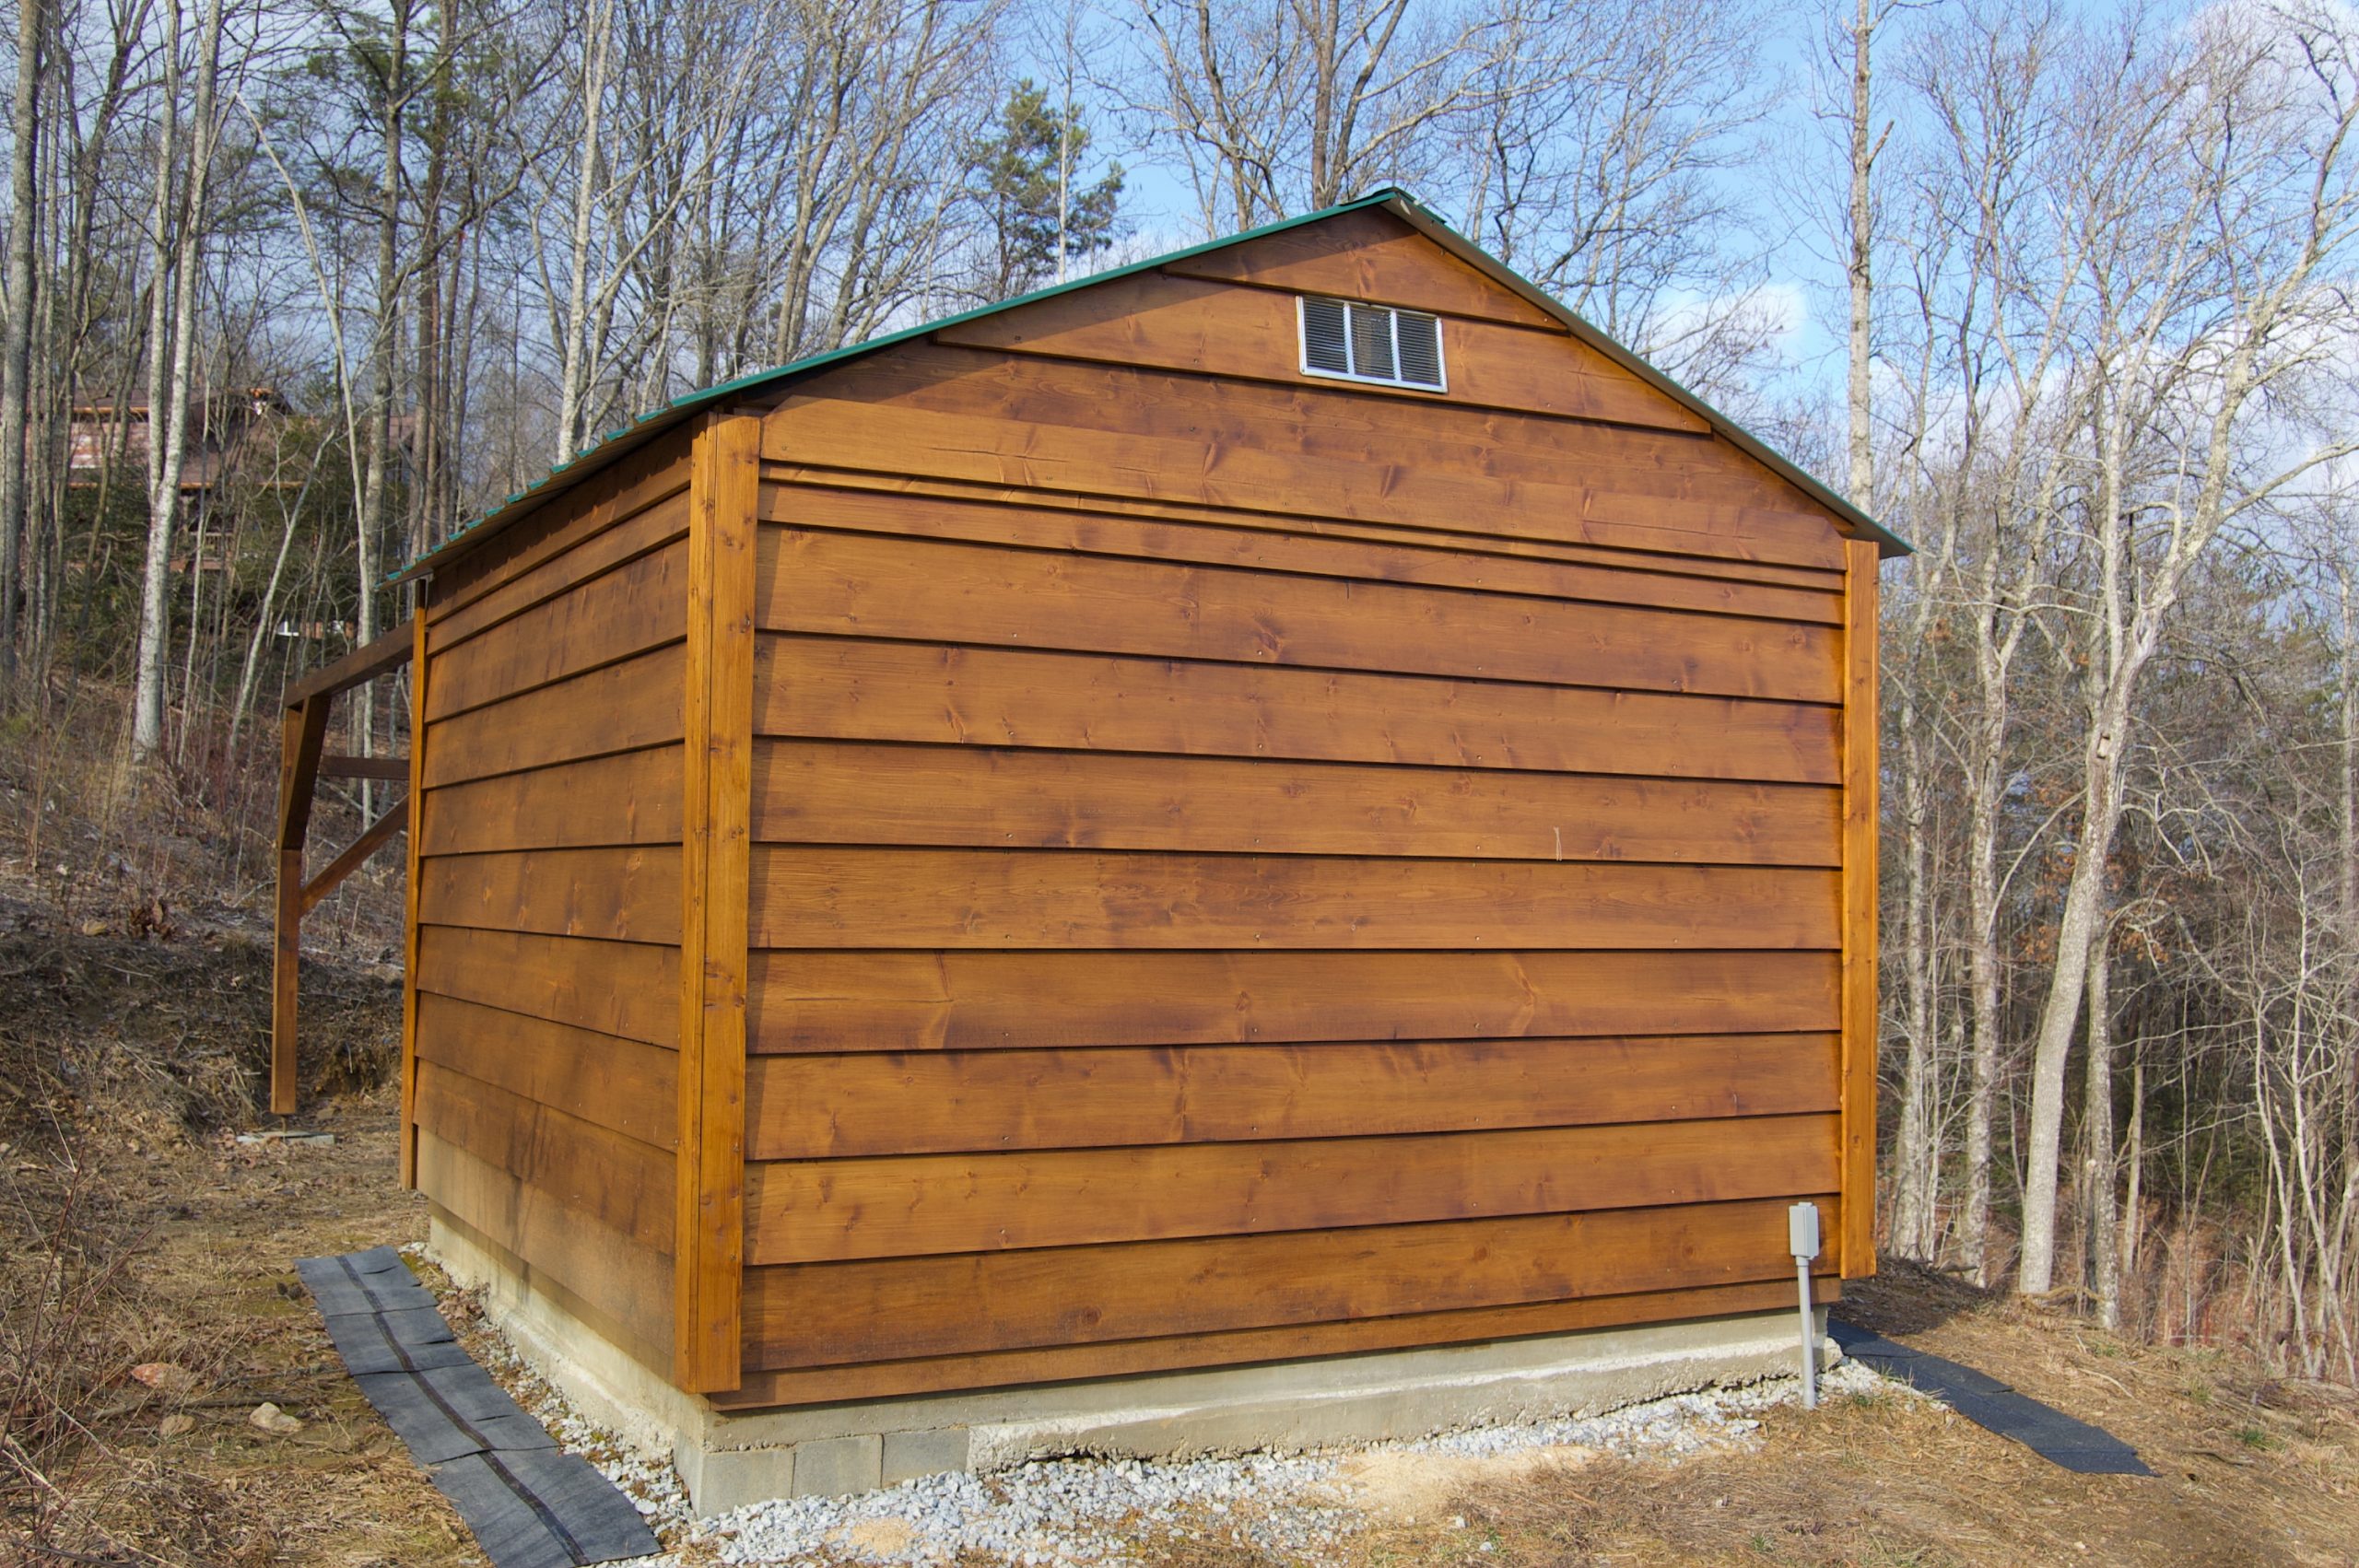
Both gables have now been installed on the roll-off roof box and fully sheathed with pine siding. A screened attic vent was added to each gable to help with passive airflow and heat reduction inside the observatory — an important consideration during the humid Georgia summers. With this step done, the roof was ready for trusses and final roofing.
The 2×10 crossbeam is now seated snugly into its notches on both gable ends, forming the spine of the roof structure. This beam helps tie the roof box together and adds critical rigidity for both the trusses and overall roll-off stability. It also served as a visual alignment check before the next stage of construction.
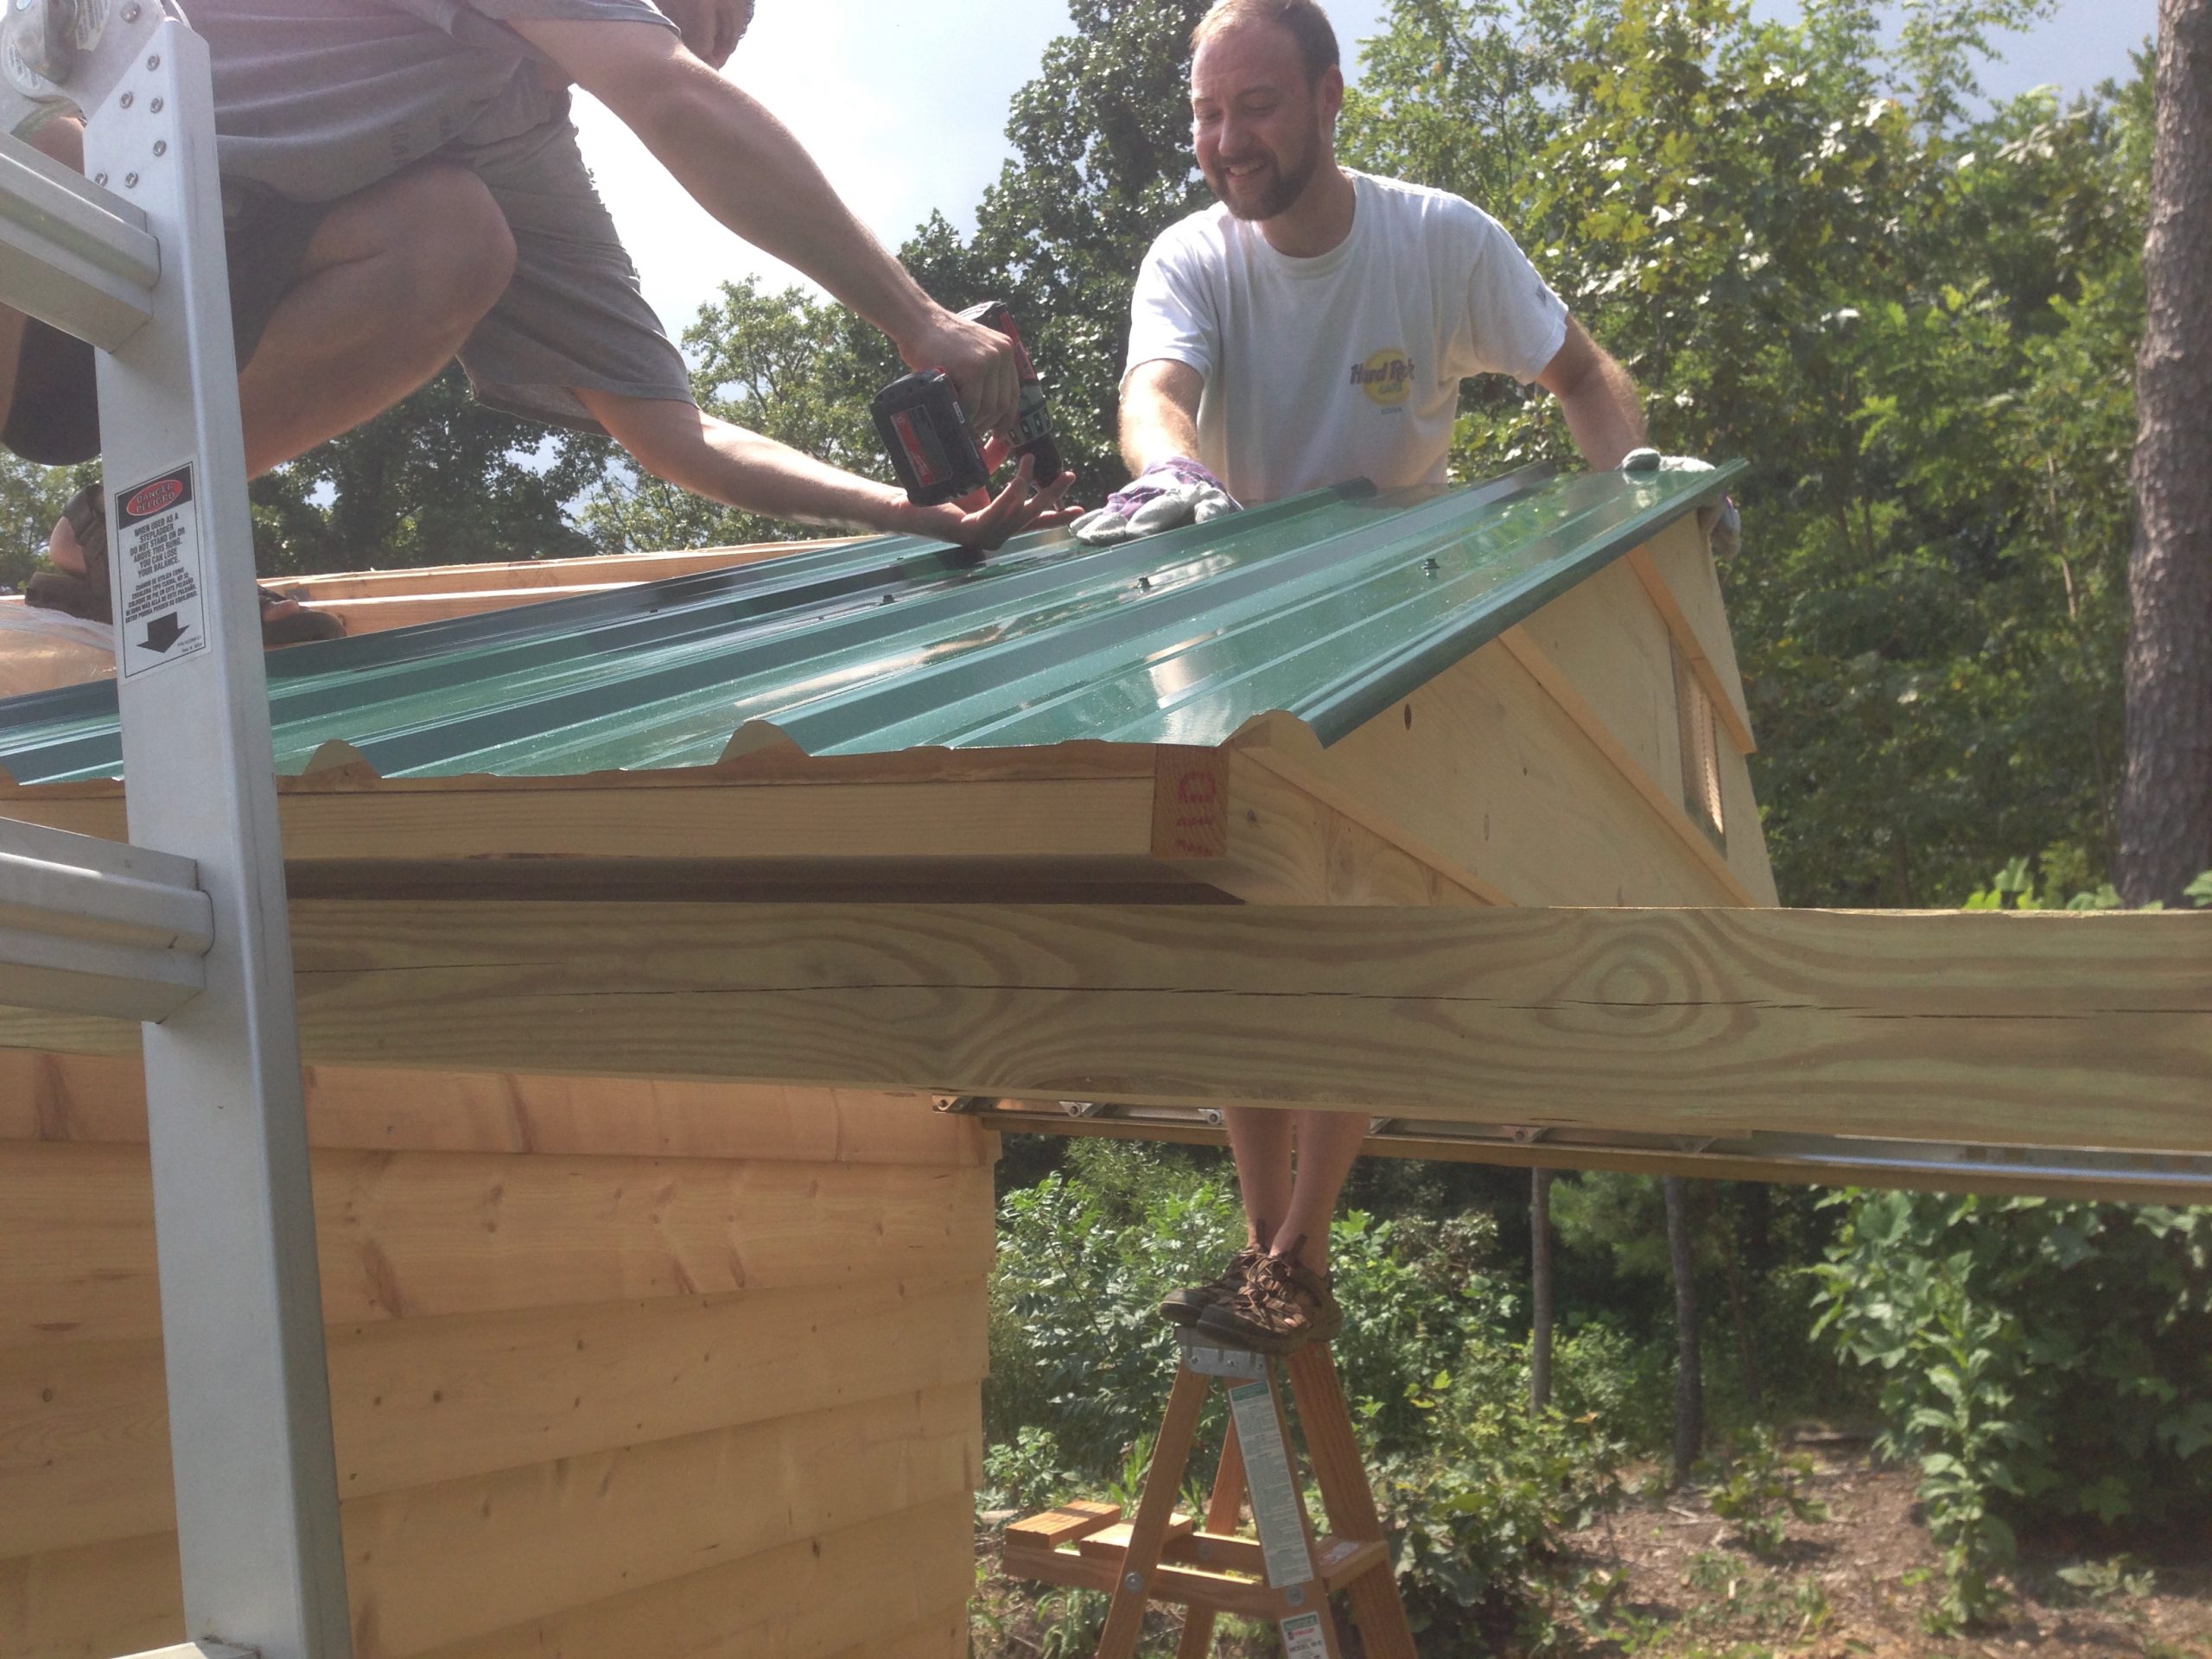
With the trusses and cross braces in place, we began attaching the green metal roofing. The SkyShed plans recommend installing the cross braces in a vertical orientation, which we followed—but in hindsight, it would have been much easier to mount them horizontally. For a small structure like this, vertical placement didn’t offer any real structural advantage and just made screwing down the roofing more awkward than it needed to be.
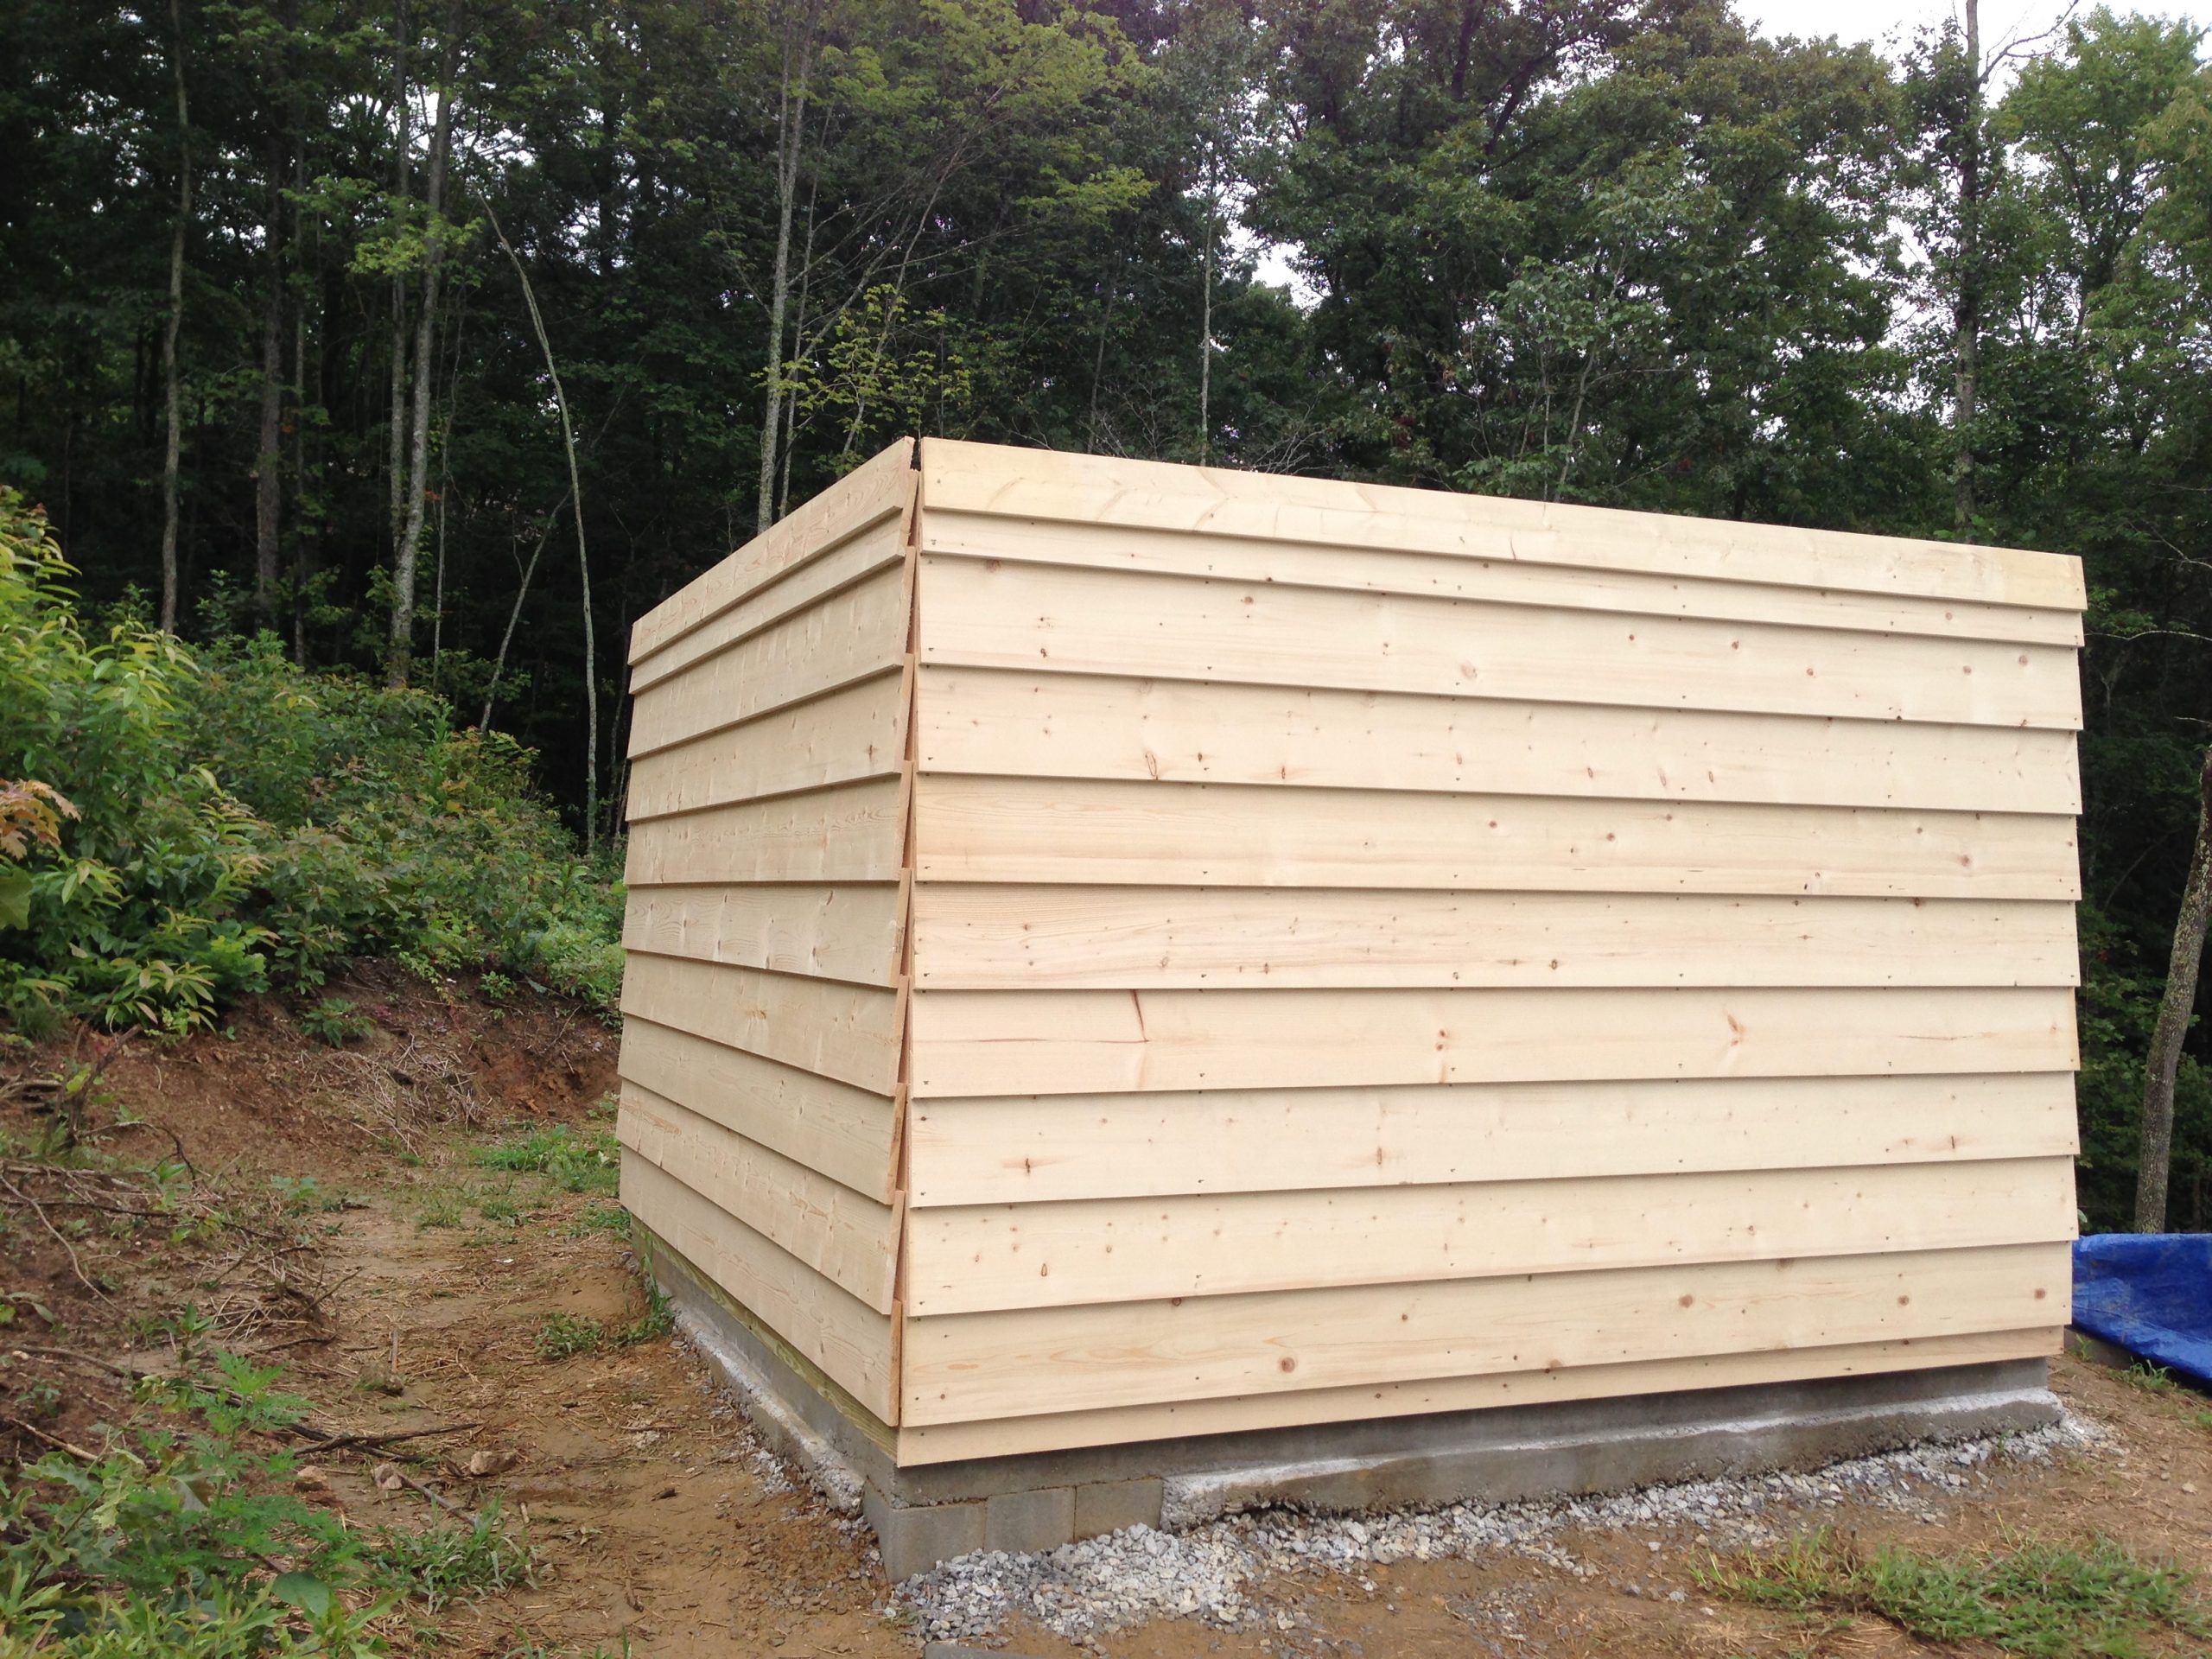
The roof is now fully installed and shown here in the closed position. With the green metal panels in place and everything squared up, the observatory structure really starts to look complete. You can see how the inset garage door track allows the roof to roll off seamlessly while maintaining a clean, cohesive profile with no visible gap between the structure and the roofline.
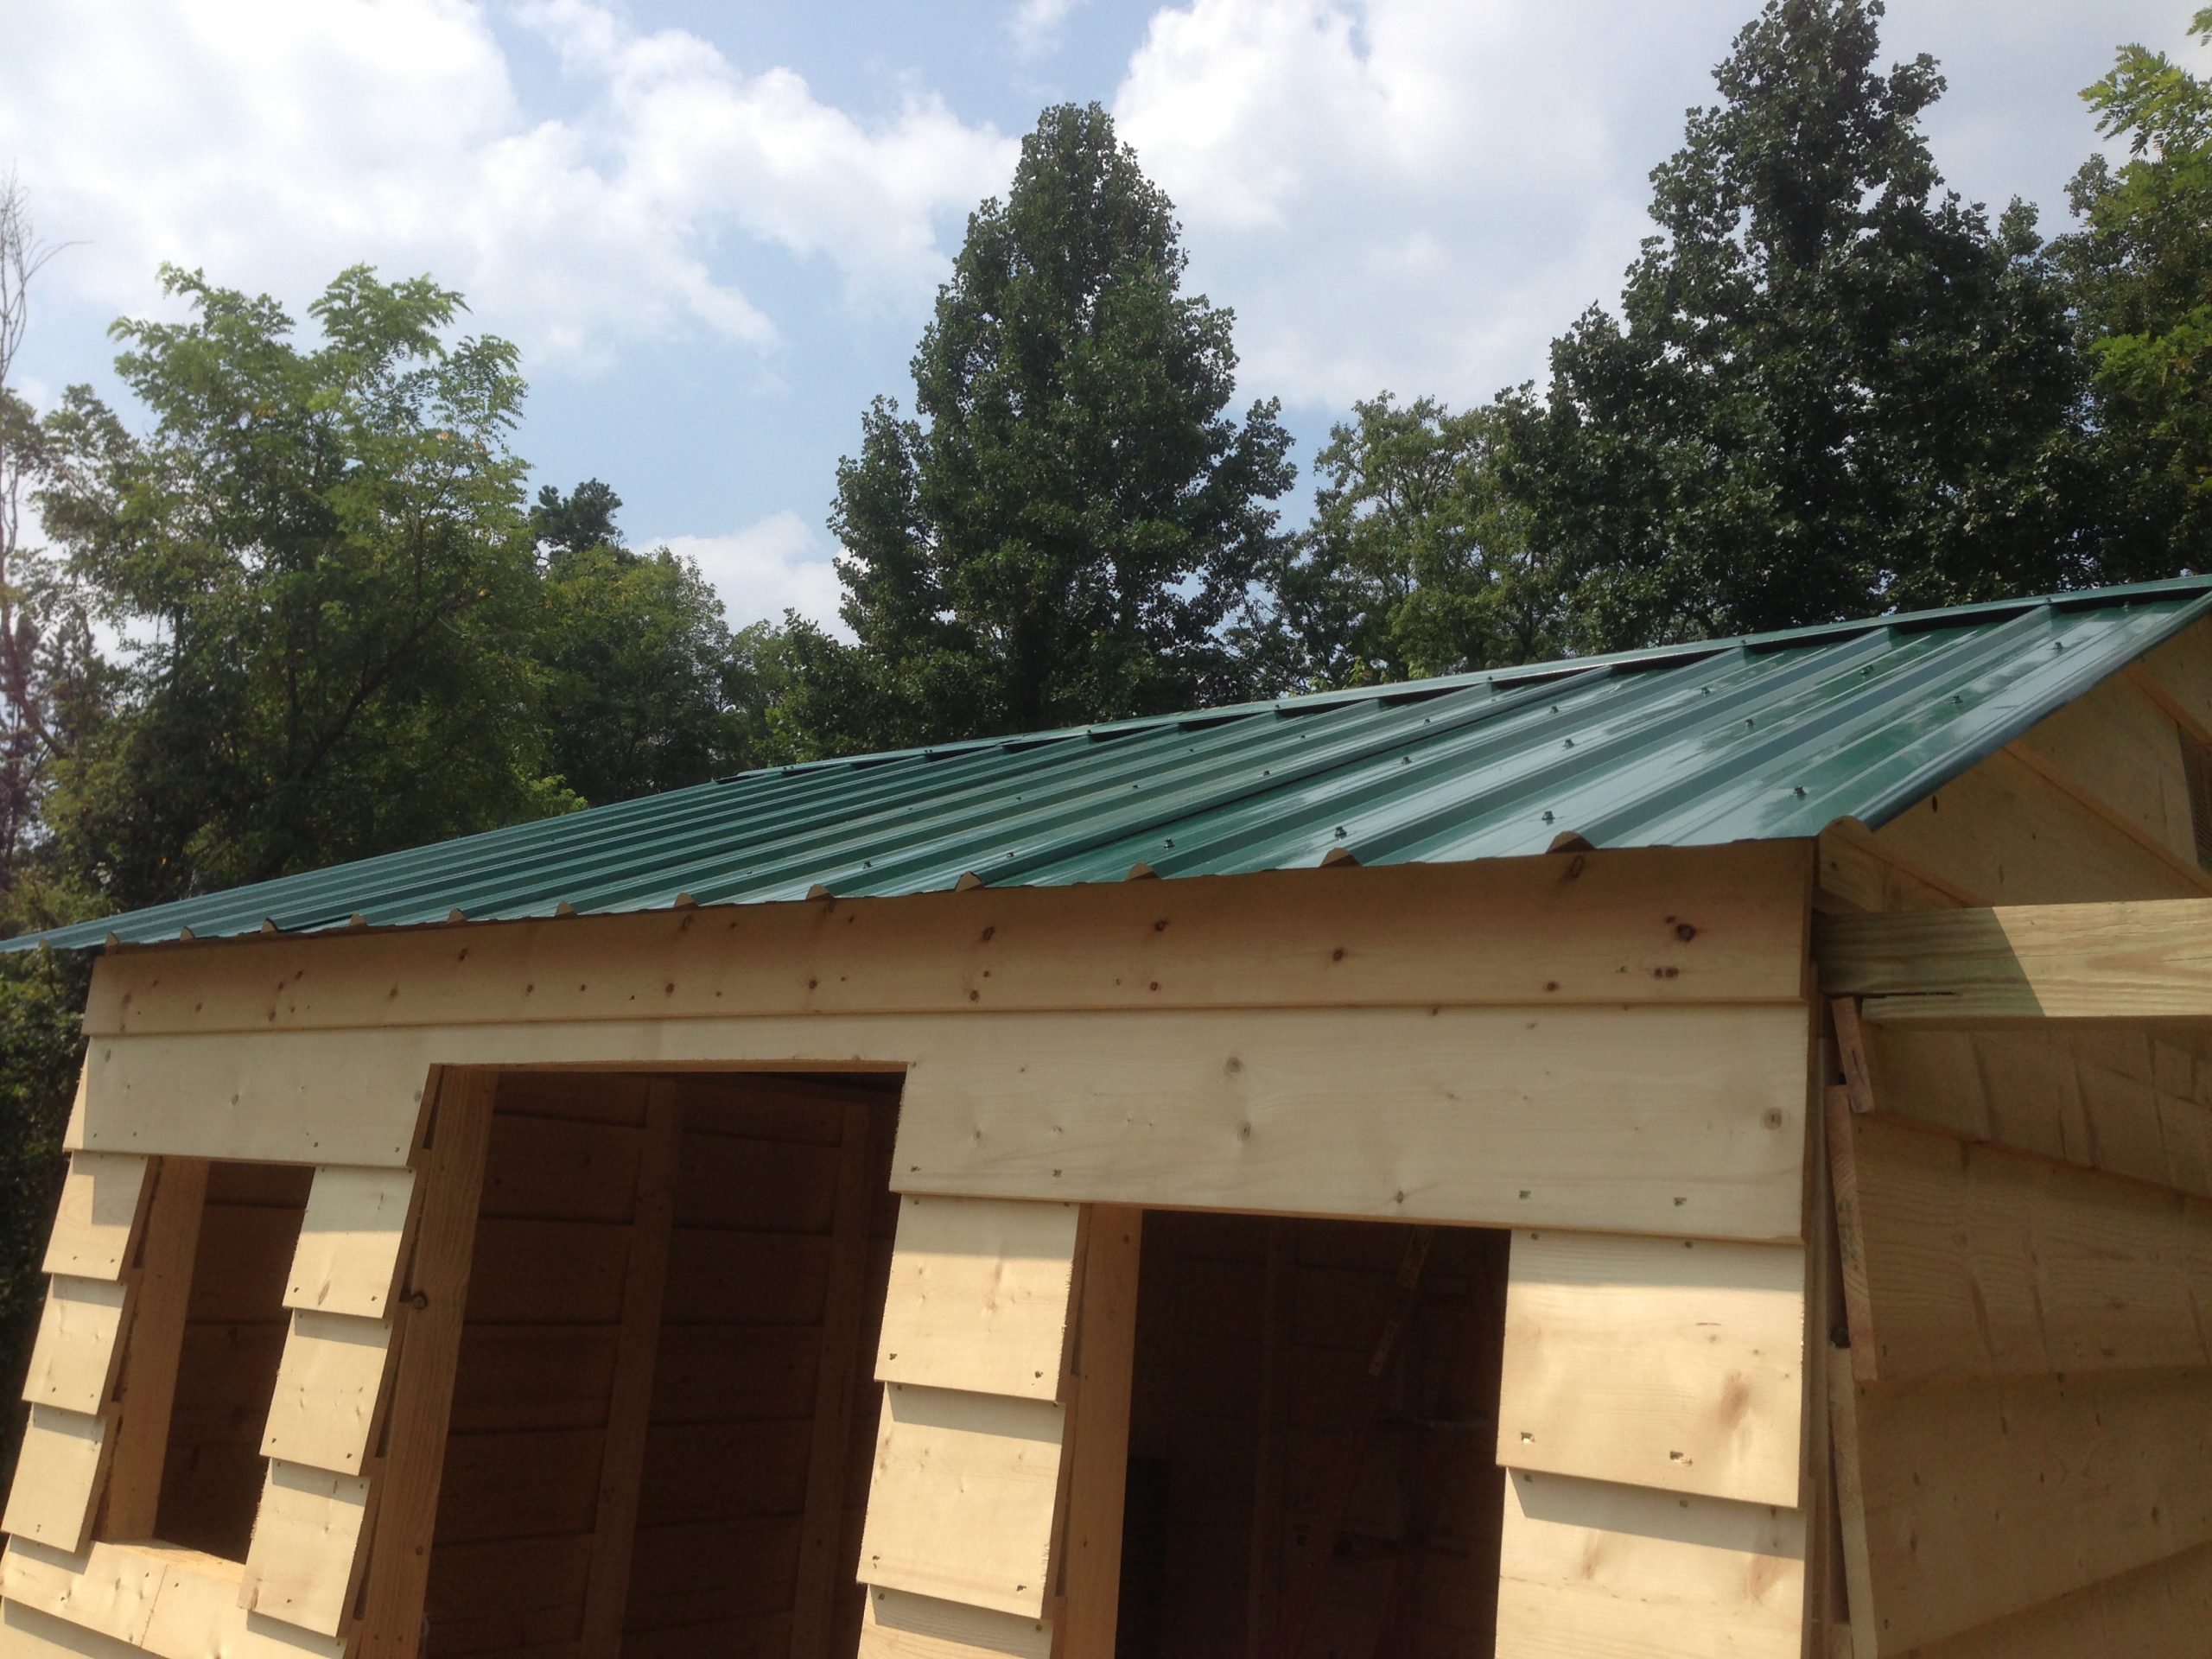
A front view of the completed roof in the closed position. The green metal roofing adds a clean, polished look while providing durable protection from the elements. The shallow roof pitch and seamless integration with the walls create a smooth profile with no visible gap, keeping the structure looking tidy and well-finished. With all panels aligned and secured, this marked the official completion of the roll-off roof installation.
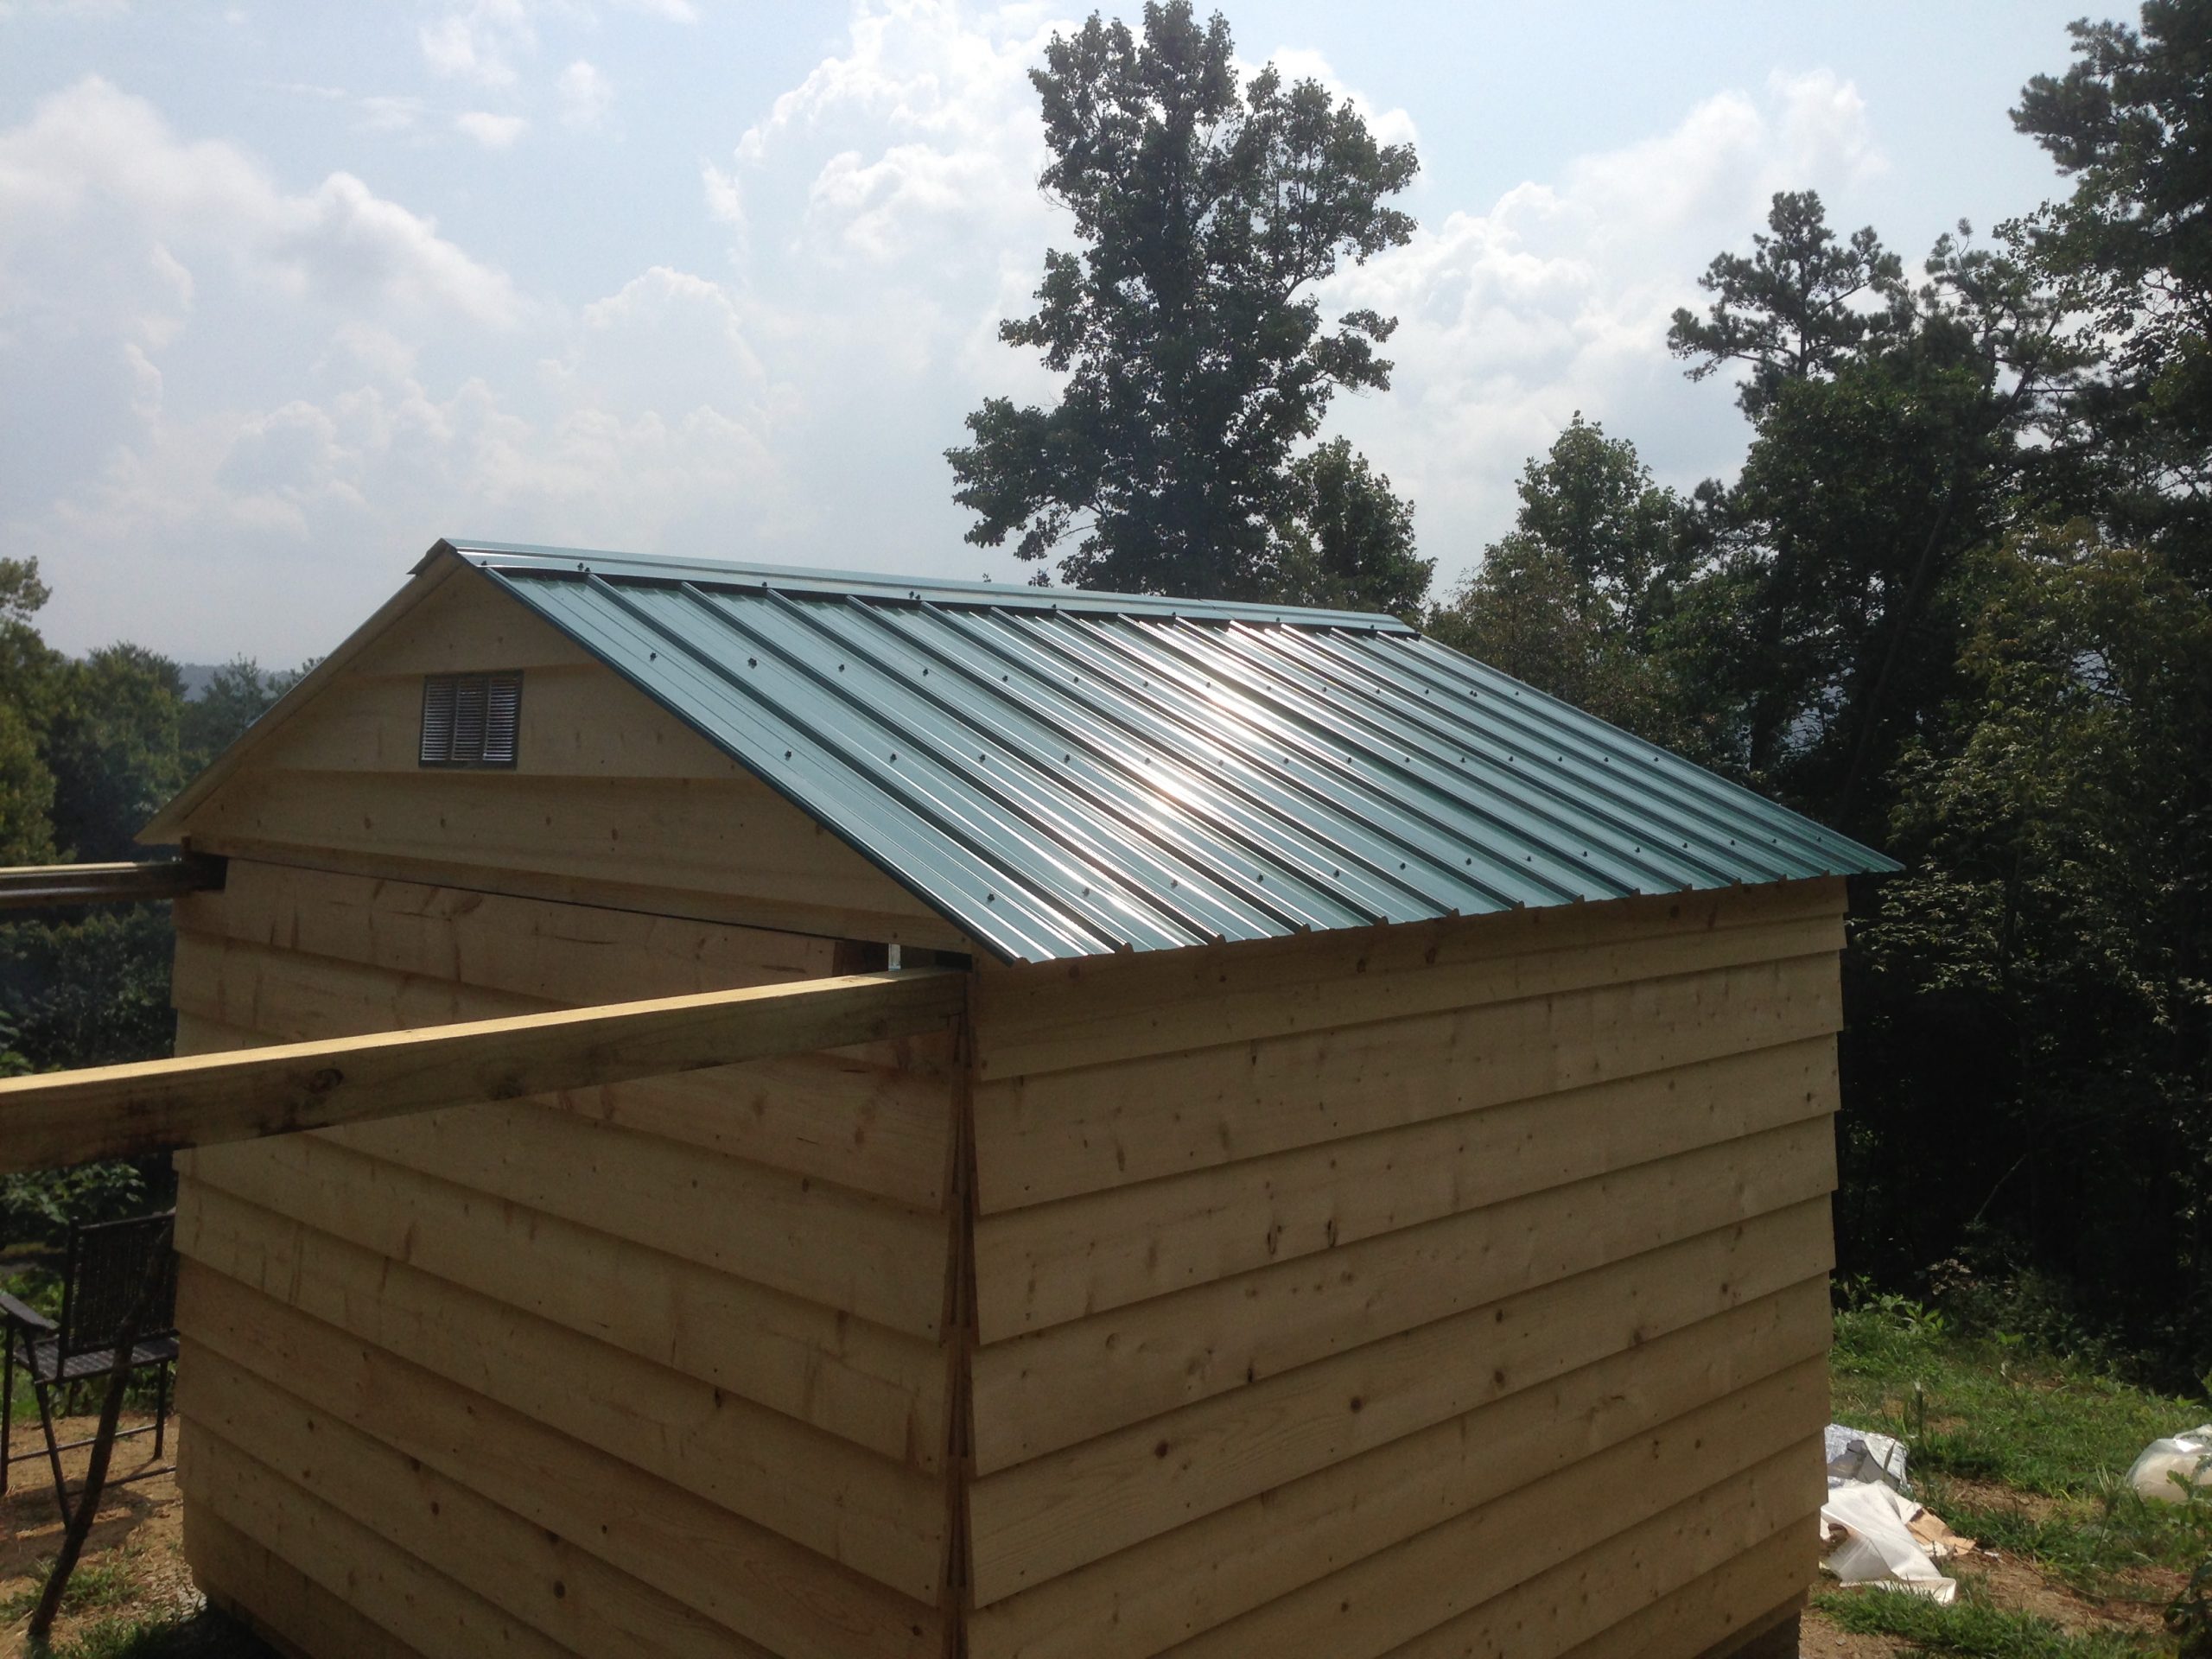
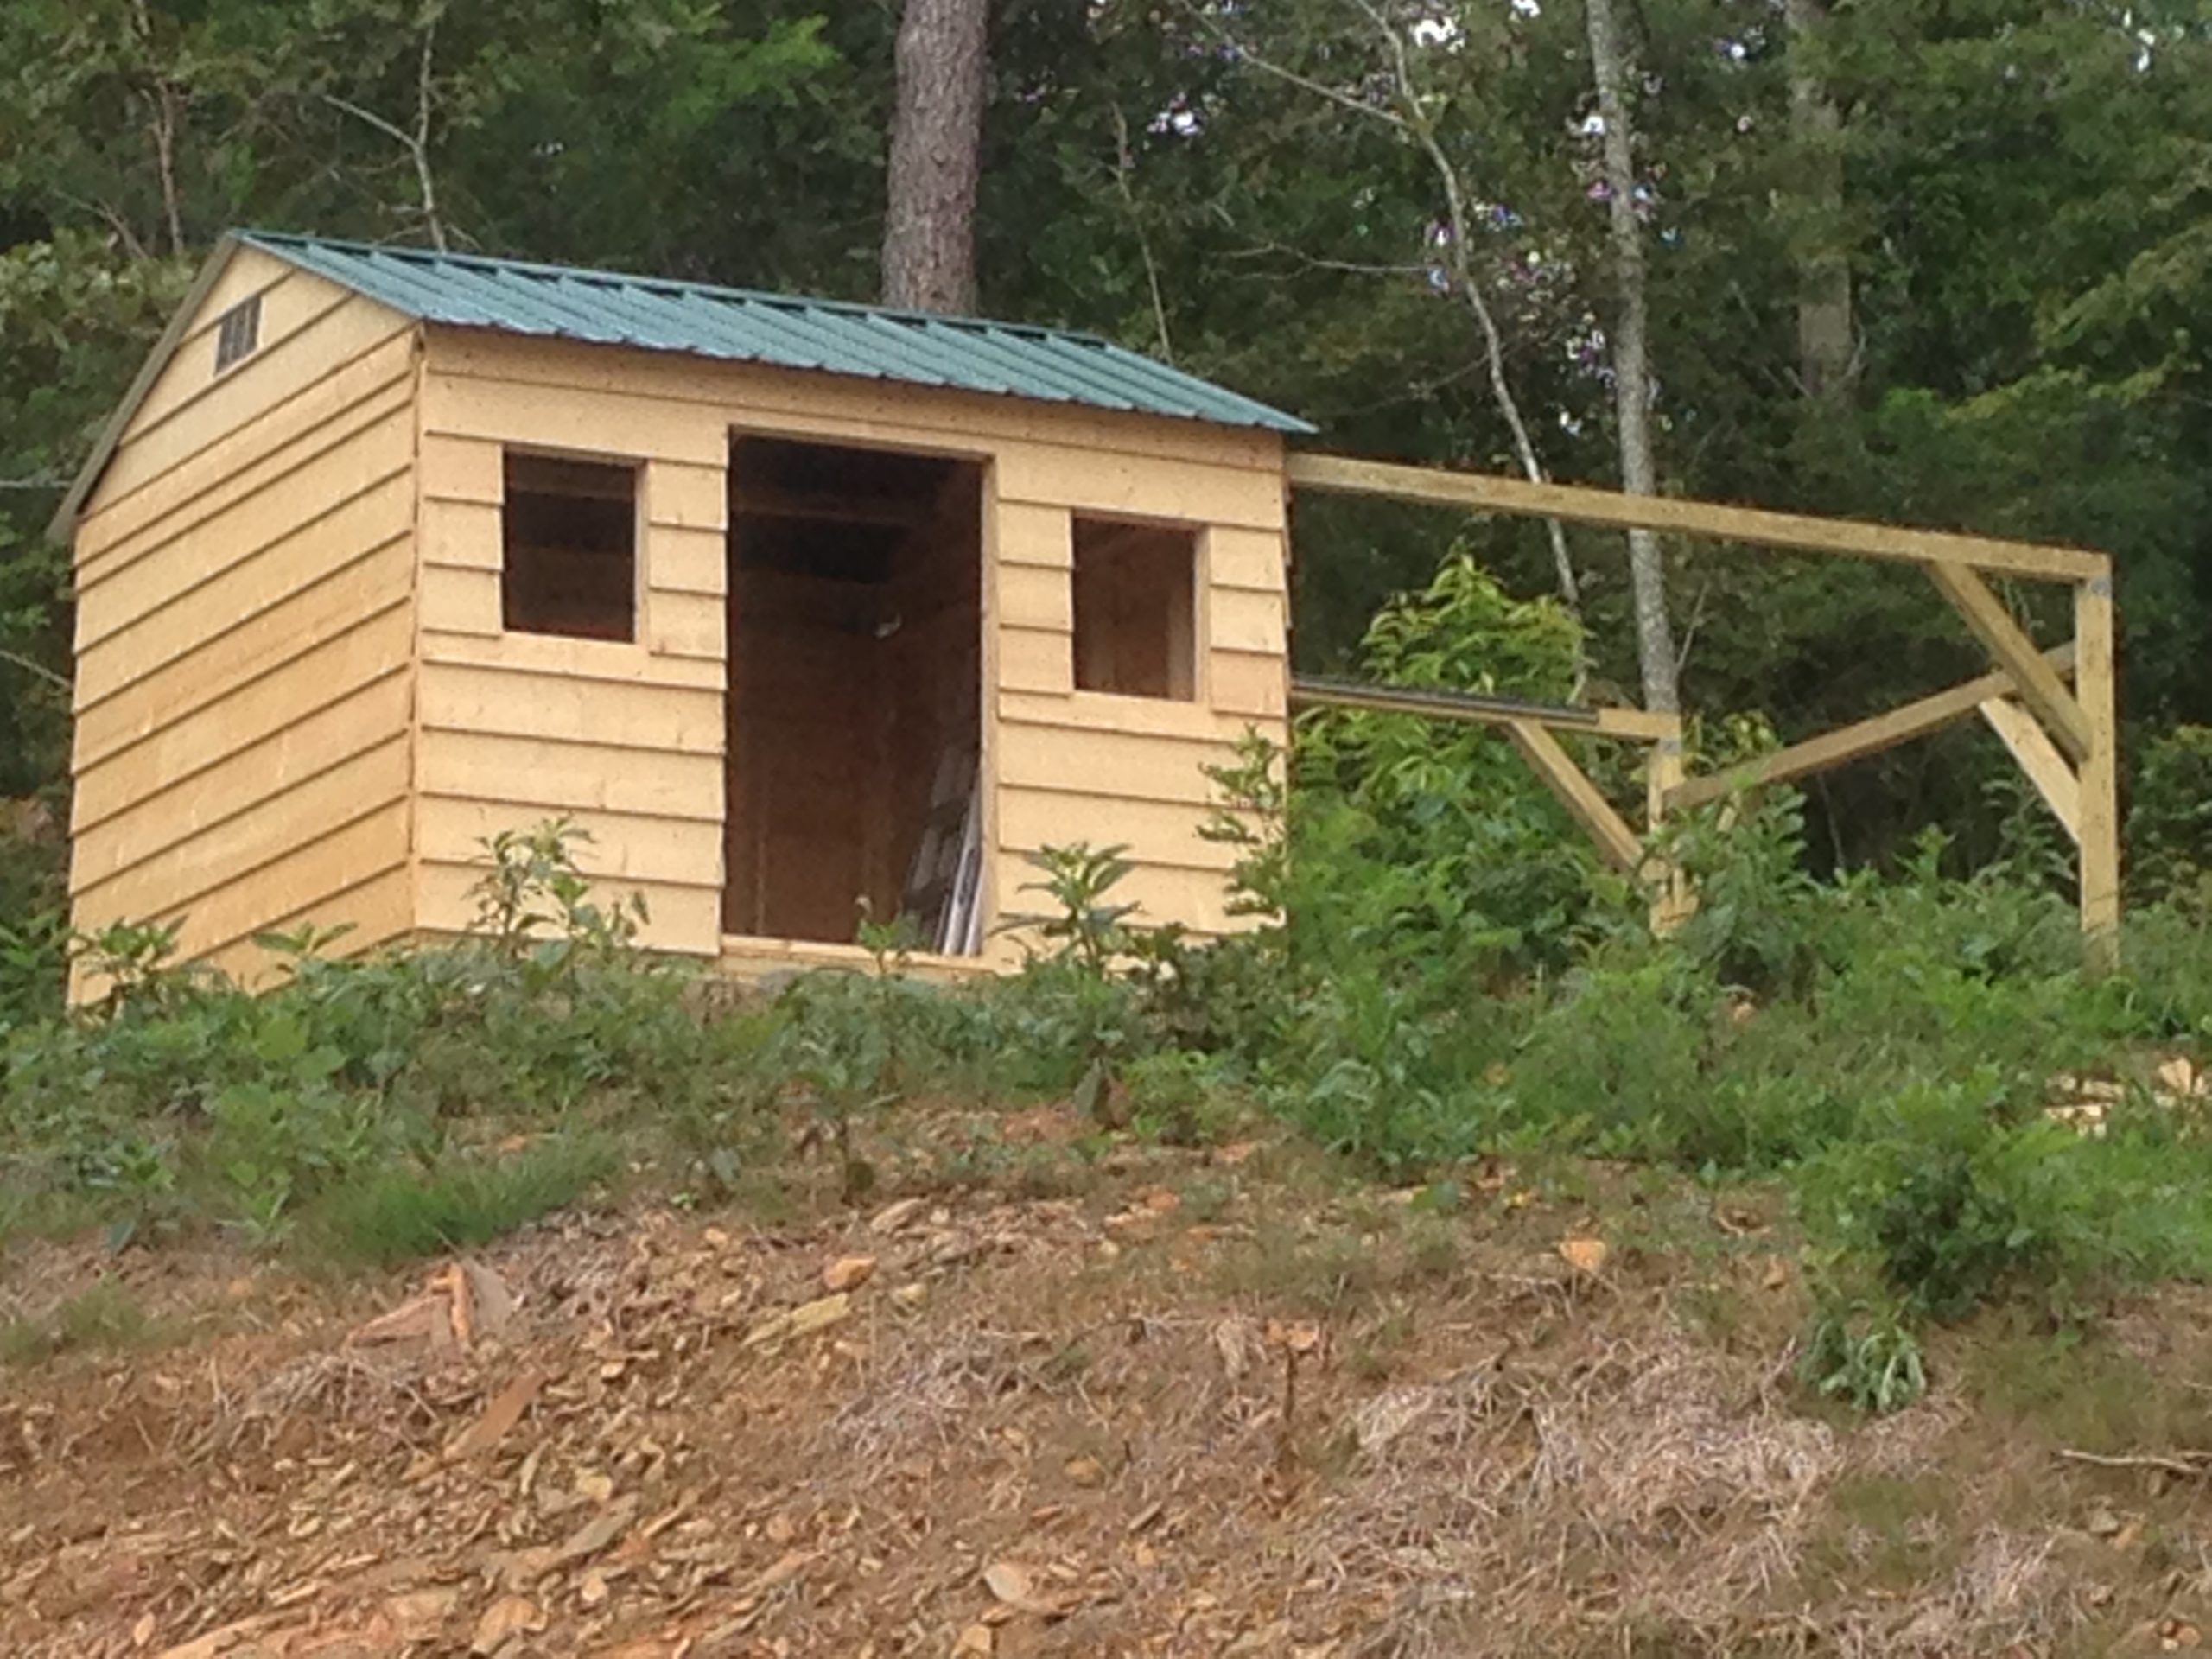
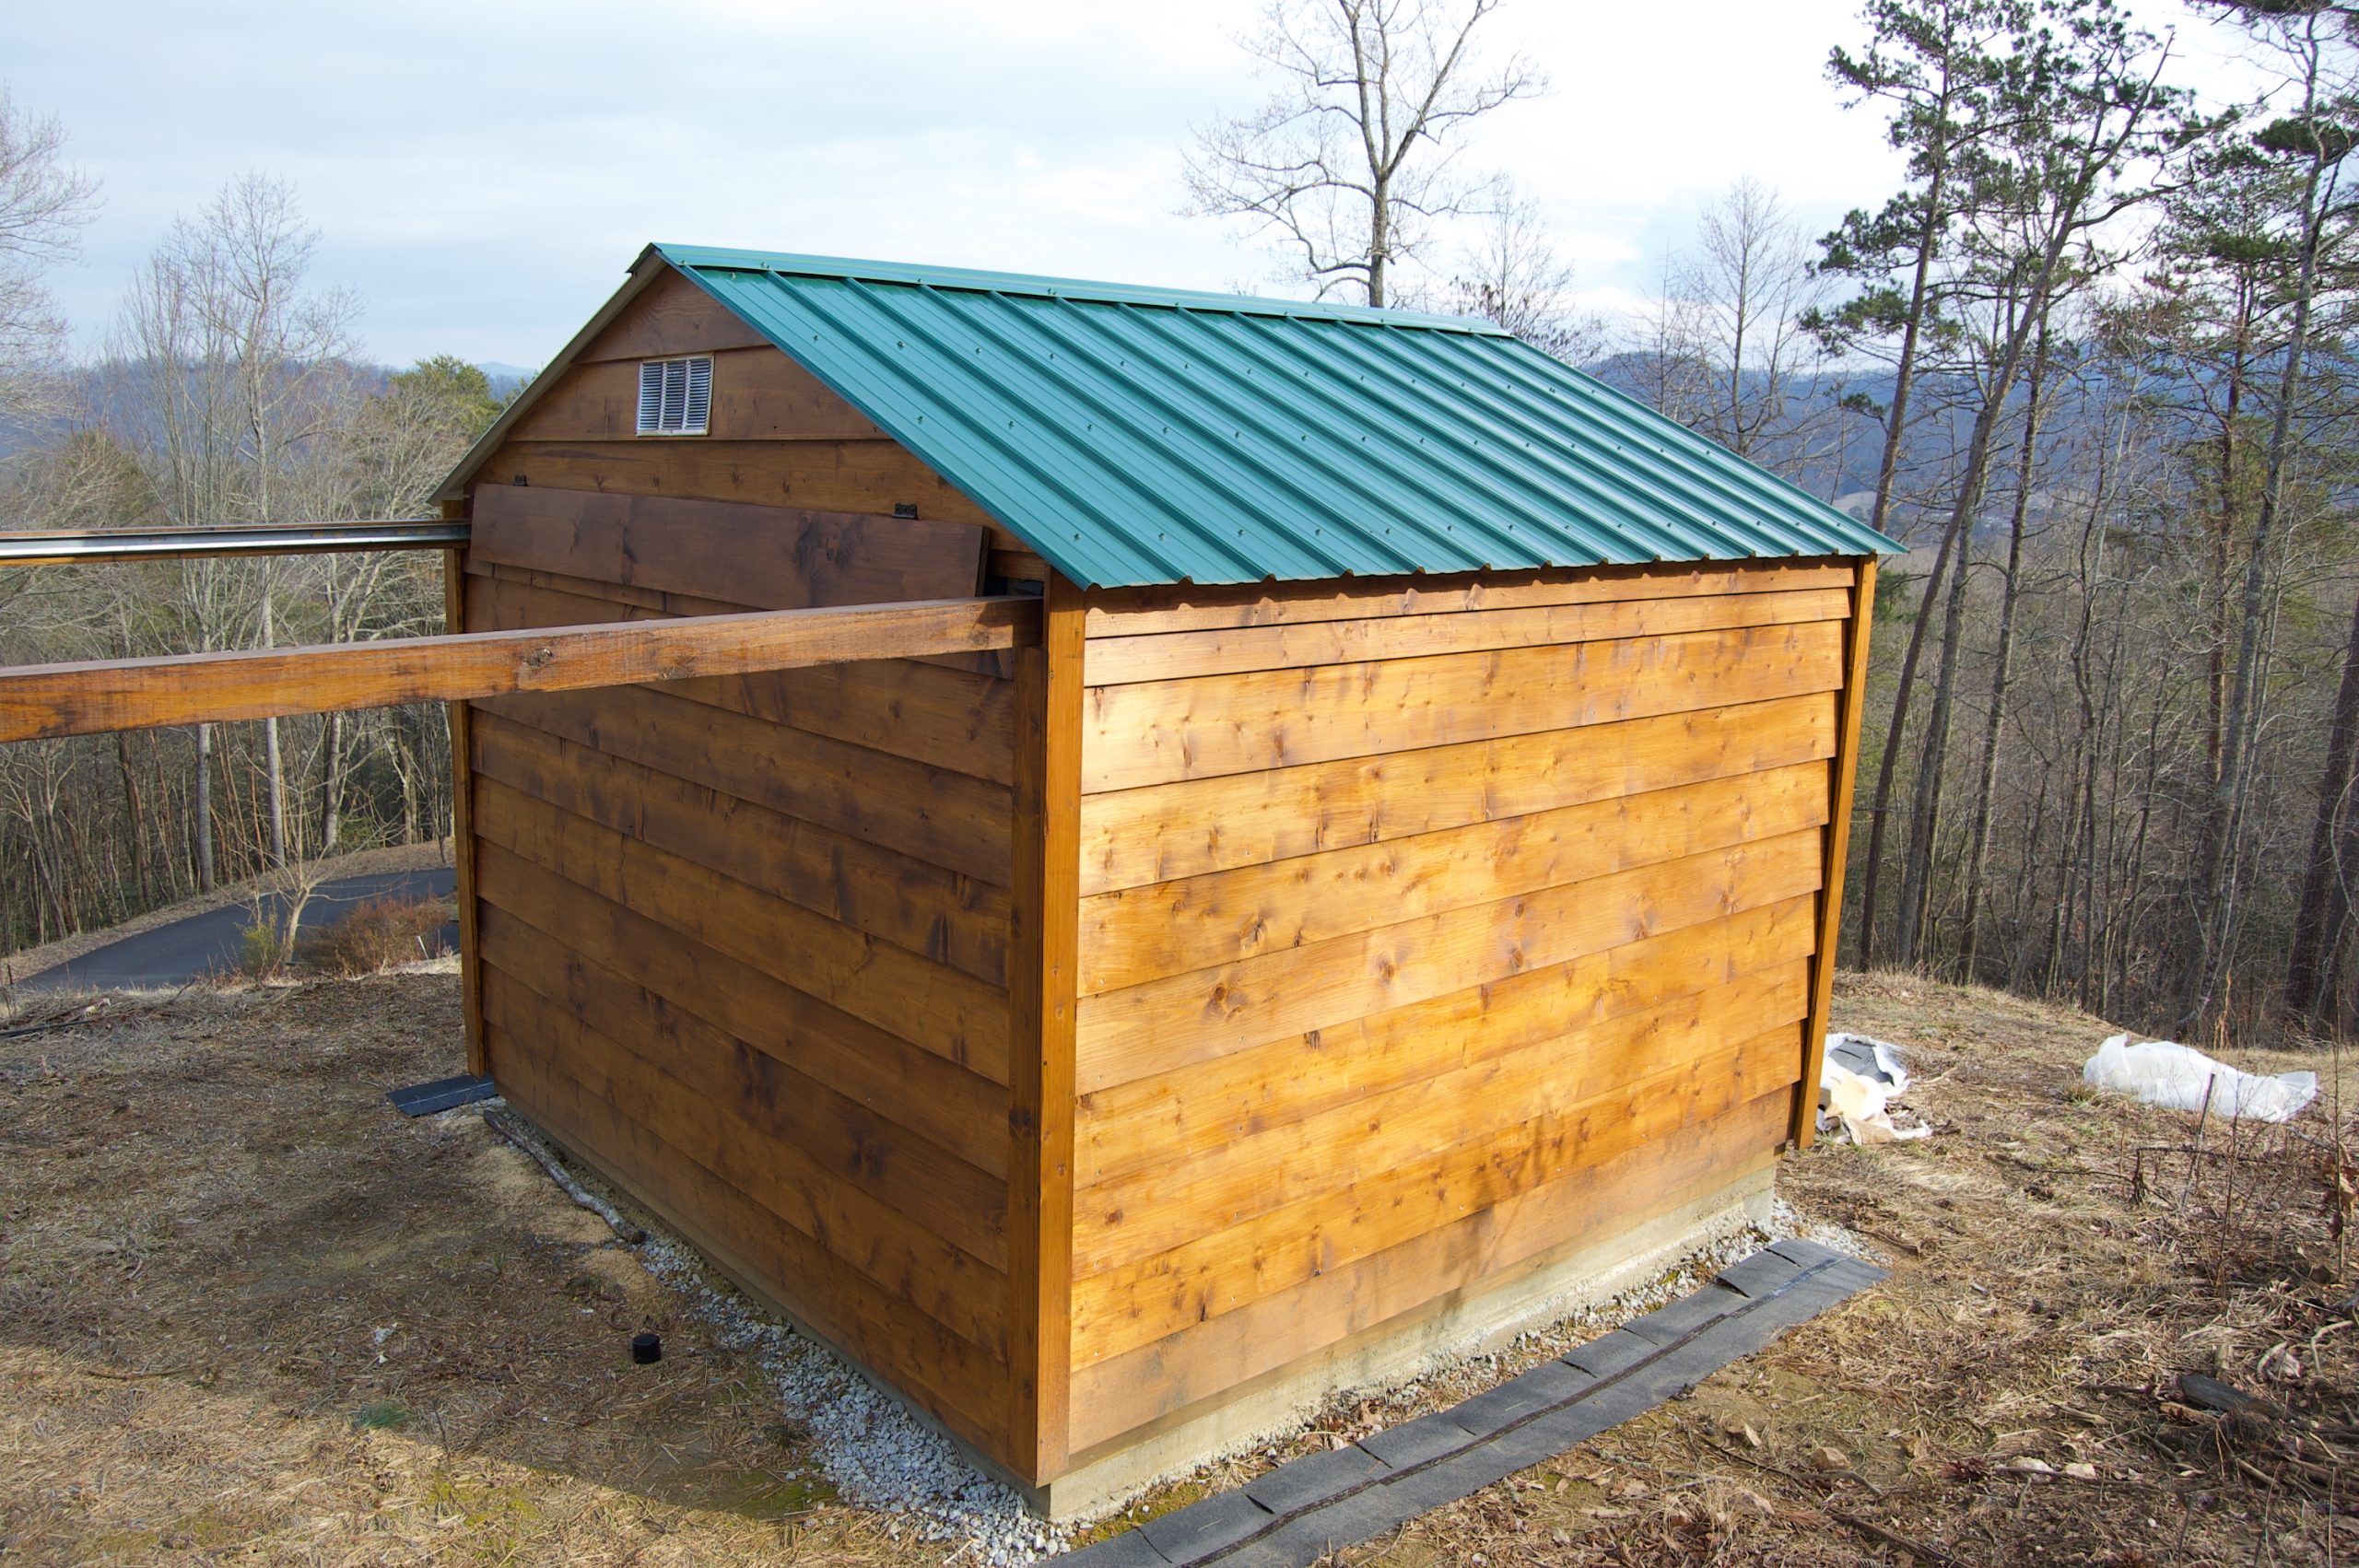
Rear view of the completed roll-off roof, fully installed and seated in the closed position. The green metal roofing reflects the afternoon sun and adds a sharp contrast against the natural wood siding. From this angle, you can see how tightly the roof aligns with the walls and gables—no overhang, no visible gaps—creating a unified appearance. The extended 2x10s for the roll-off rails are also visible here, ready to support the roof when it slides open.
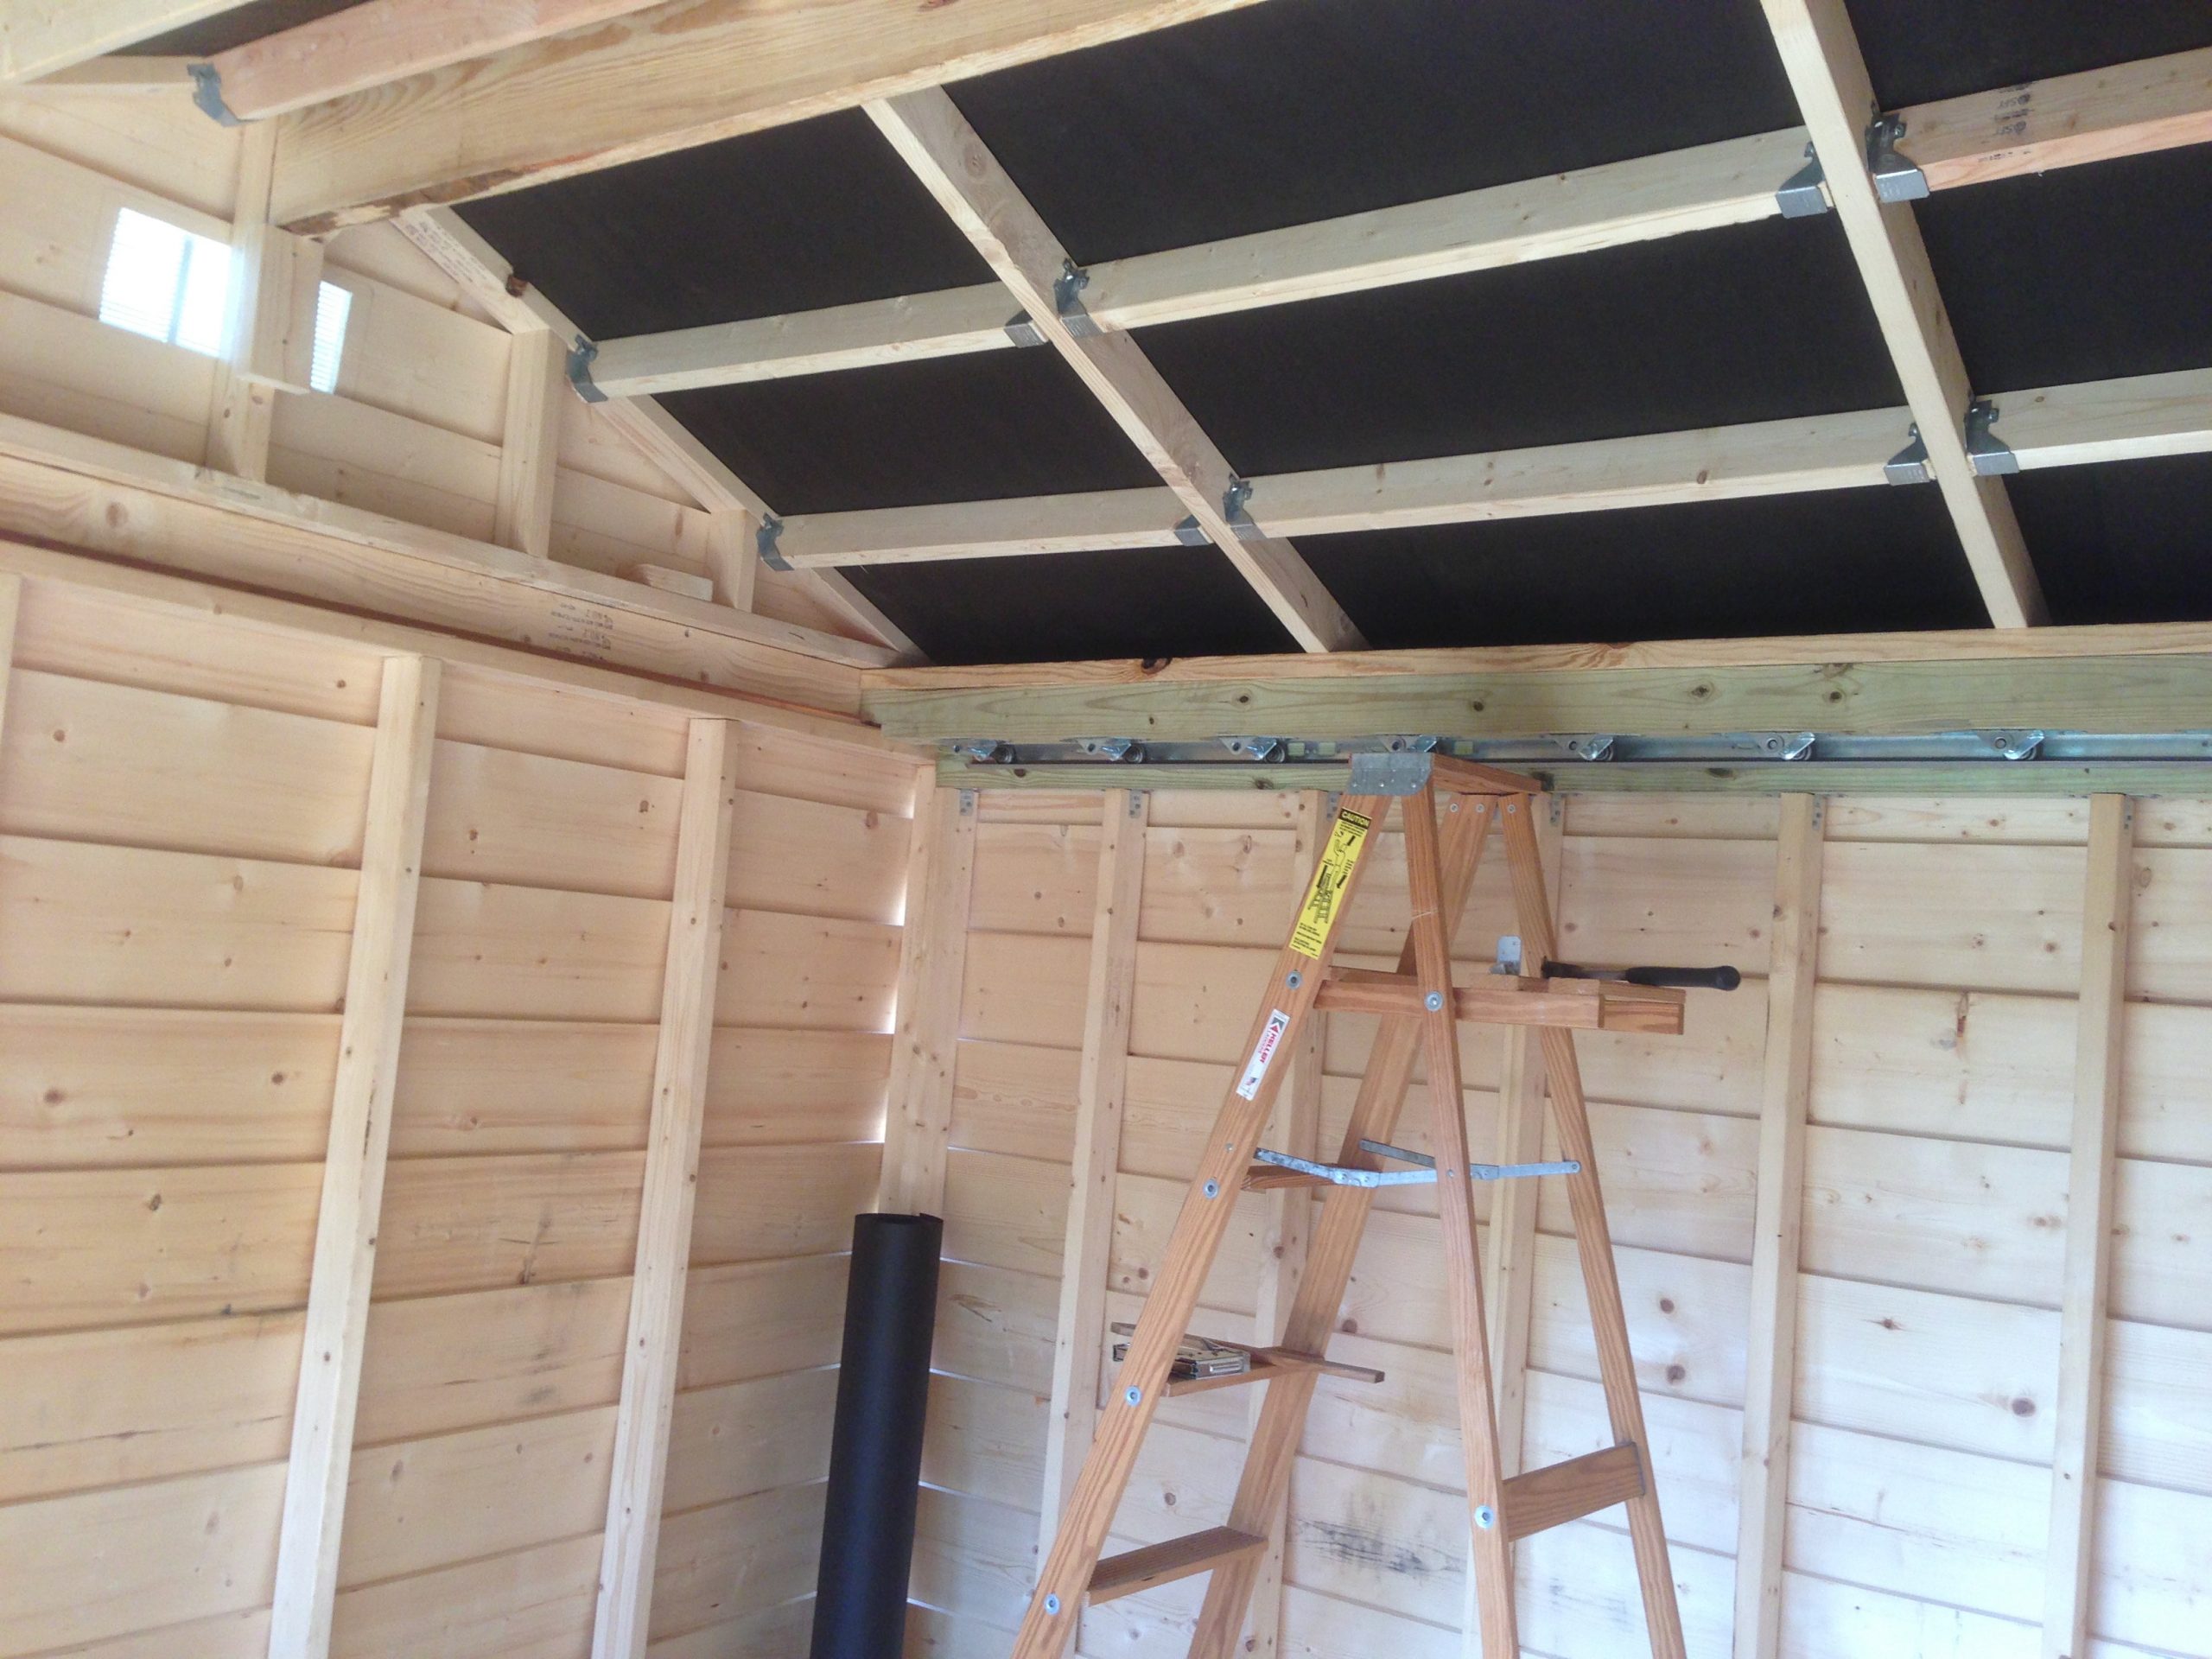
Interior view of the completed roof structure with the roof in the closed position. The black roofing paper was added beneath the metal as a moisture barrier to reduce condensation on the underside—something that seemed prudent given Georgia’s humidity. In practice, though, this step proved unnecessary for Mesa Vista Observatory, which was built without it and has never had an issue. The trusses, brackets, and cross bracing are all visible here, and the smooth alignment of the rollers within the inset garage door track is evident.
With the roof installed, the final exterior tasks could be completed—trim, windows, door, and stain. While straightforward compared to the earlier stages, these finishing touches made a huge difference in how the observatory both looked and functioned. The trim was added around each corner, the windows, and the doorway, helping seal gaps and lending the building a crisp, clean finish. That said, the overlapping board siding created some challenges at the corners. Even using 1×2 trim boards, there were small gaps that weren’t fully sealed, especially where the siding overlapped beneath. Insects found these openings quickly, so I reluctantly filled them with spray foam to keep things better sealed. It wasn’t ideal, but it worked—even if it didn’t look great from the inside.
For the windows, I opted not to follow the SkyShed design. Instead, I found pre-built units at Lowe’s that were not only a perfect fit but also operable, allowing them to be opened for ventilation—something that’s especially helpful in Georgia’s heat. They were also cheaper and easier than anything I could have custom-built.
The door was built according to the SkyShed plans. With only six feet of wall height, commercial options were limited, but the simple wood design was easy to assemble and resulted in a seamless look that matched the rest of the observatory. As for the siding, I stained the entire exterior instead of painting it. While many recommend lighter colors to help reduce heat buildup, I wanted the observatory to match the adjacent cabin and garage, so I chose the same roofing metal and stain colors used on those buildings. Despite the darker tones, I never had significant issues with heat. Georgia summers are brutal regardless of color choice, and any observatory here is going to require active environmental control if you’re observing year-round.
Windows installed, but trim still to come.
At this stage, the pre-fab windows from Lowe’s had been installed, fitting cleanly into the existing openings. The exterior was starting to resemble a finished structure, though the window and corner trim hadn’t been added yet. This was the first moment it felt more like an observatory and less like a shed frame.
Trim and door installation complete.
This stage brought everything together visually—window trim, corner trim, and the custom-built door are all in place. The trim helps seal the building and adds a finished look, though the overlapping siding meant the 1×2 corner trim didn’t provide a perfect seal. I reluctantly used spray foam in the gaps to keep bugs out. The door, built to SkyShed specifications, blends well with the siding and was a much better fit than any off-the-shelf option given the structure’s modest height.
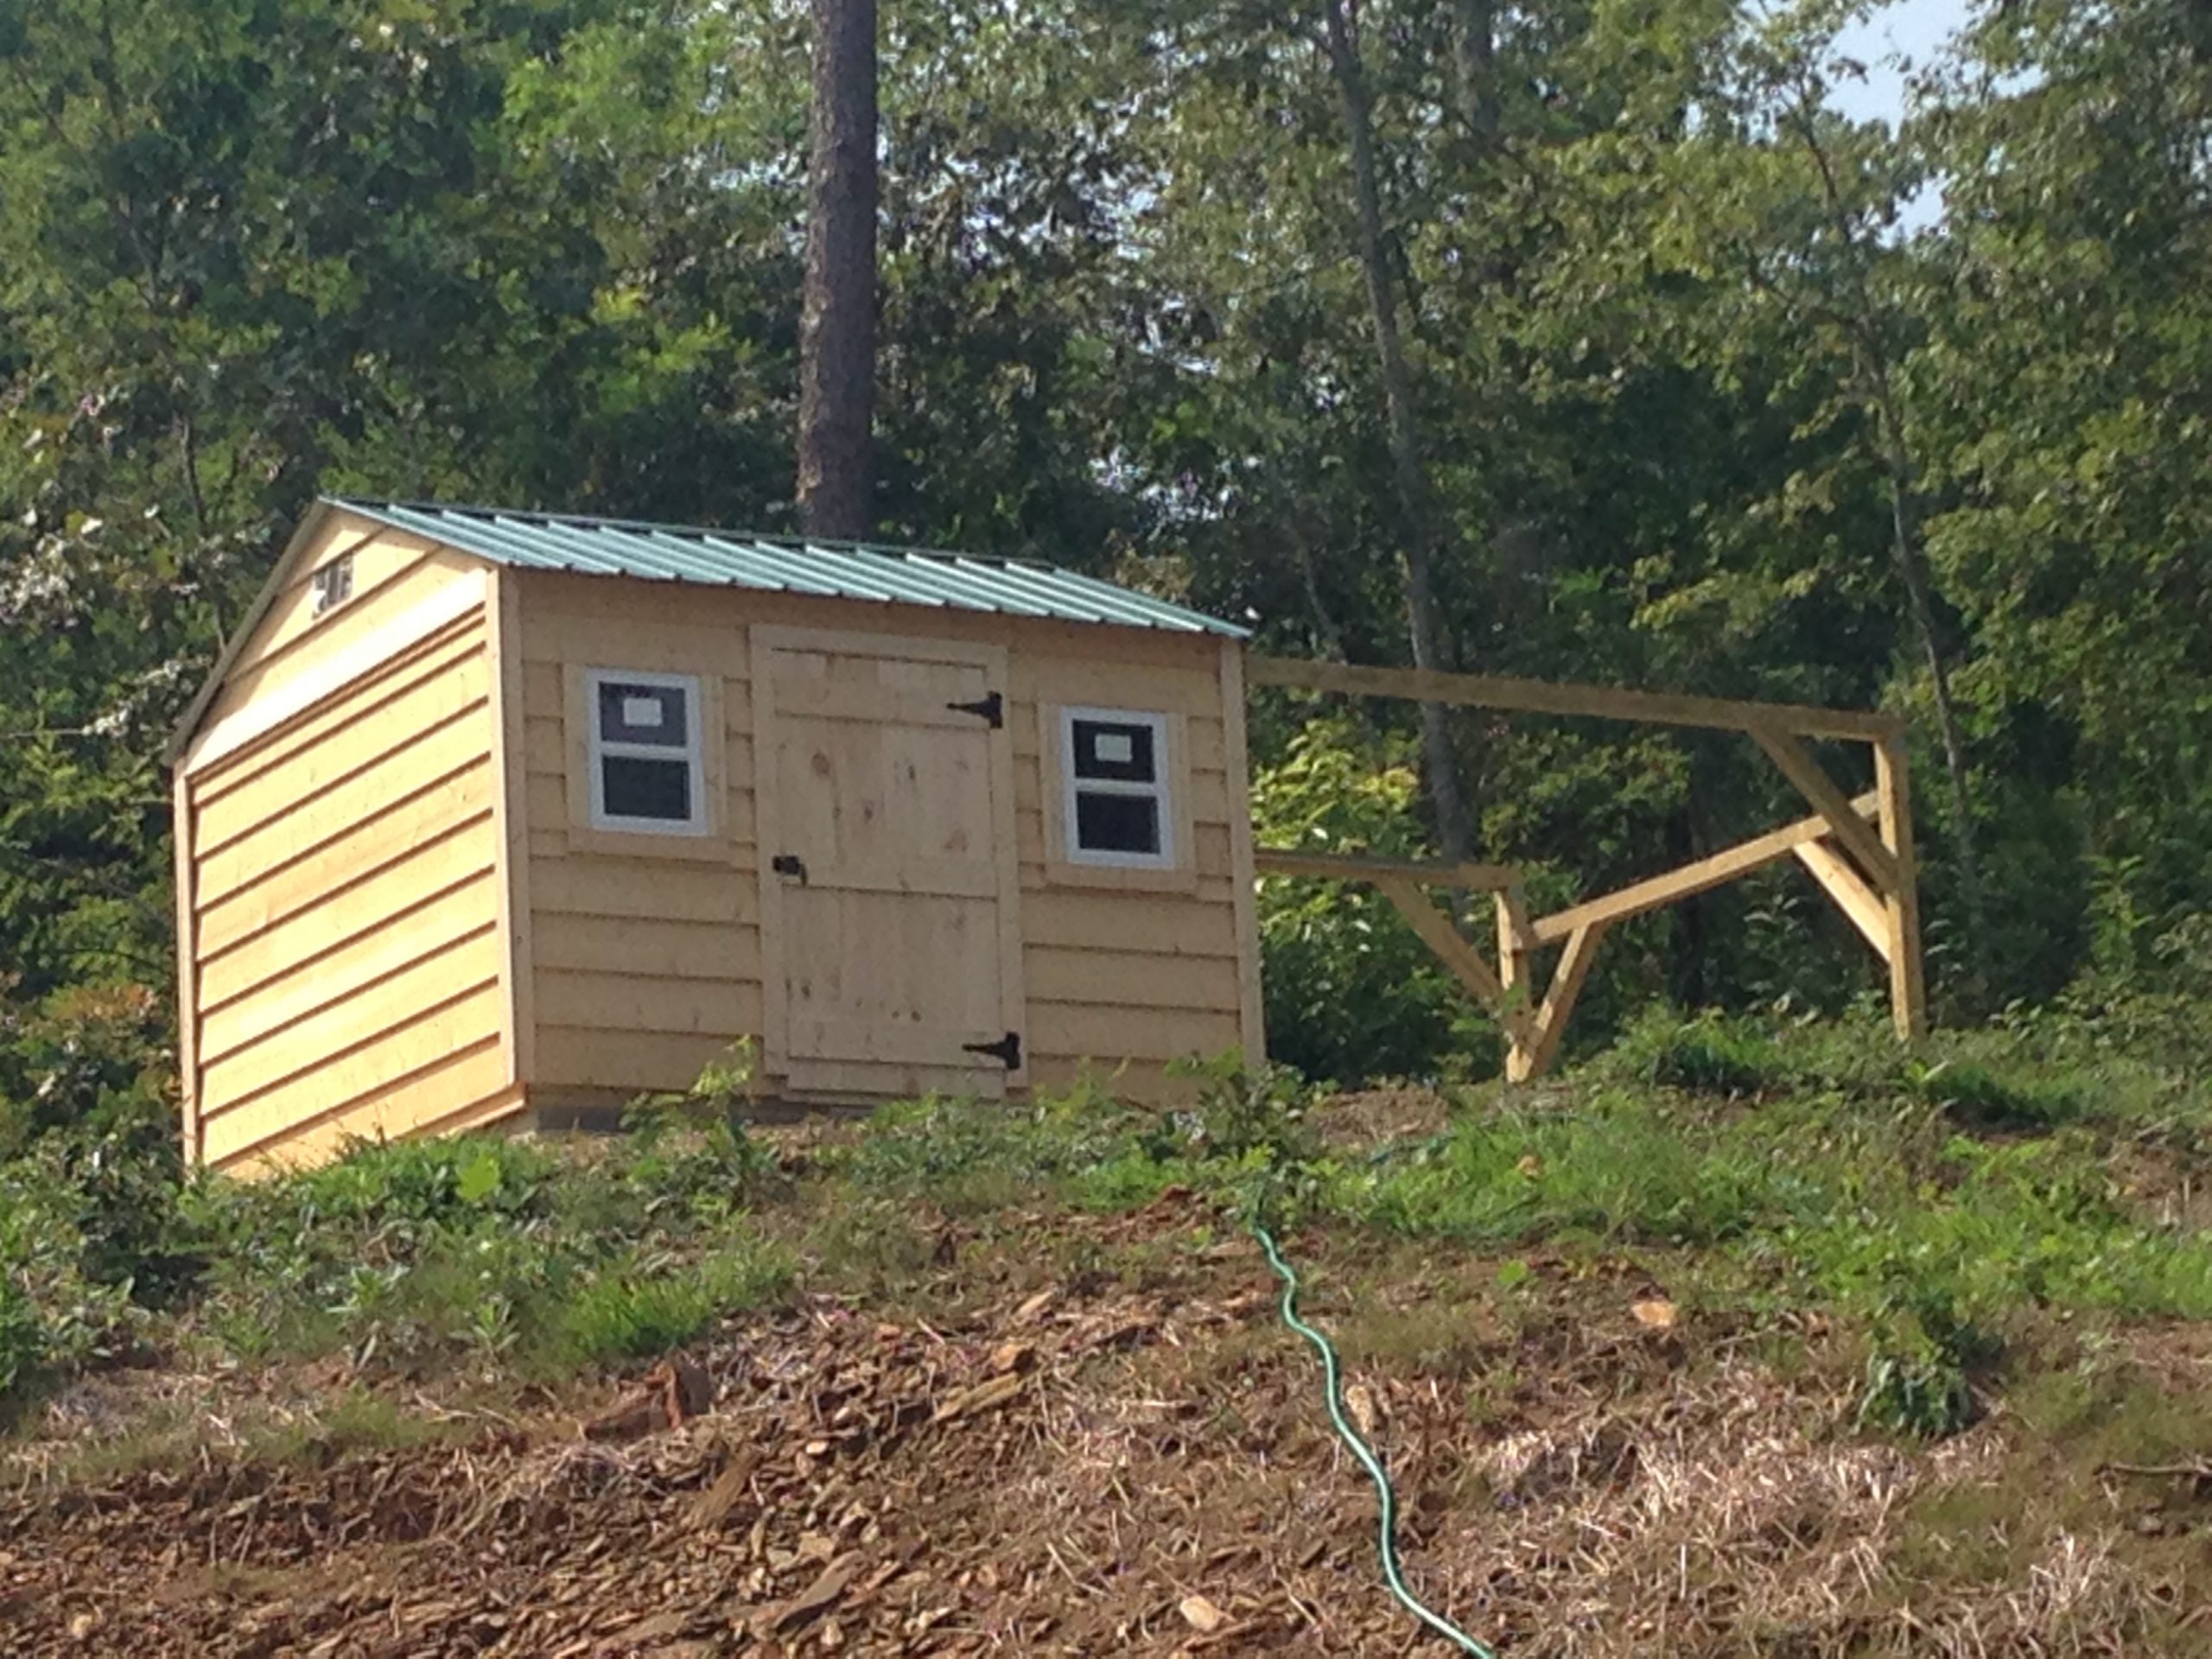
Final exterior finishing complete.
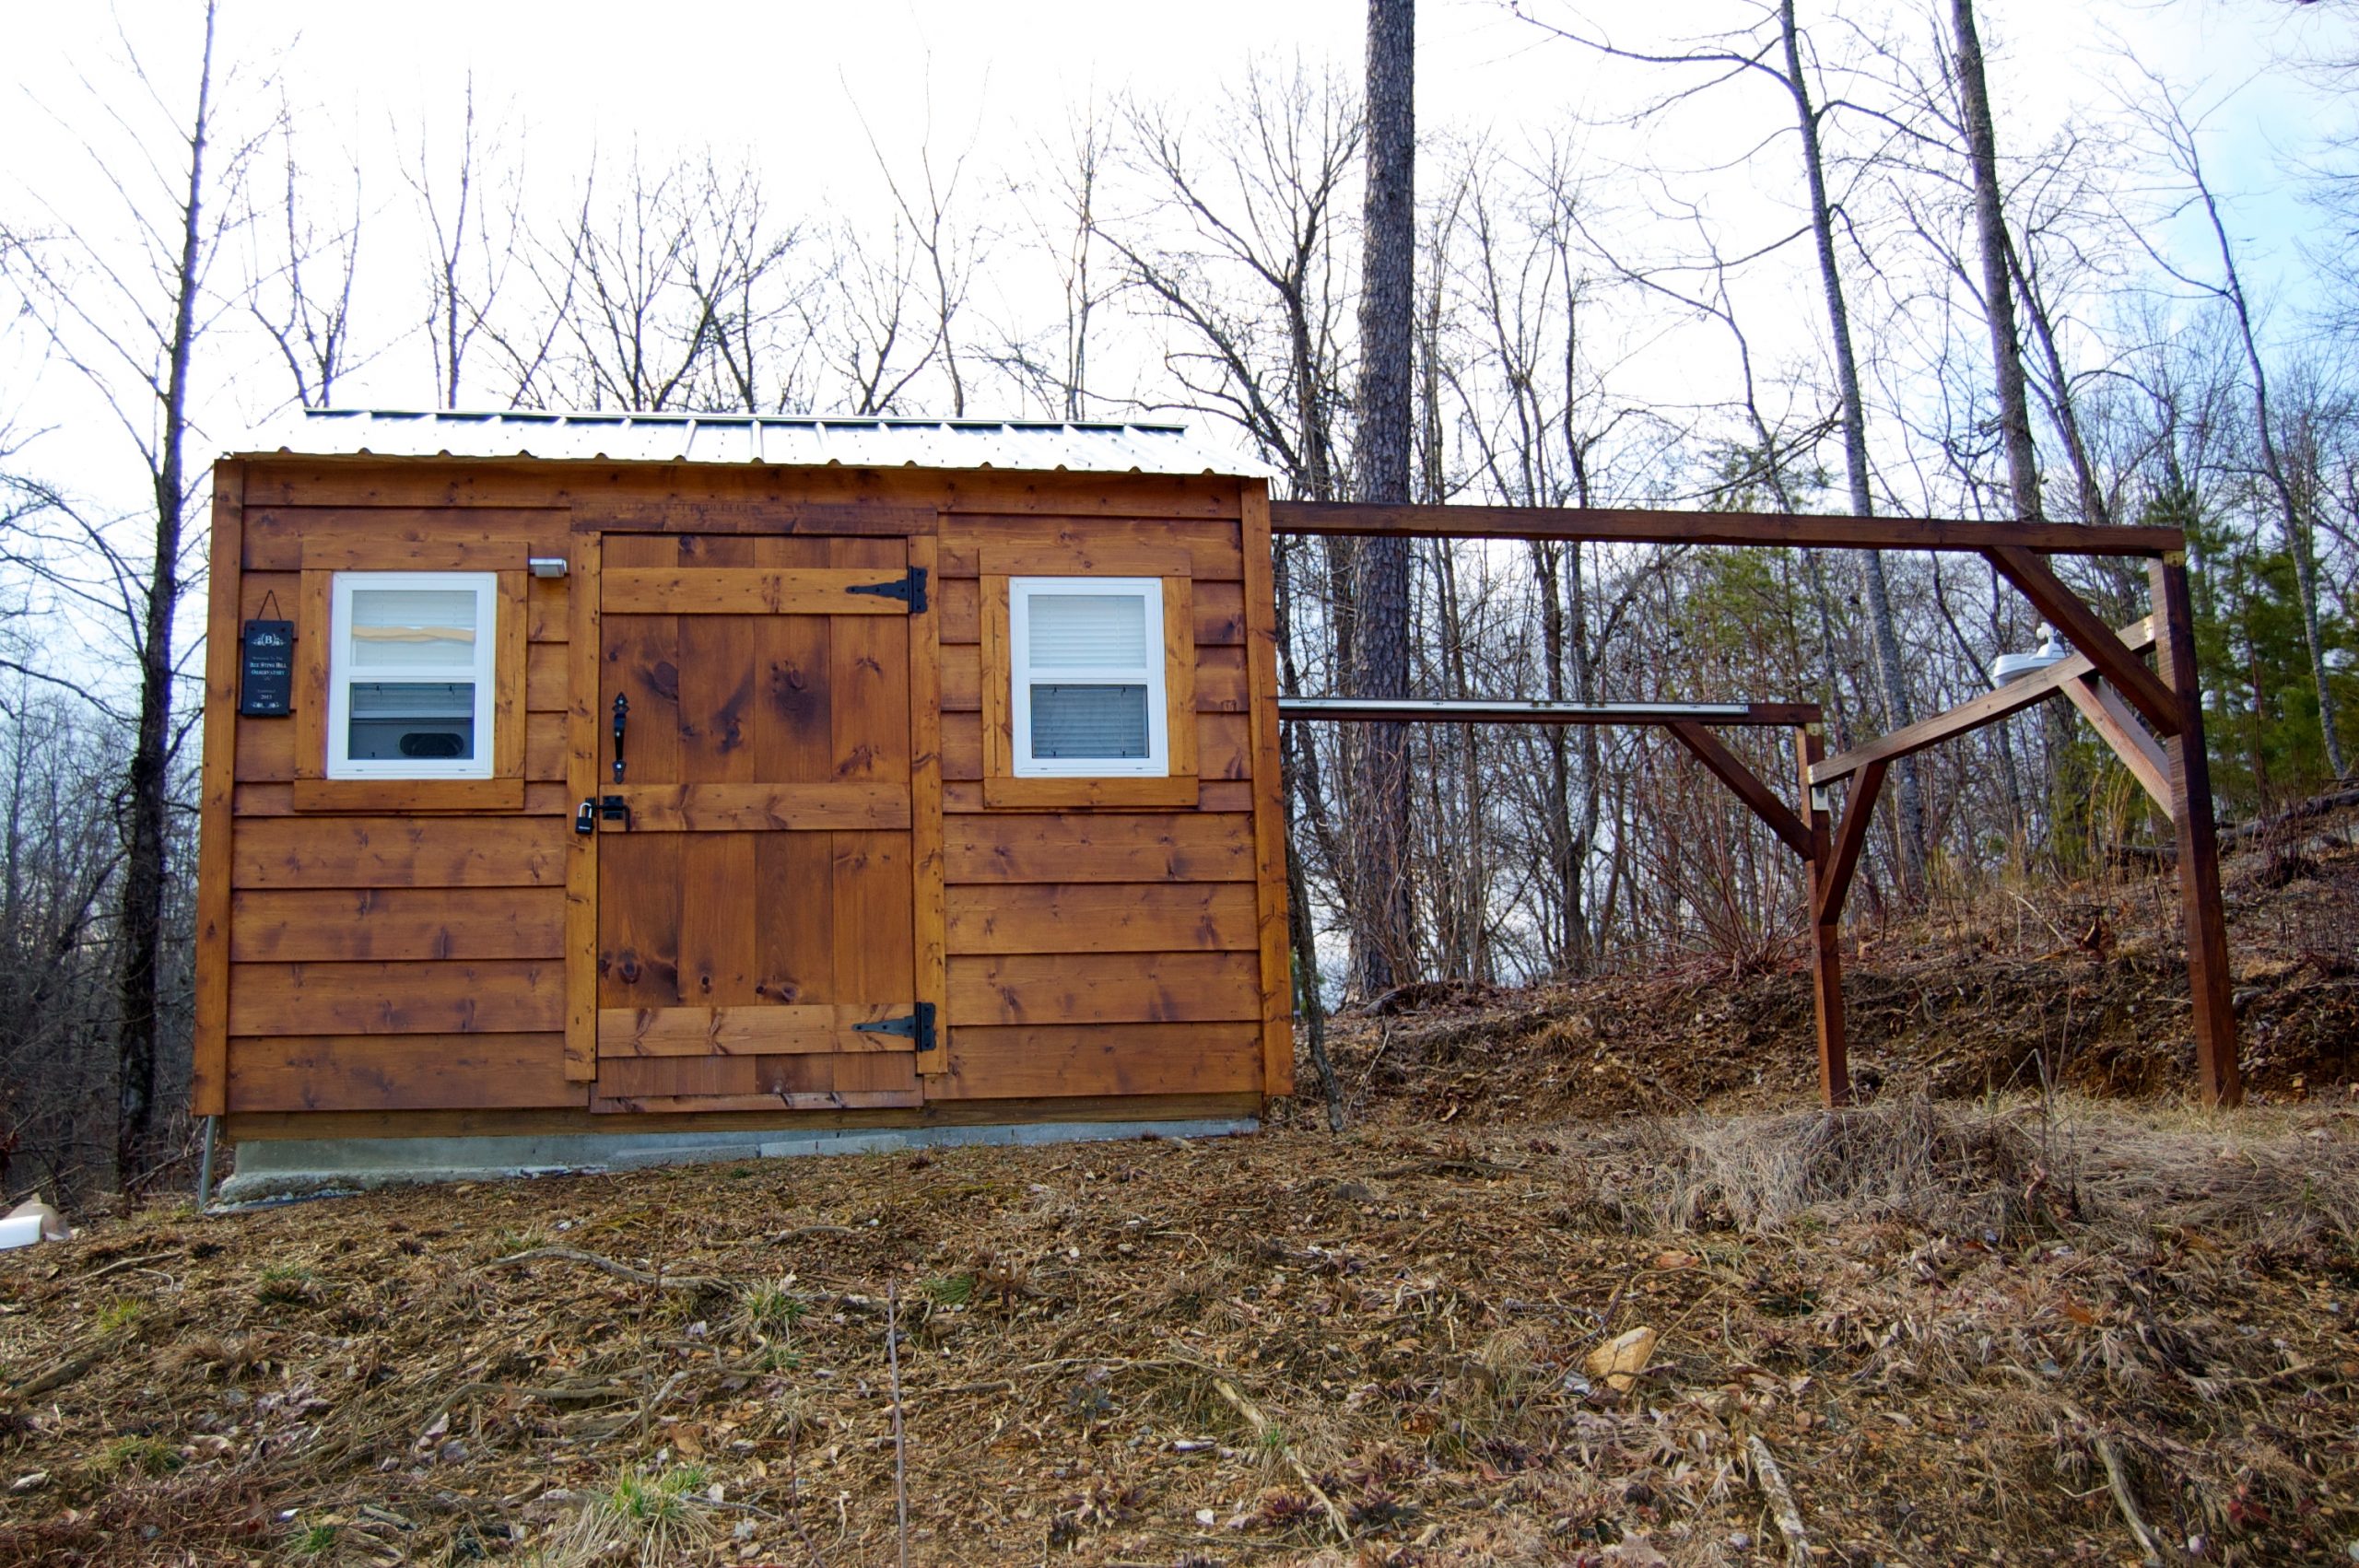
With the stain applied, the observatory now blends naturally with the nearby cabin and garage, both in tone and material. The darker color may not be optimal for temperature control, but it was the right choice aesthetically—and in the Georgia climate, some form of active cooling is necessary no matter what color scheme you choose. This photo captures the completed look: stained siding, trimmed windows and doors, and the roll-off structure fully built and finished to match.
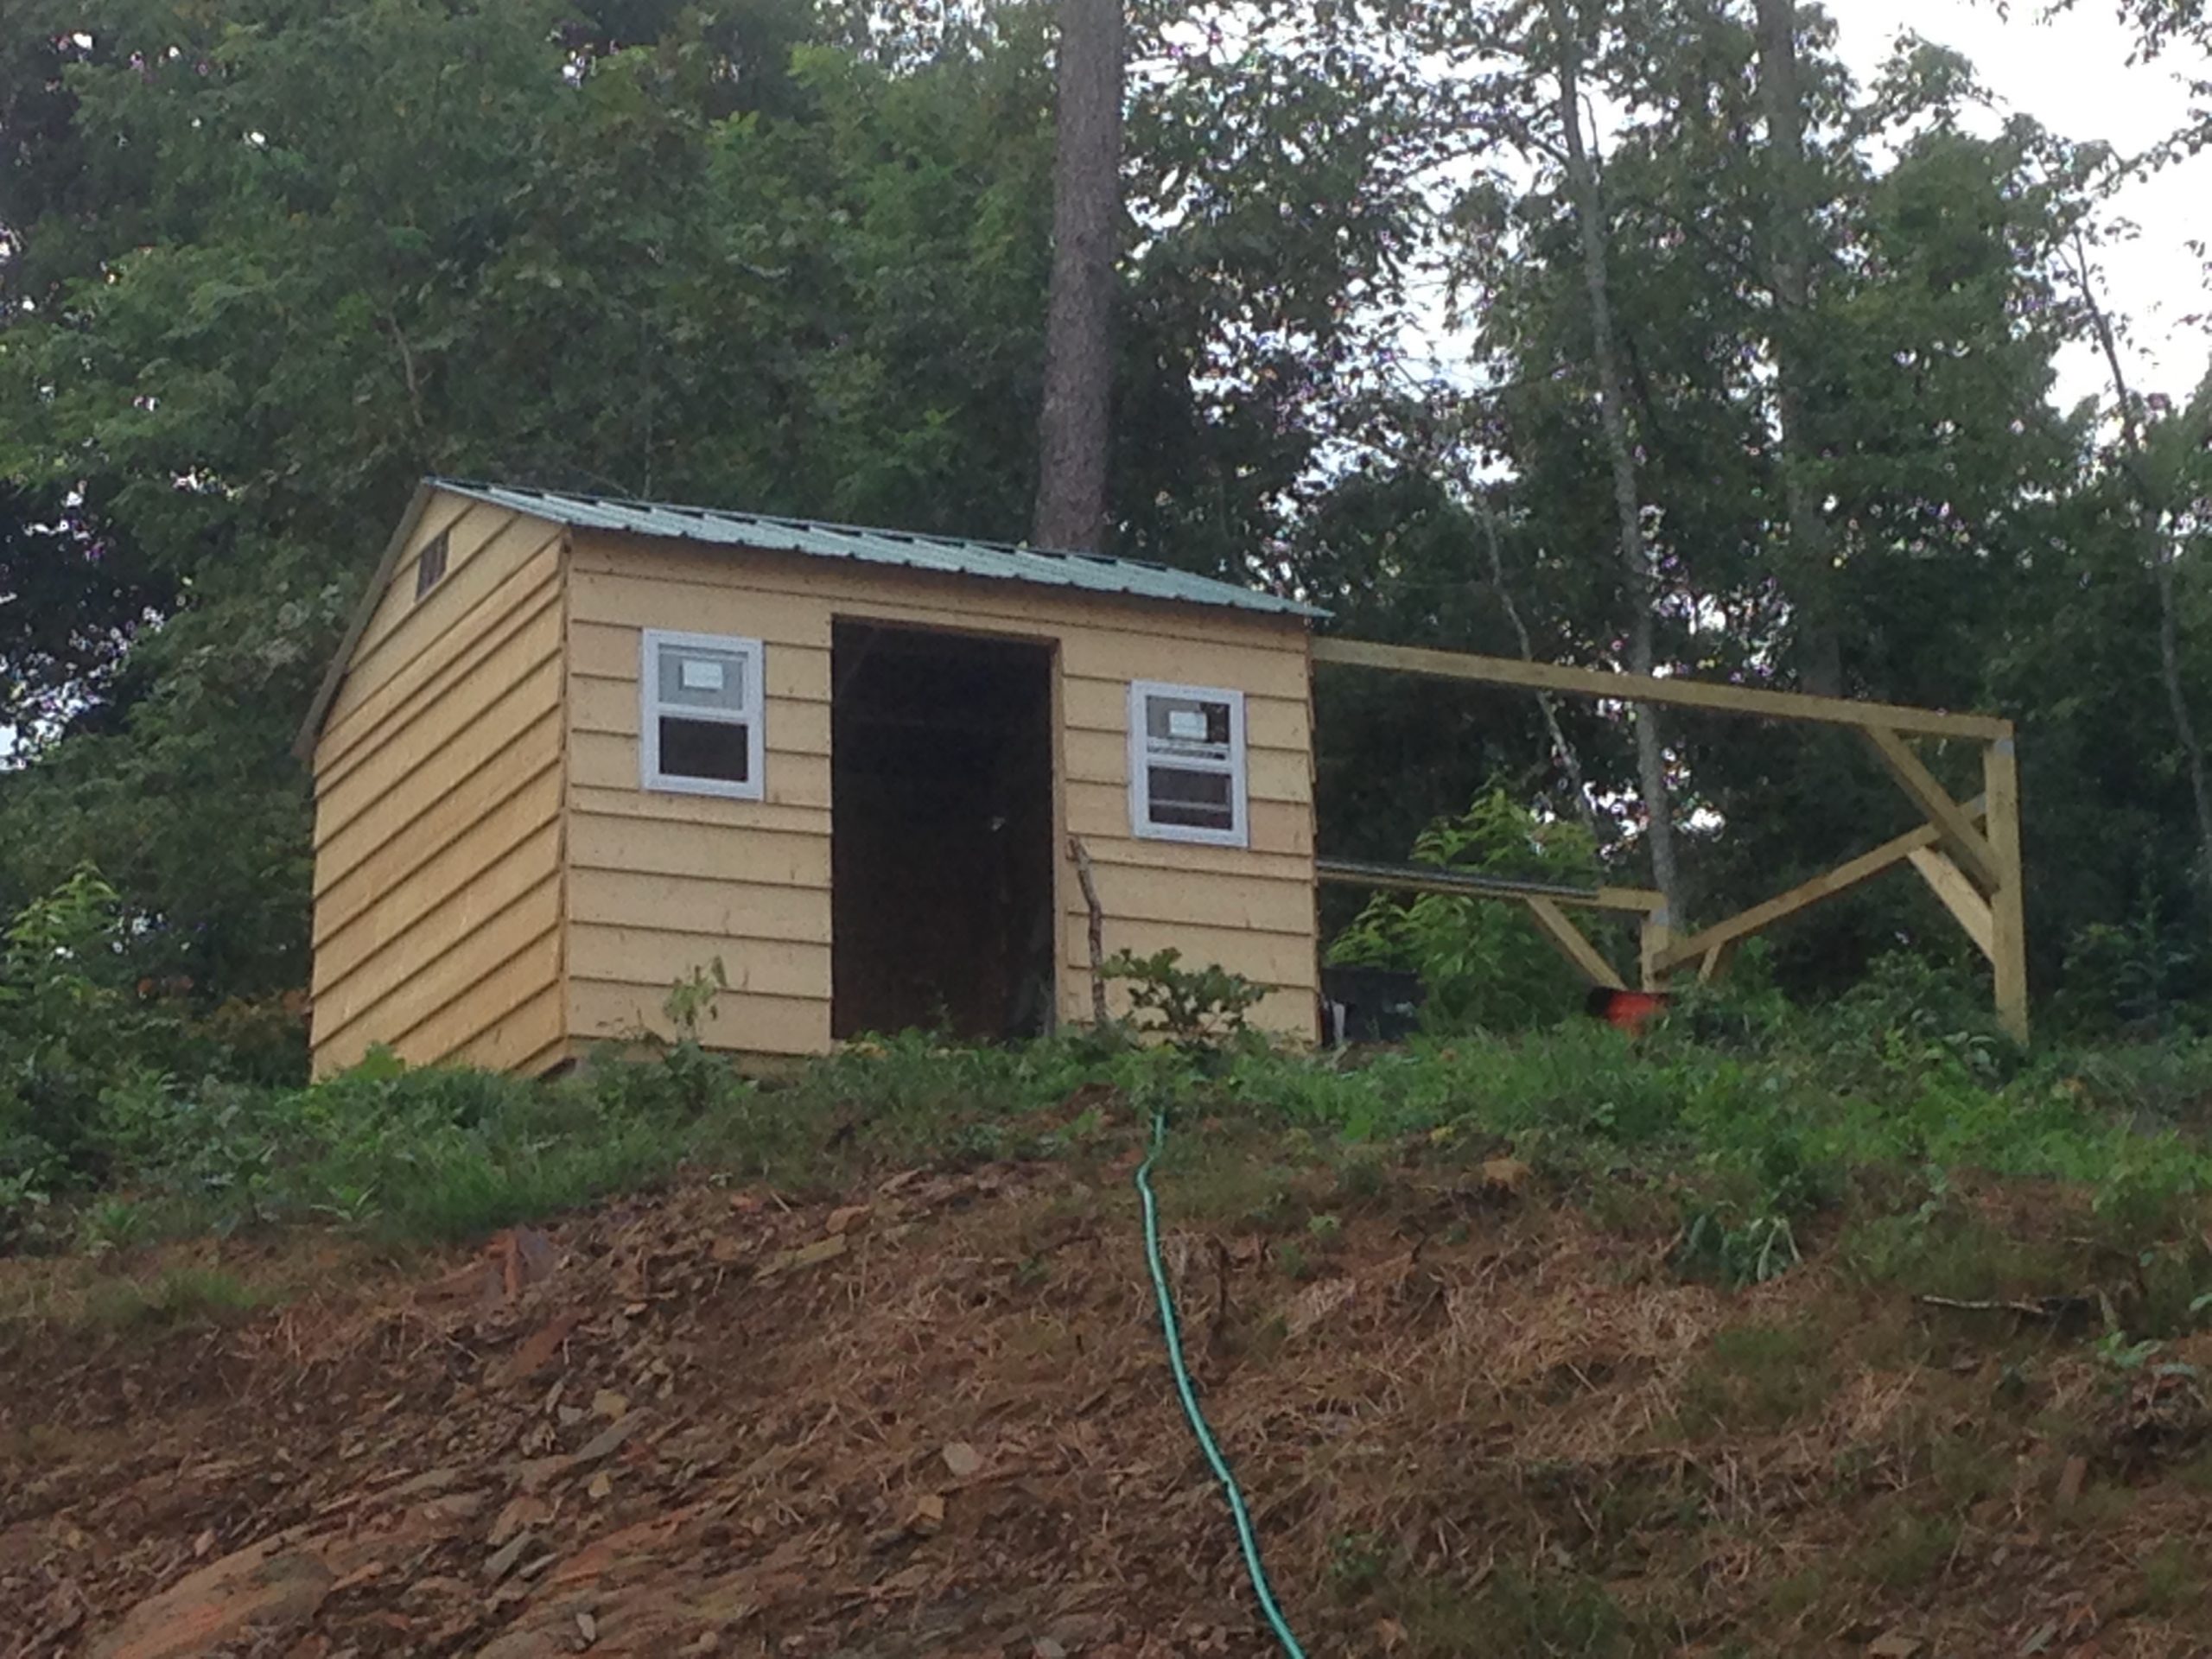
The finished observatory from the front and north side shows how well the building settled into the landscape. The trim is fully installed, the siding and roof have been stained to match nearby structures. The roll-off rails are also stained to match, tying everything together. A simple stone path leads to the entrance, rounding out the observatory’s transformation from a raw frame to a fully finished, cohesive structure.
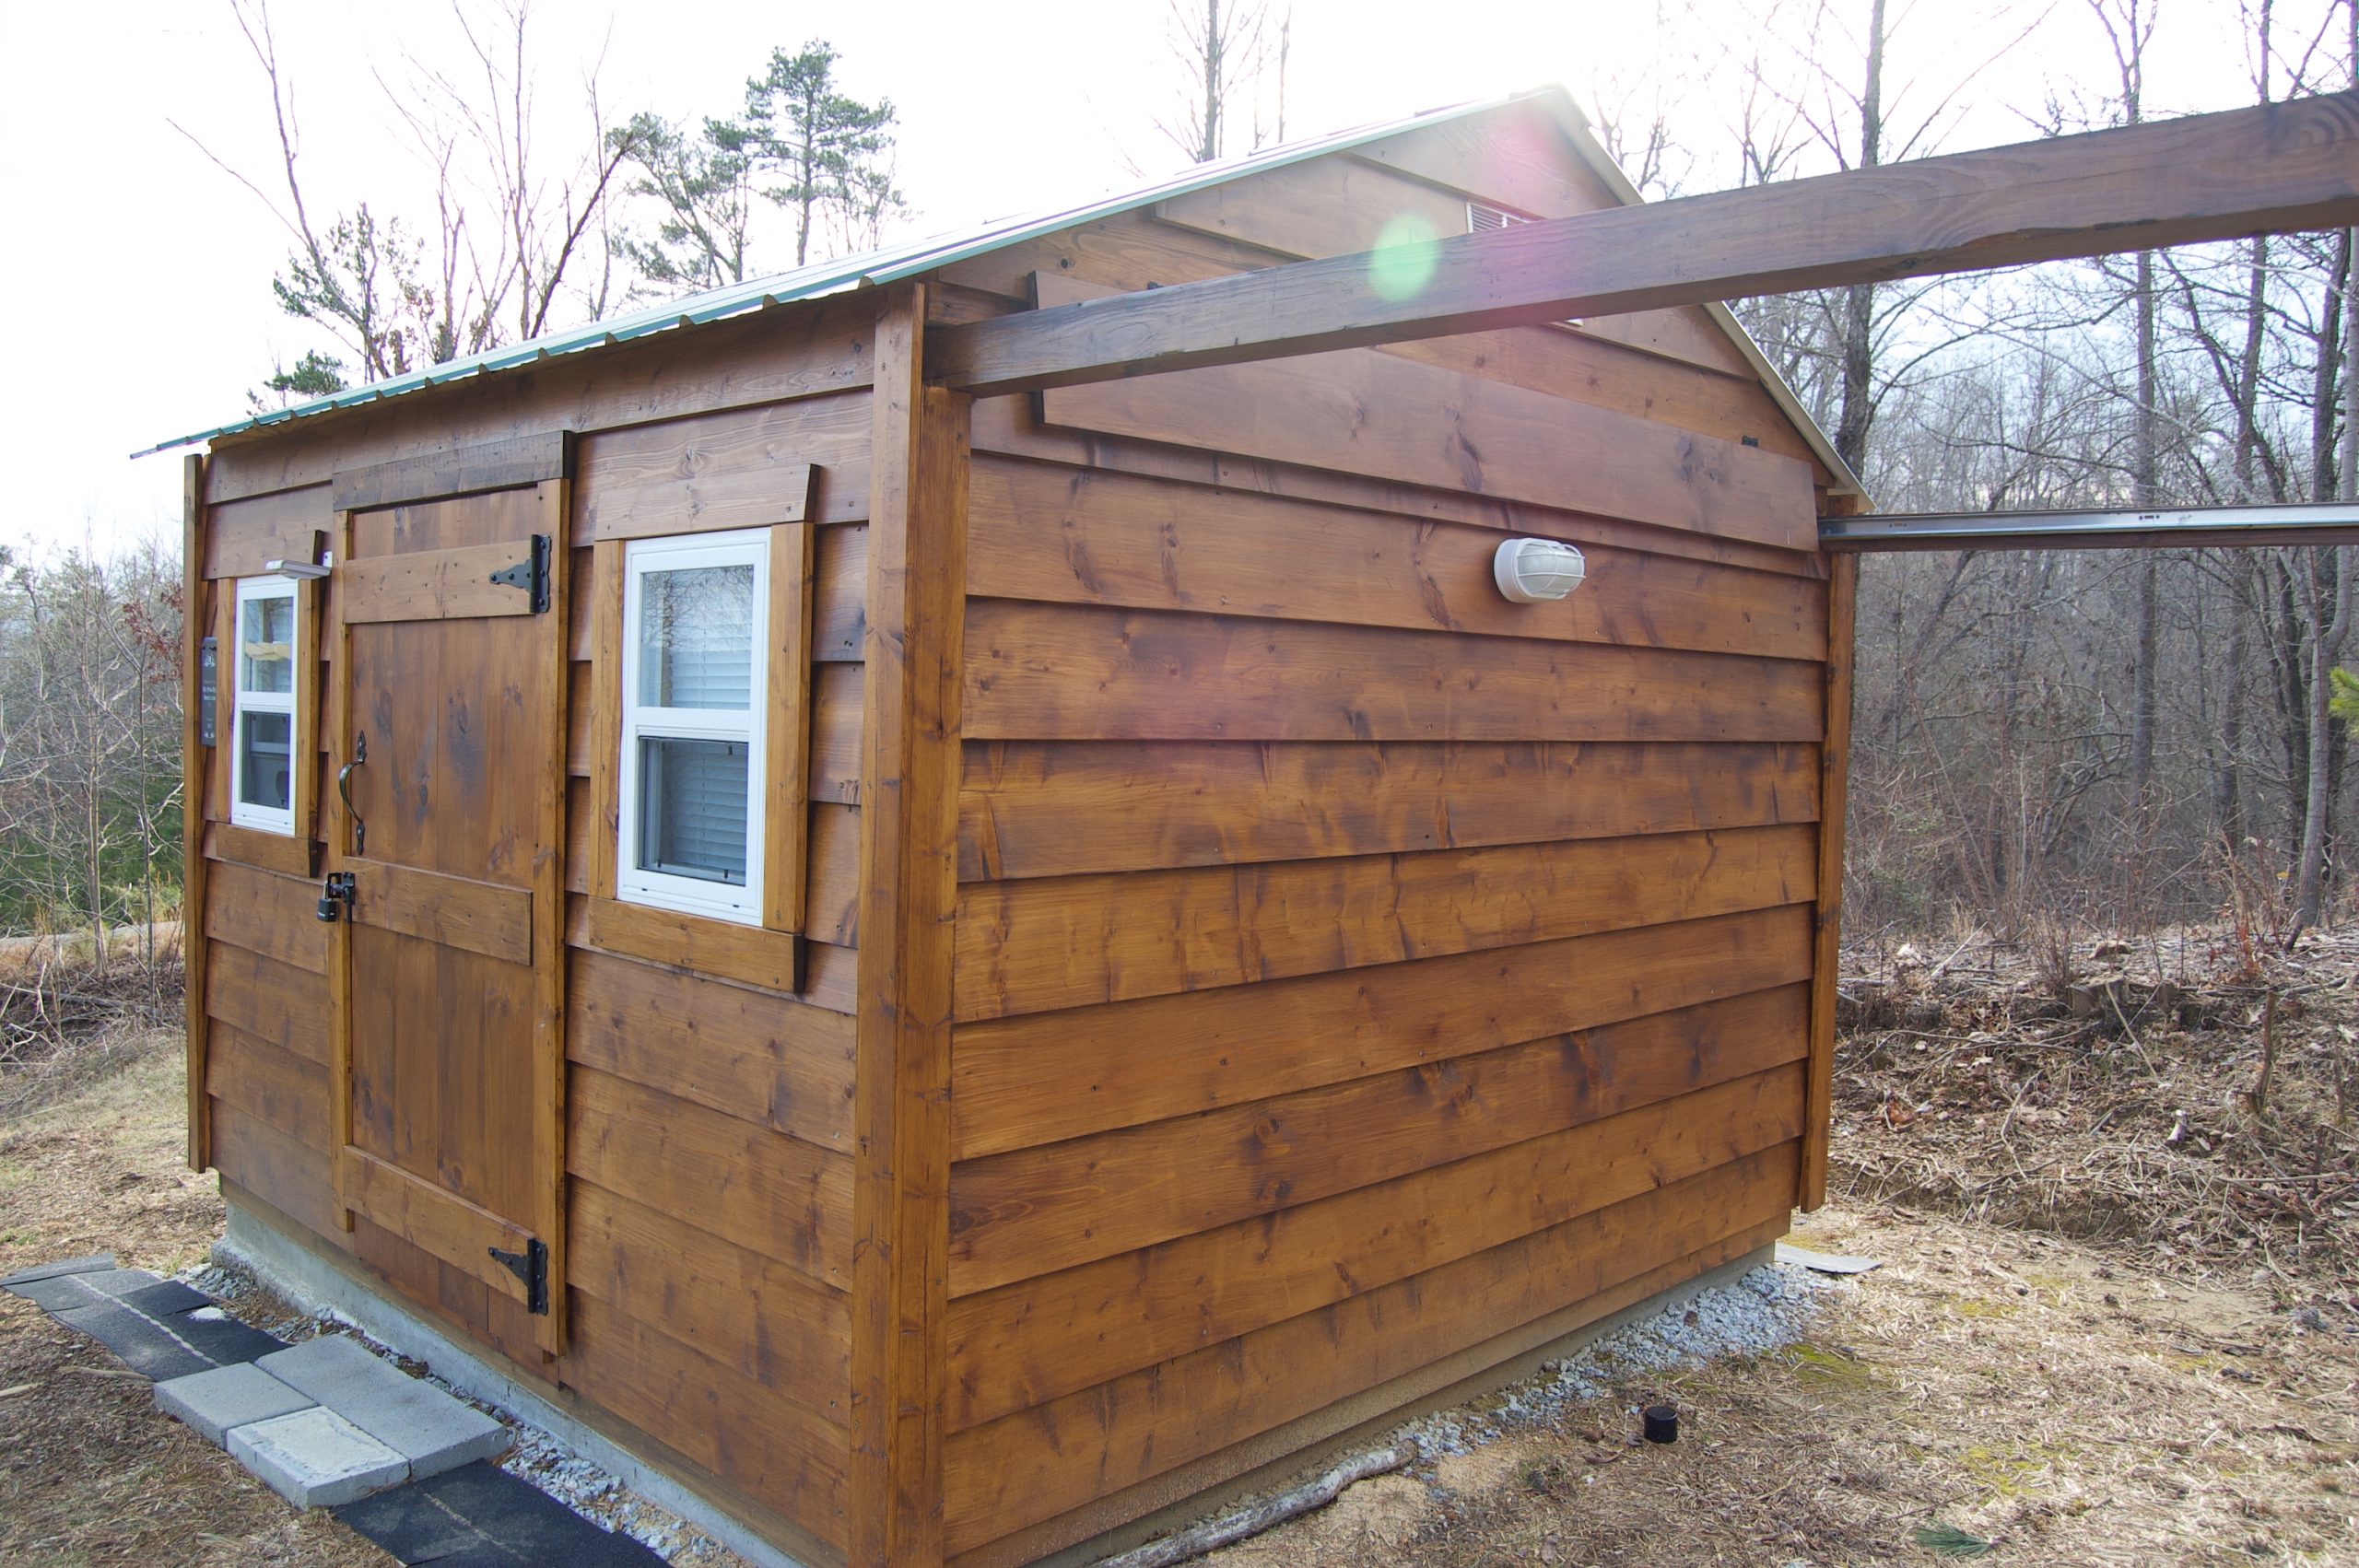
The north side and east wall show off the completed stain work and trim from another angle, with the observatory’s color now matching the surrounding structures. The clean edge detail along the trim and siding helps emphasize how well the building is sealed up visually—though spray foam was later added in the corner seams for better protection from insects. The landscaping around the foundation is also taking shape here, with gravel in place to aid with drainage. I would eventually outline the entire structure with gravel.
The south and east walls shown here highlight the crisp, finished look of the stained siding and trim. You can also see how the corner trim ties the sides together visually, even if it didn’t fully seal the gaps on its own due to the overlapping siding. Spray foam was later added discreetly in those seams to help keep bugs out. The photo also gives a good view of the pier-mounted power conduit entering the observatory—something we’ll explore more in the next section.
With the structure completed, the final step was to make the observatory functional—installing electrical, setting up the telescope, building a small accessory shelf, and carving out a modest workspace. I didn’t finish the interior walls, so the studs and wiring remain fully exposed. It’s not especially pretty, but it’s practical and works just fine. I also laid down a piece of outdoor carpet for comfort and insulation, further proof that using OSB for the floor would have worked just as well as the pricier tongue-and-groove pine I chose.
The electrical system was straightforward thanks to some advance planning. When I had my garage built, I had extra circuits installed with the intention of eventually building this observatory. I ran the power underground in conduit from the garage to the observatory, following code requirements. Inside, I wired six GFCI outlets and installed two lights—one on the interior and another on the exterior wall beside the roll-off track. The system delivers more than enough power for all my needs, including running multiple computers, telescope accessories, and a combined A/C and fan unit that helps cool the space before observing sessions.
With the telescope mounted and my small desk in place, the observatory was finally operational. It’s a snug fit, but efficient and cozy. At first, I imagined it would be ideal to observe directly under the night sky, but the reality of Georgia’s relentless insect population quickly changed my mind. That experience ultimately influenced the design of Mesa Vista Observatory, where I knew I wanted to include a separate warm room—something this earlier build didn’t have, but very much needed.
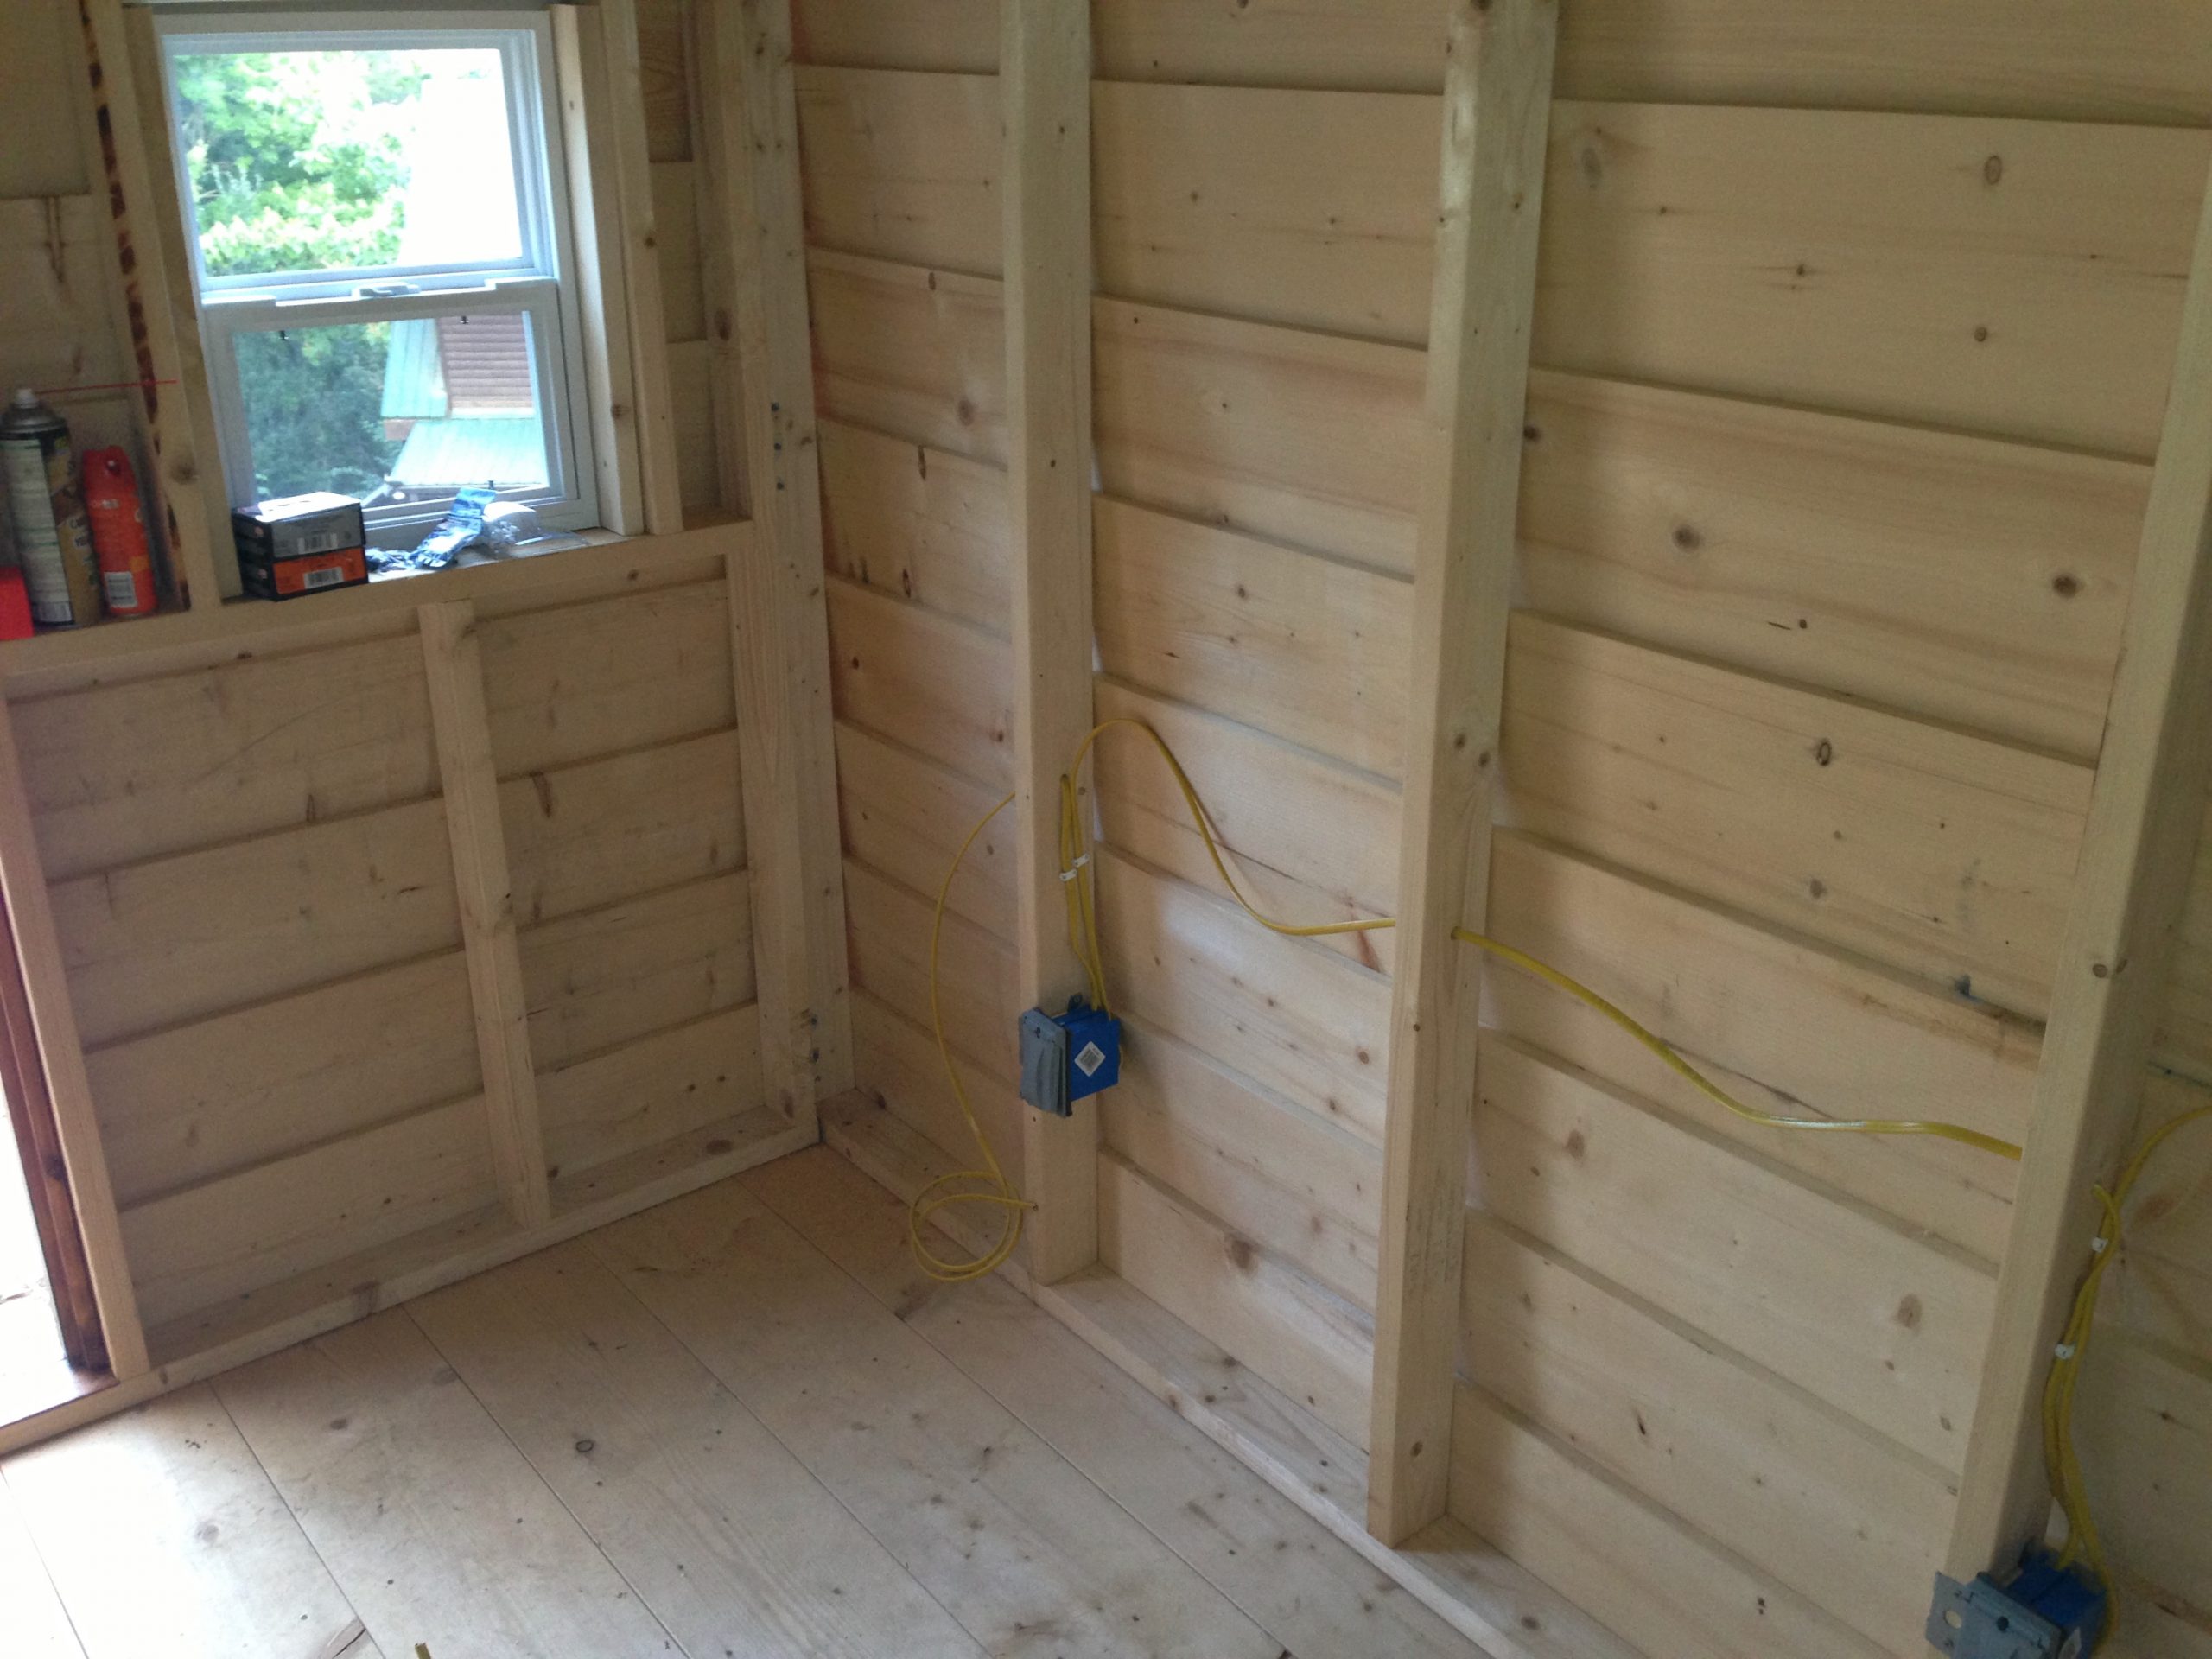
Initial electrical work in progress. A couple of blue outlet boxes are mounted and the Romex wiring is loosely routed through the wall studs. Nothing fancy, and definitely not my cleanest install, but it got the job done—and once everything was in place, it handled all the observatory’s power needs without issue.
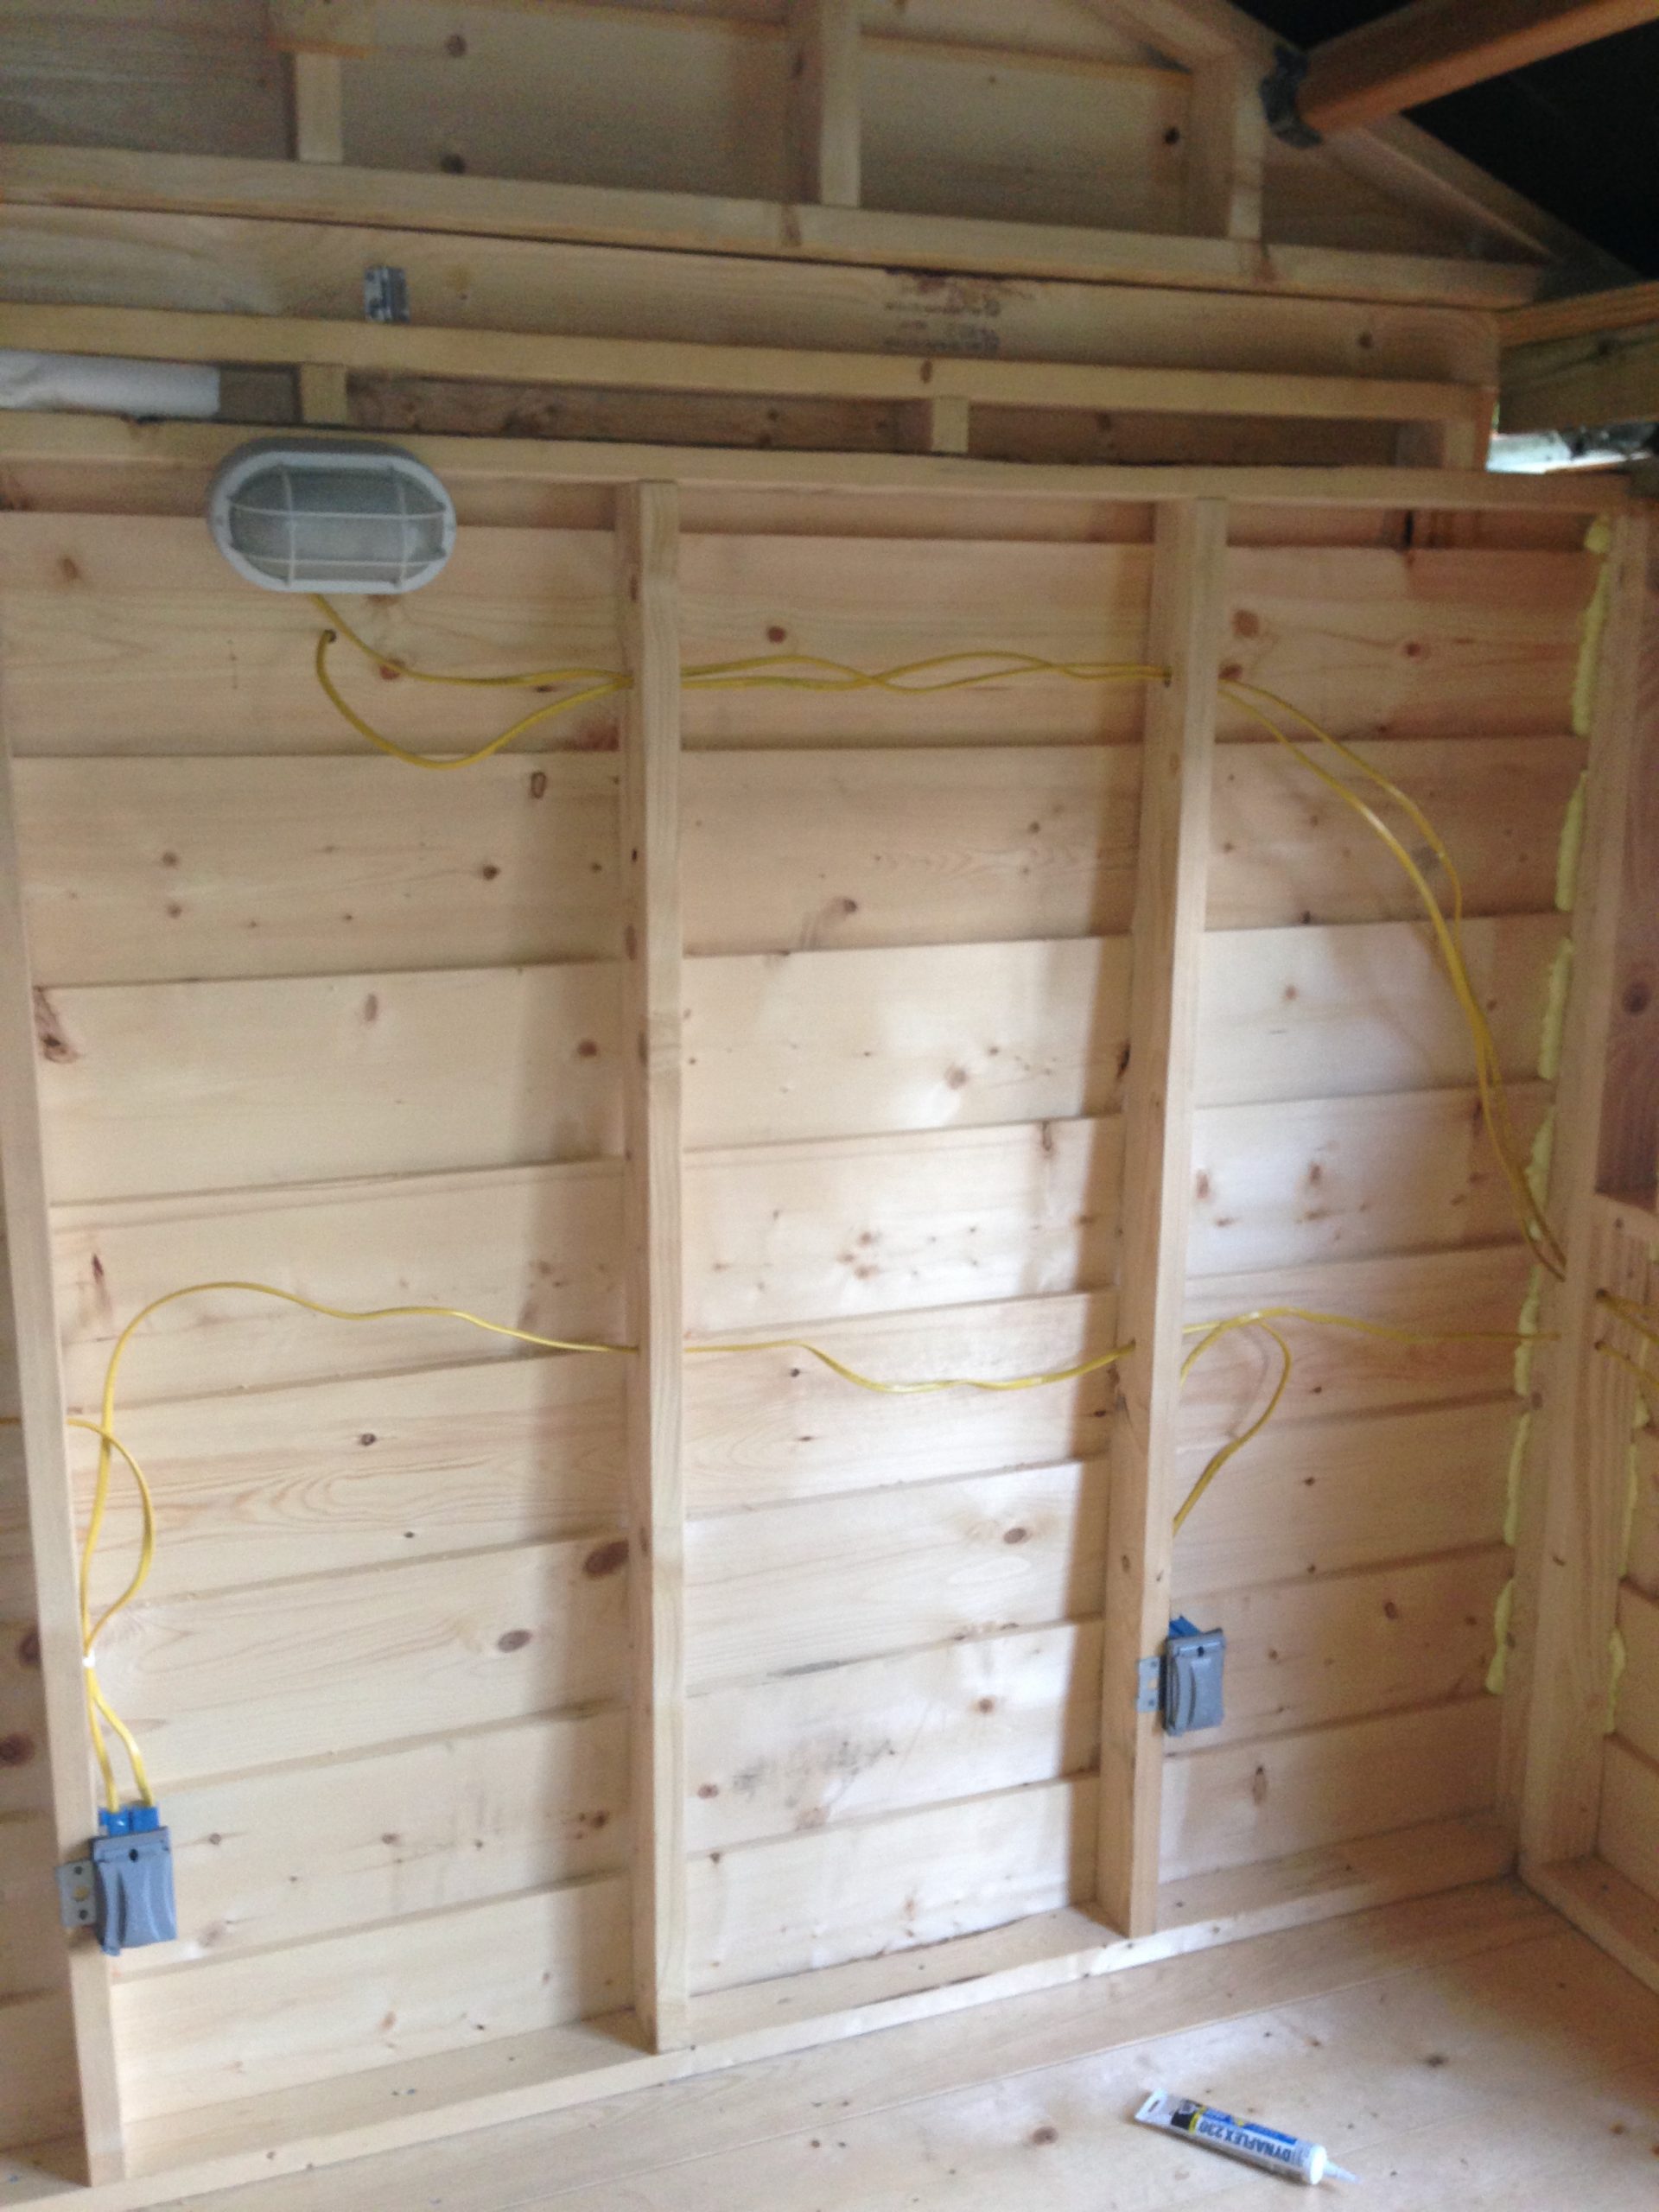
More wiring progress shown here, with additional GFCI outlets in place and the single interior light fixture mounted up high. I kept the wiring surface-mounted and exposed since I didn’t finish the walls. It’s not the prettiest solution, but it was simple and functional—plenty of power for the equipment, and just enough light when setting up before dark.
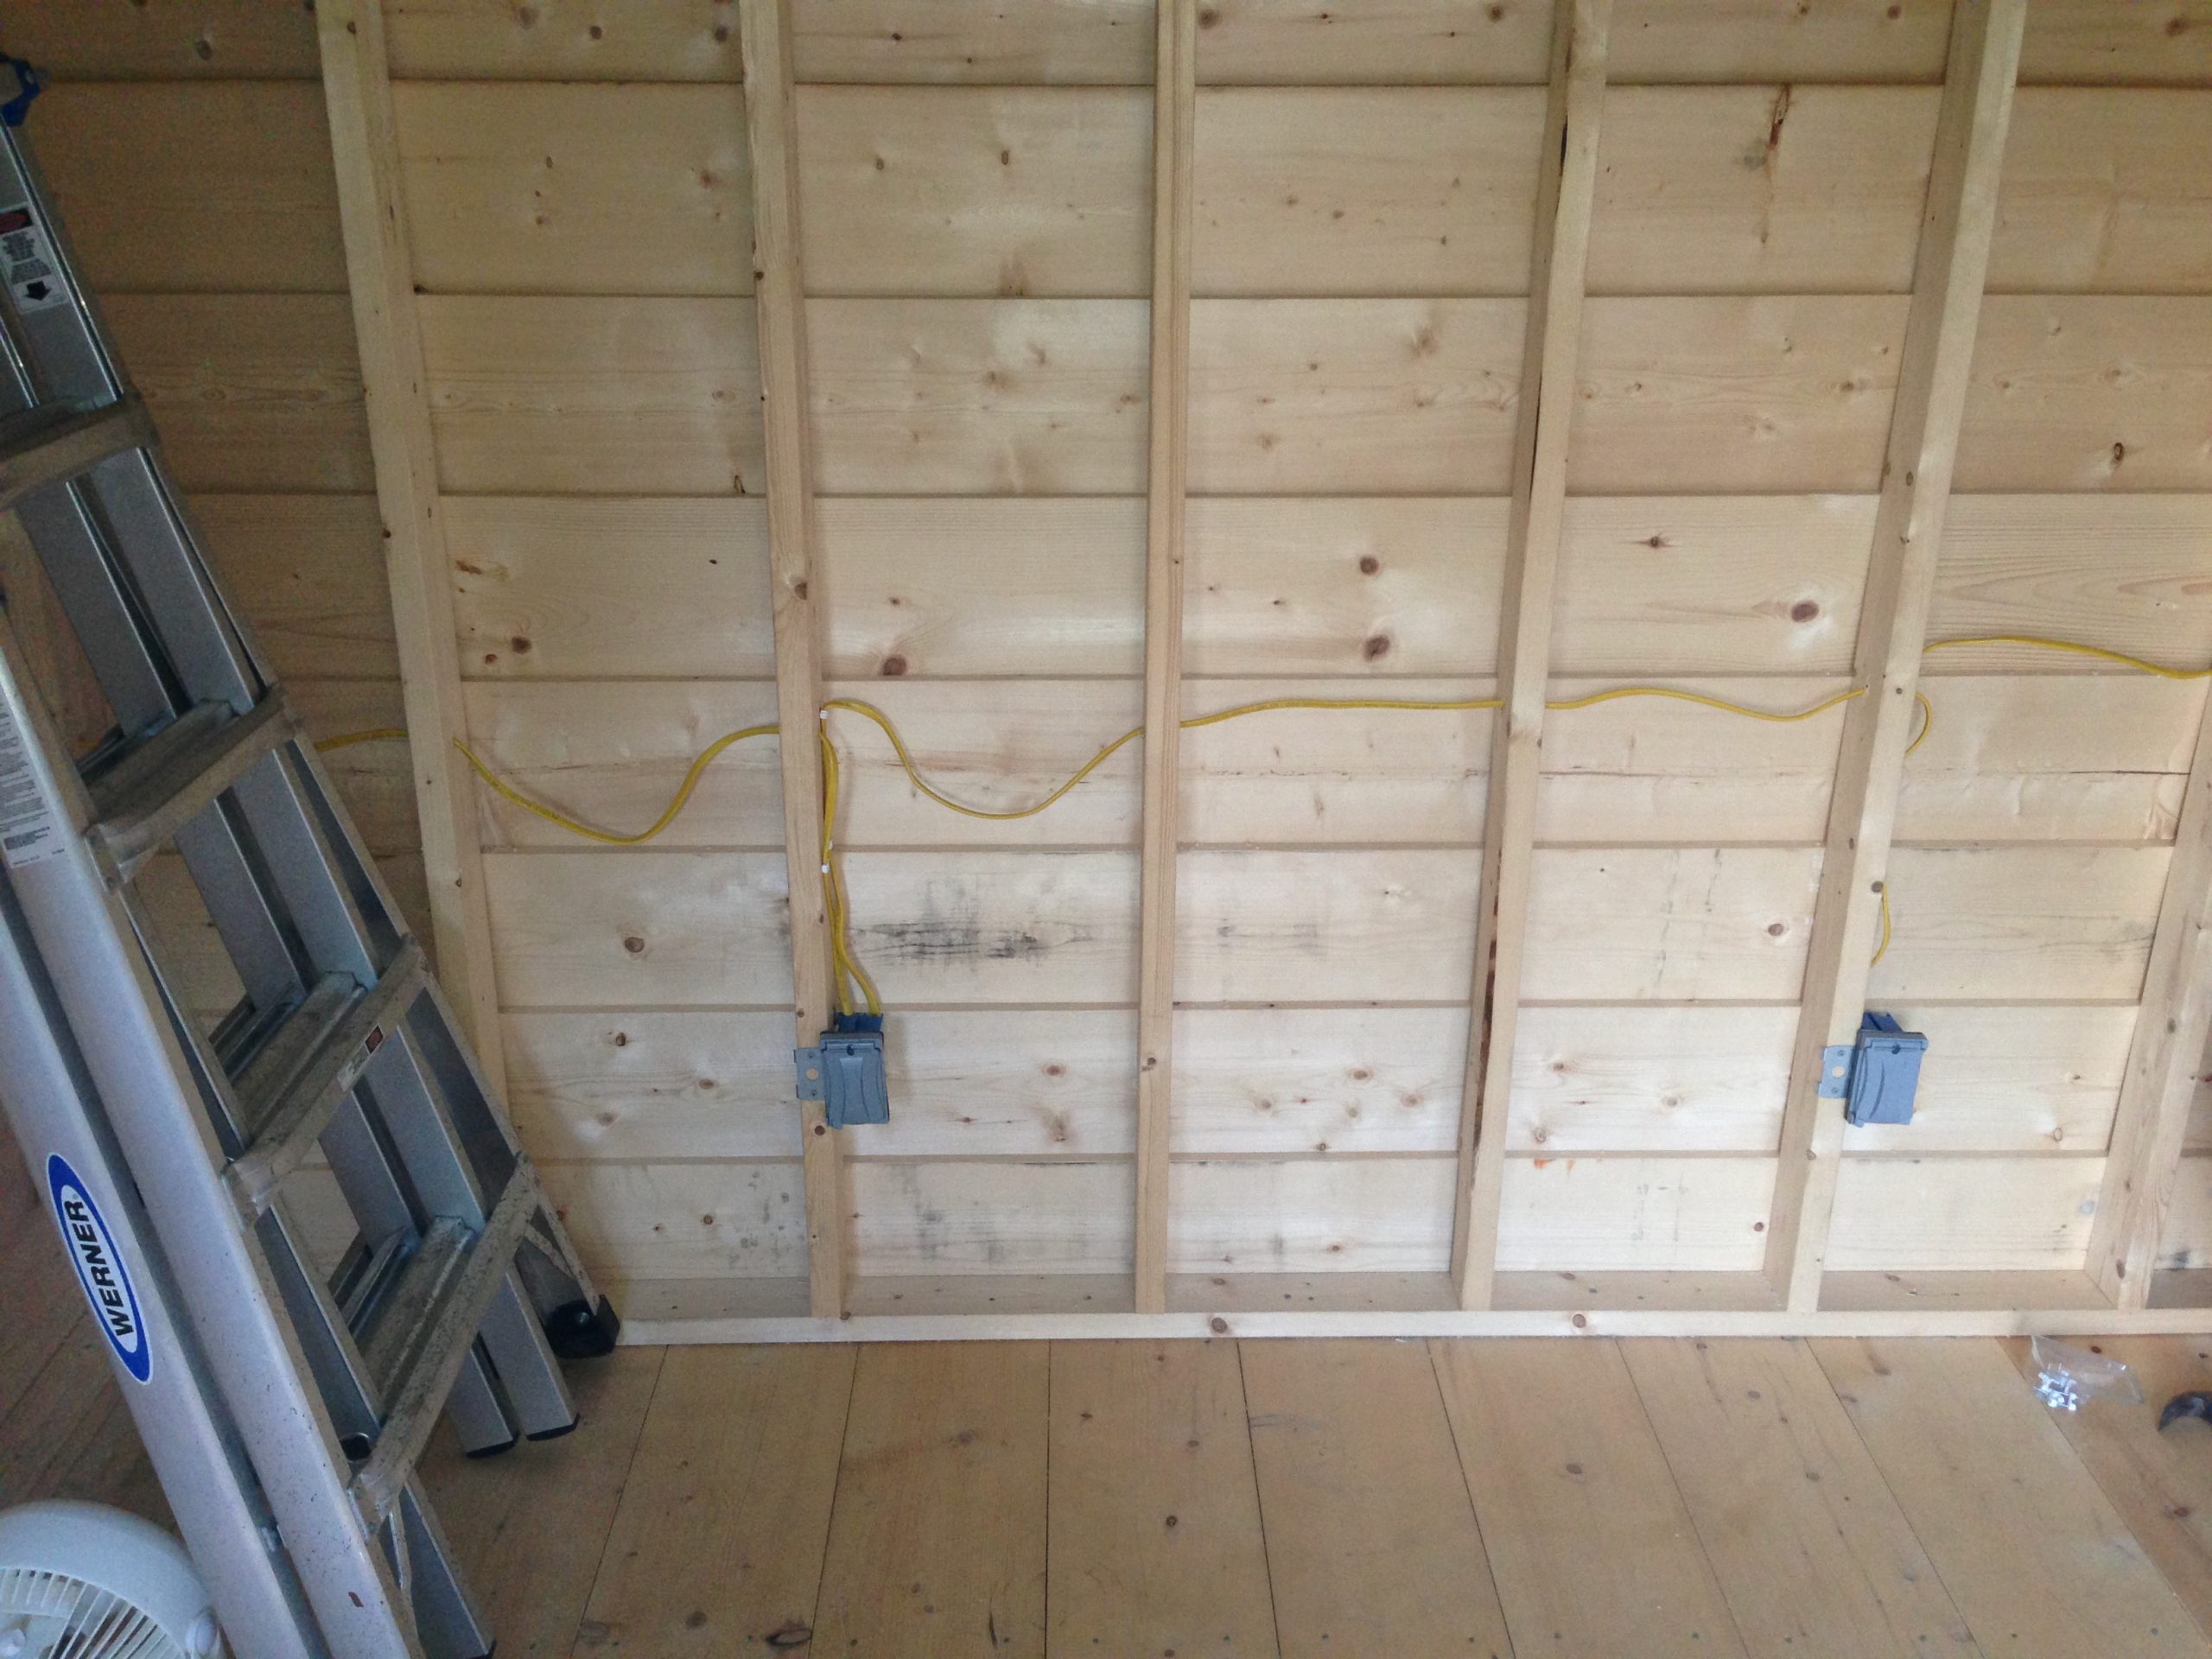
A look at the east wall showing more of the GFCI outlets wired in. The exposed Romex was tacked directly to the studs, and while it’s far from polished, it kept things practical and code-compliant. This setup gave me enough power access points to run equipment from either side of the observatory, including fans, dew heaters, or any auxiliary gear.

The trenching begins—this was the path from the garage’s electrical panel up to the observatory. I laid conduit per code to carry power safely underground. The slate and clay soil made this harder than it looks; every foot was a battle.
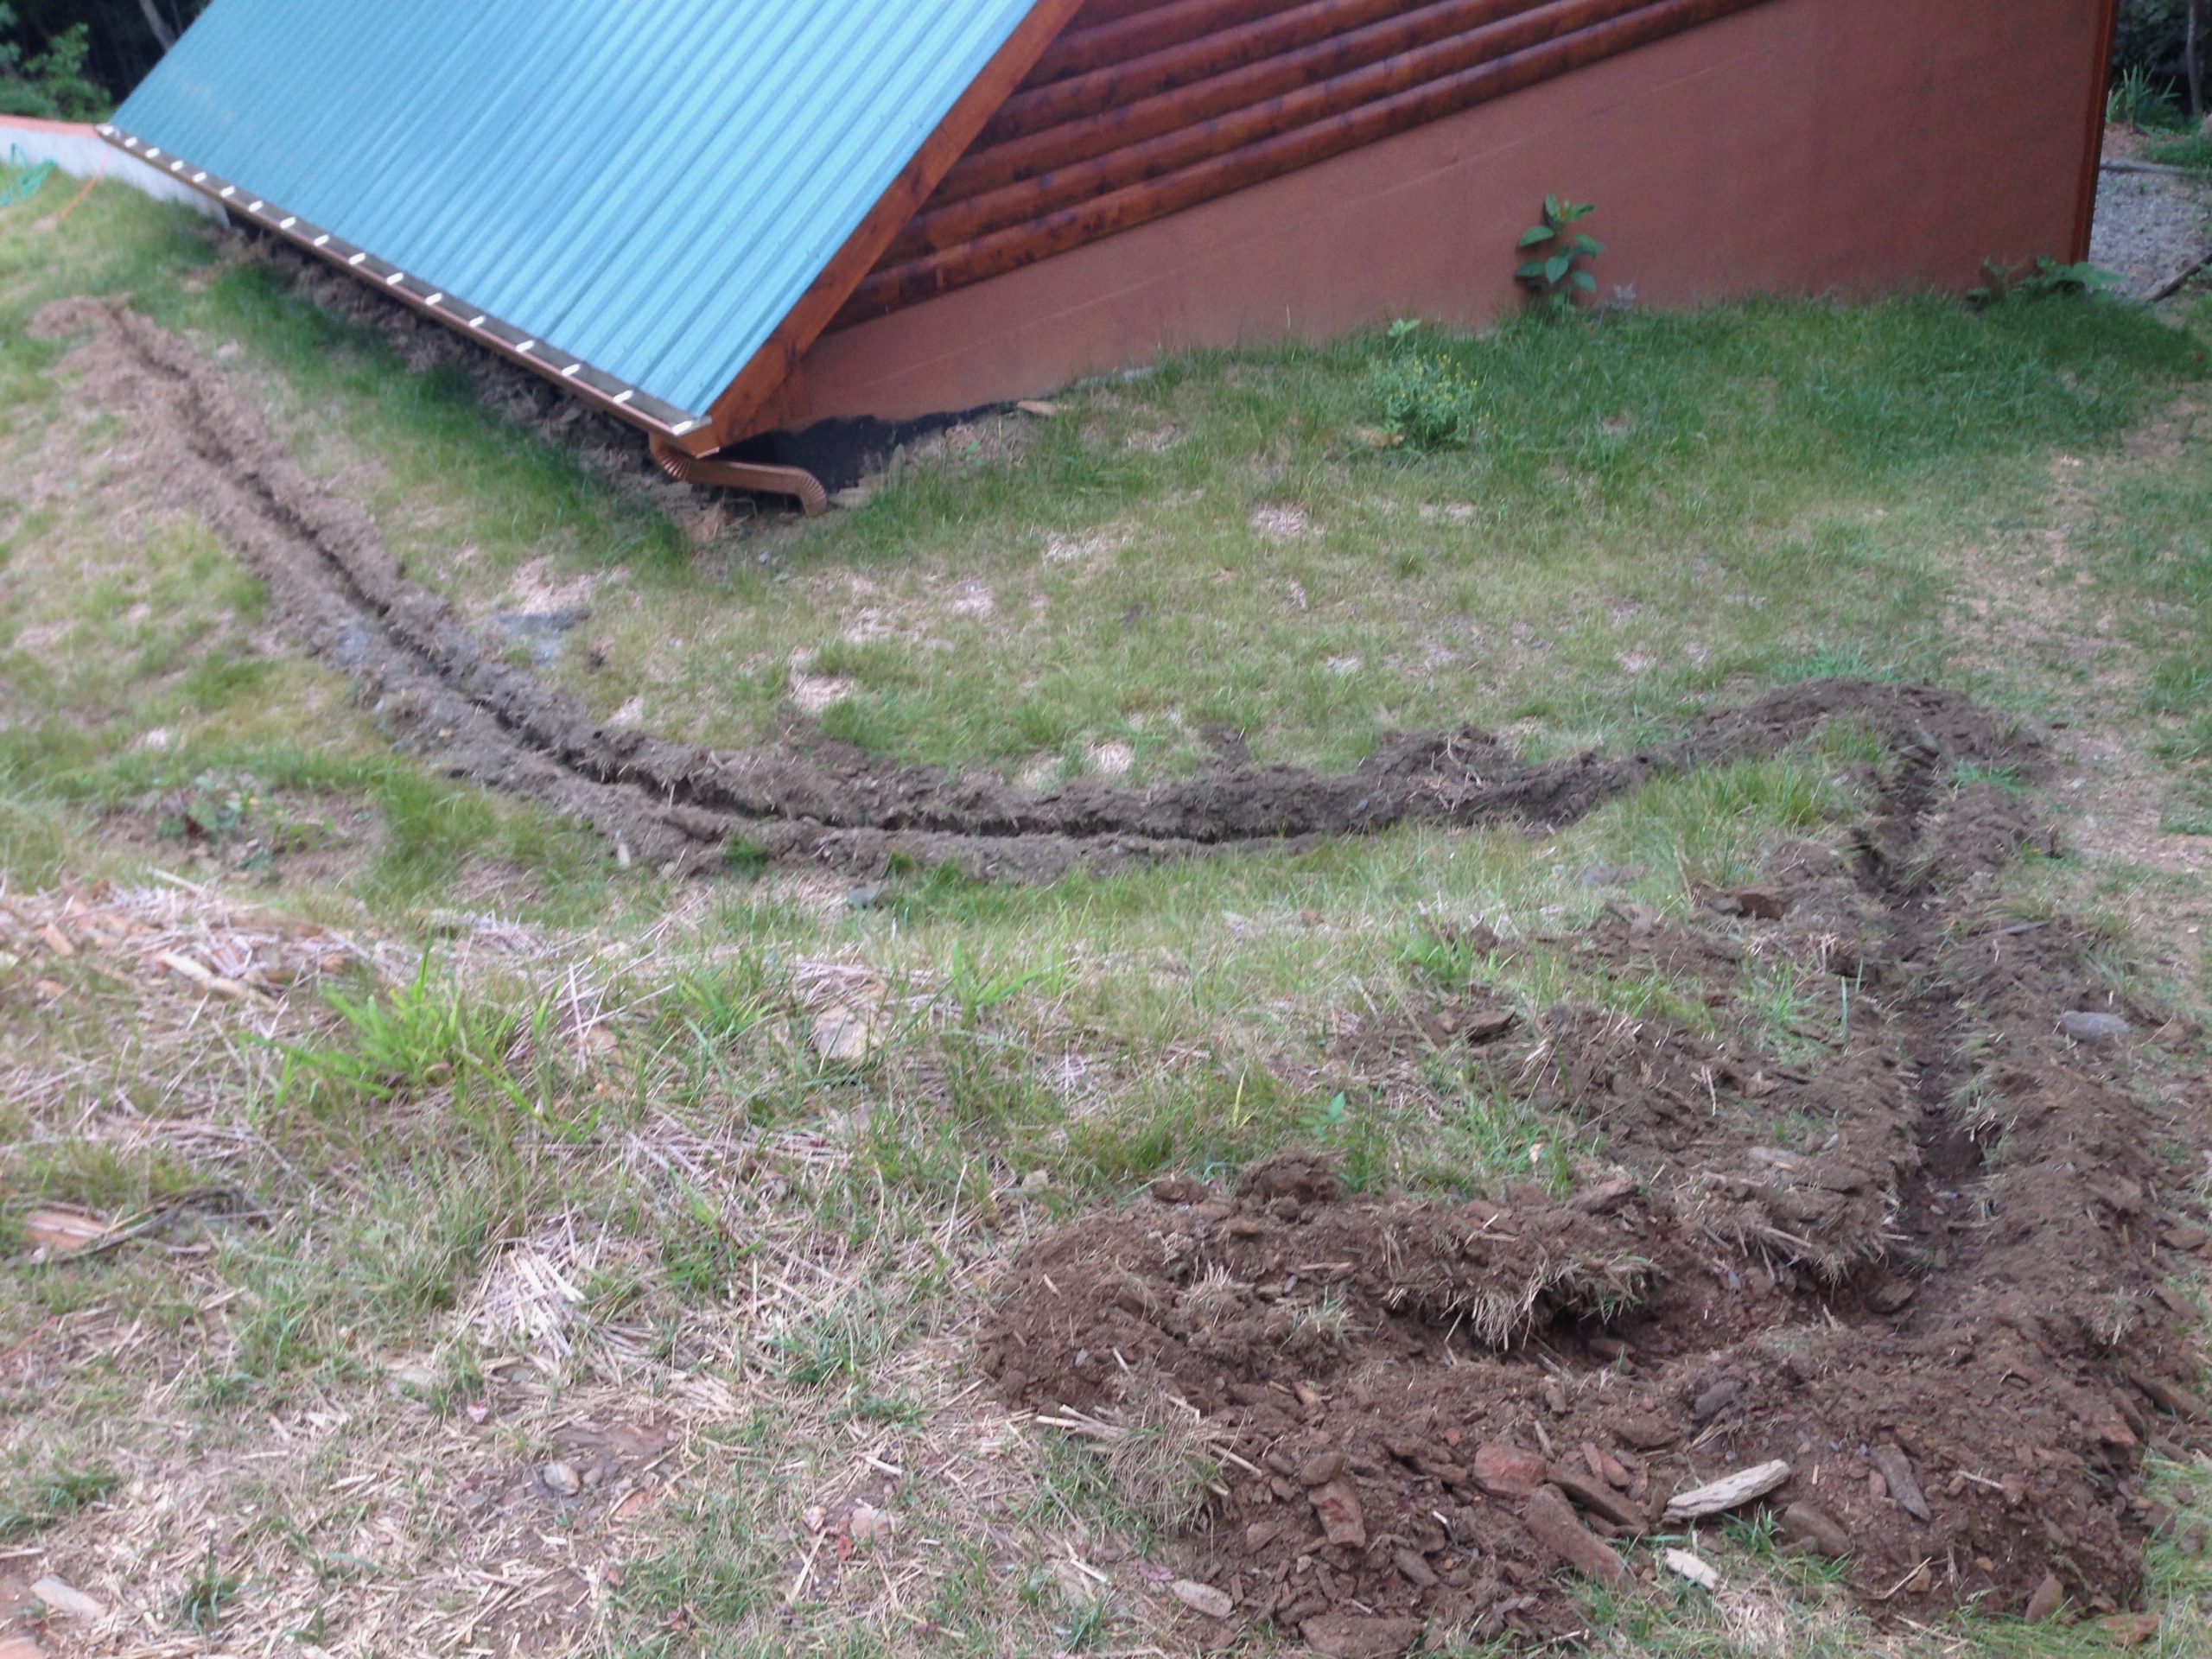
More trenching progress. This was just the initial outline to define the route—eventually, the whole thing would be dug deeper to meet code. The winding path reflects the reality of working around embedded rock and roots.
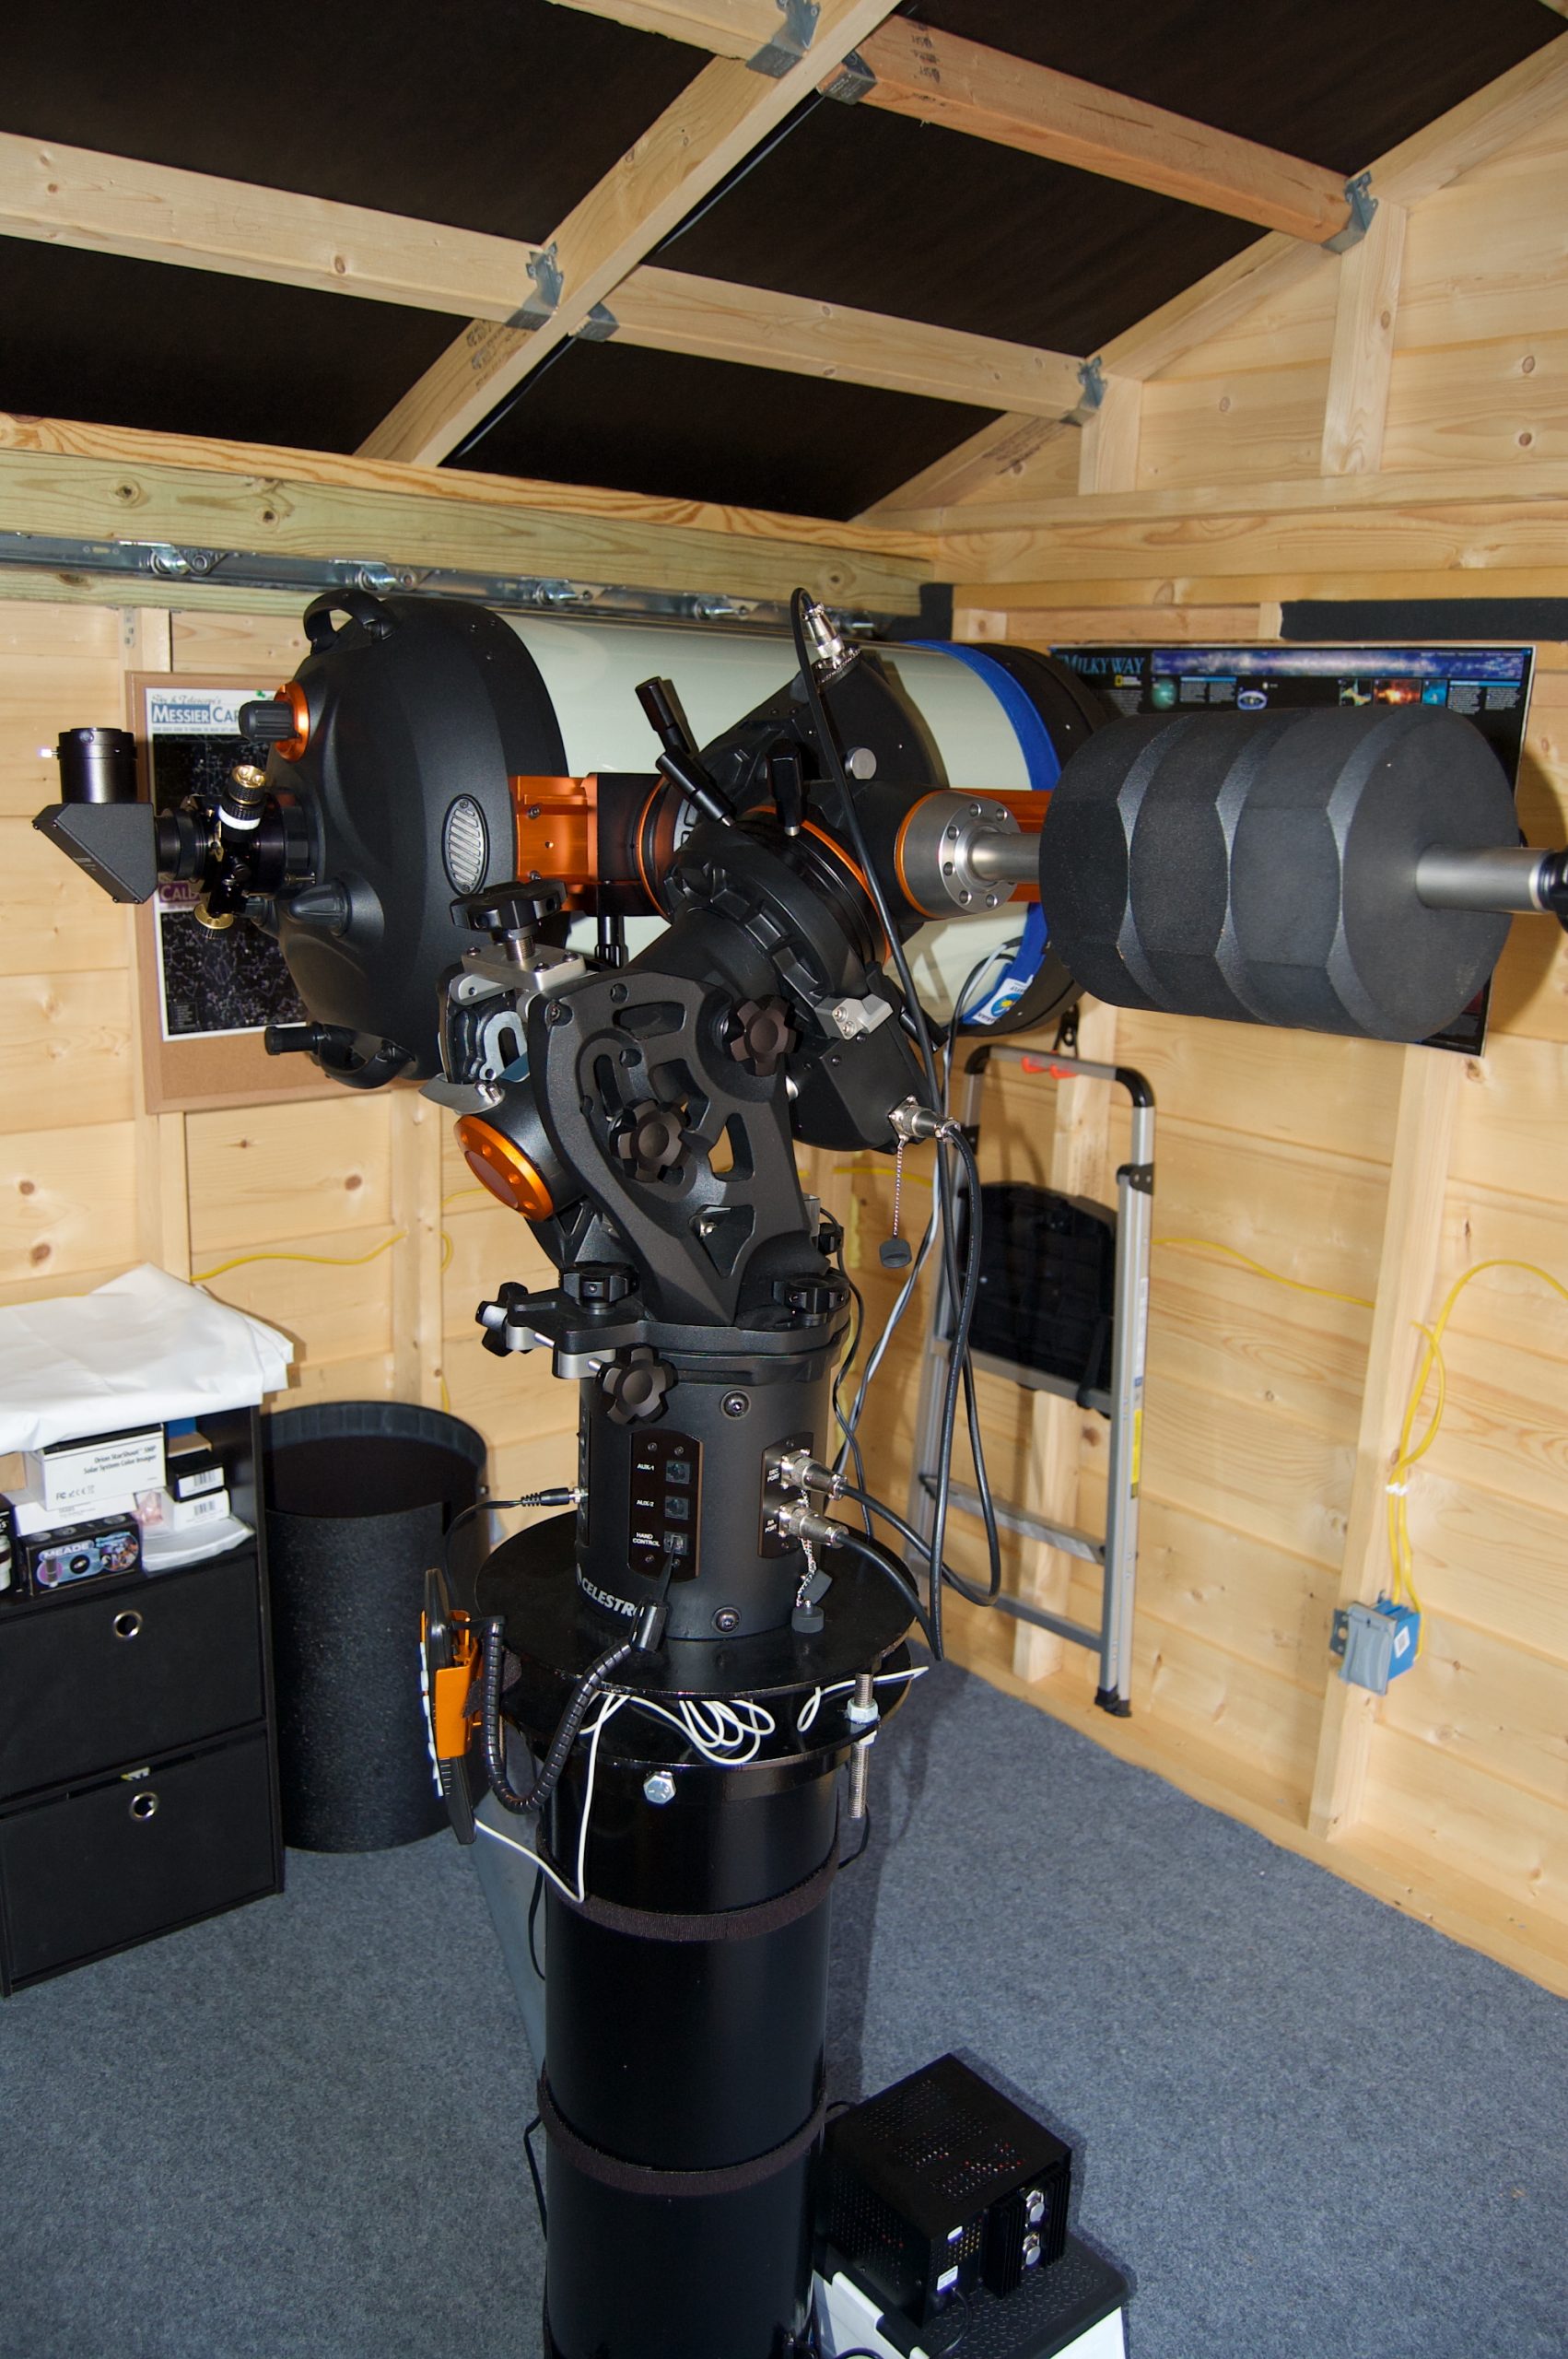
With the telescope installed and equipment in place, the observatory finally took on its true personality. I added some astronomy-themed posters, tucked accessories into drawers and bins, and mounted a few items on the wall for easy access. It’s a snug little space, but everything fits—and having power, shelter, and a stable pier beats being eaten alive by Georgia mosquitoes, at least until you open the roof.
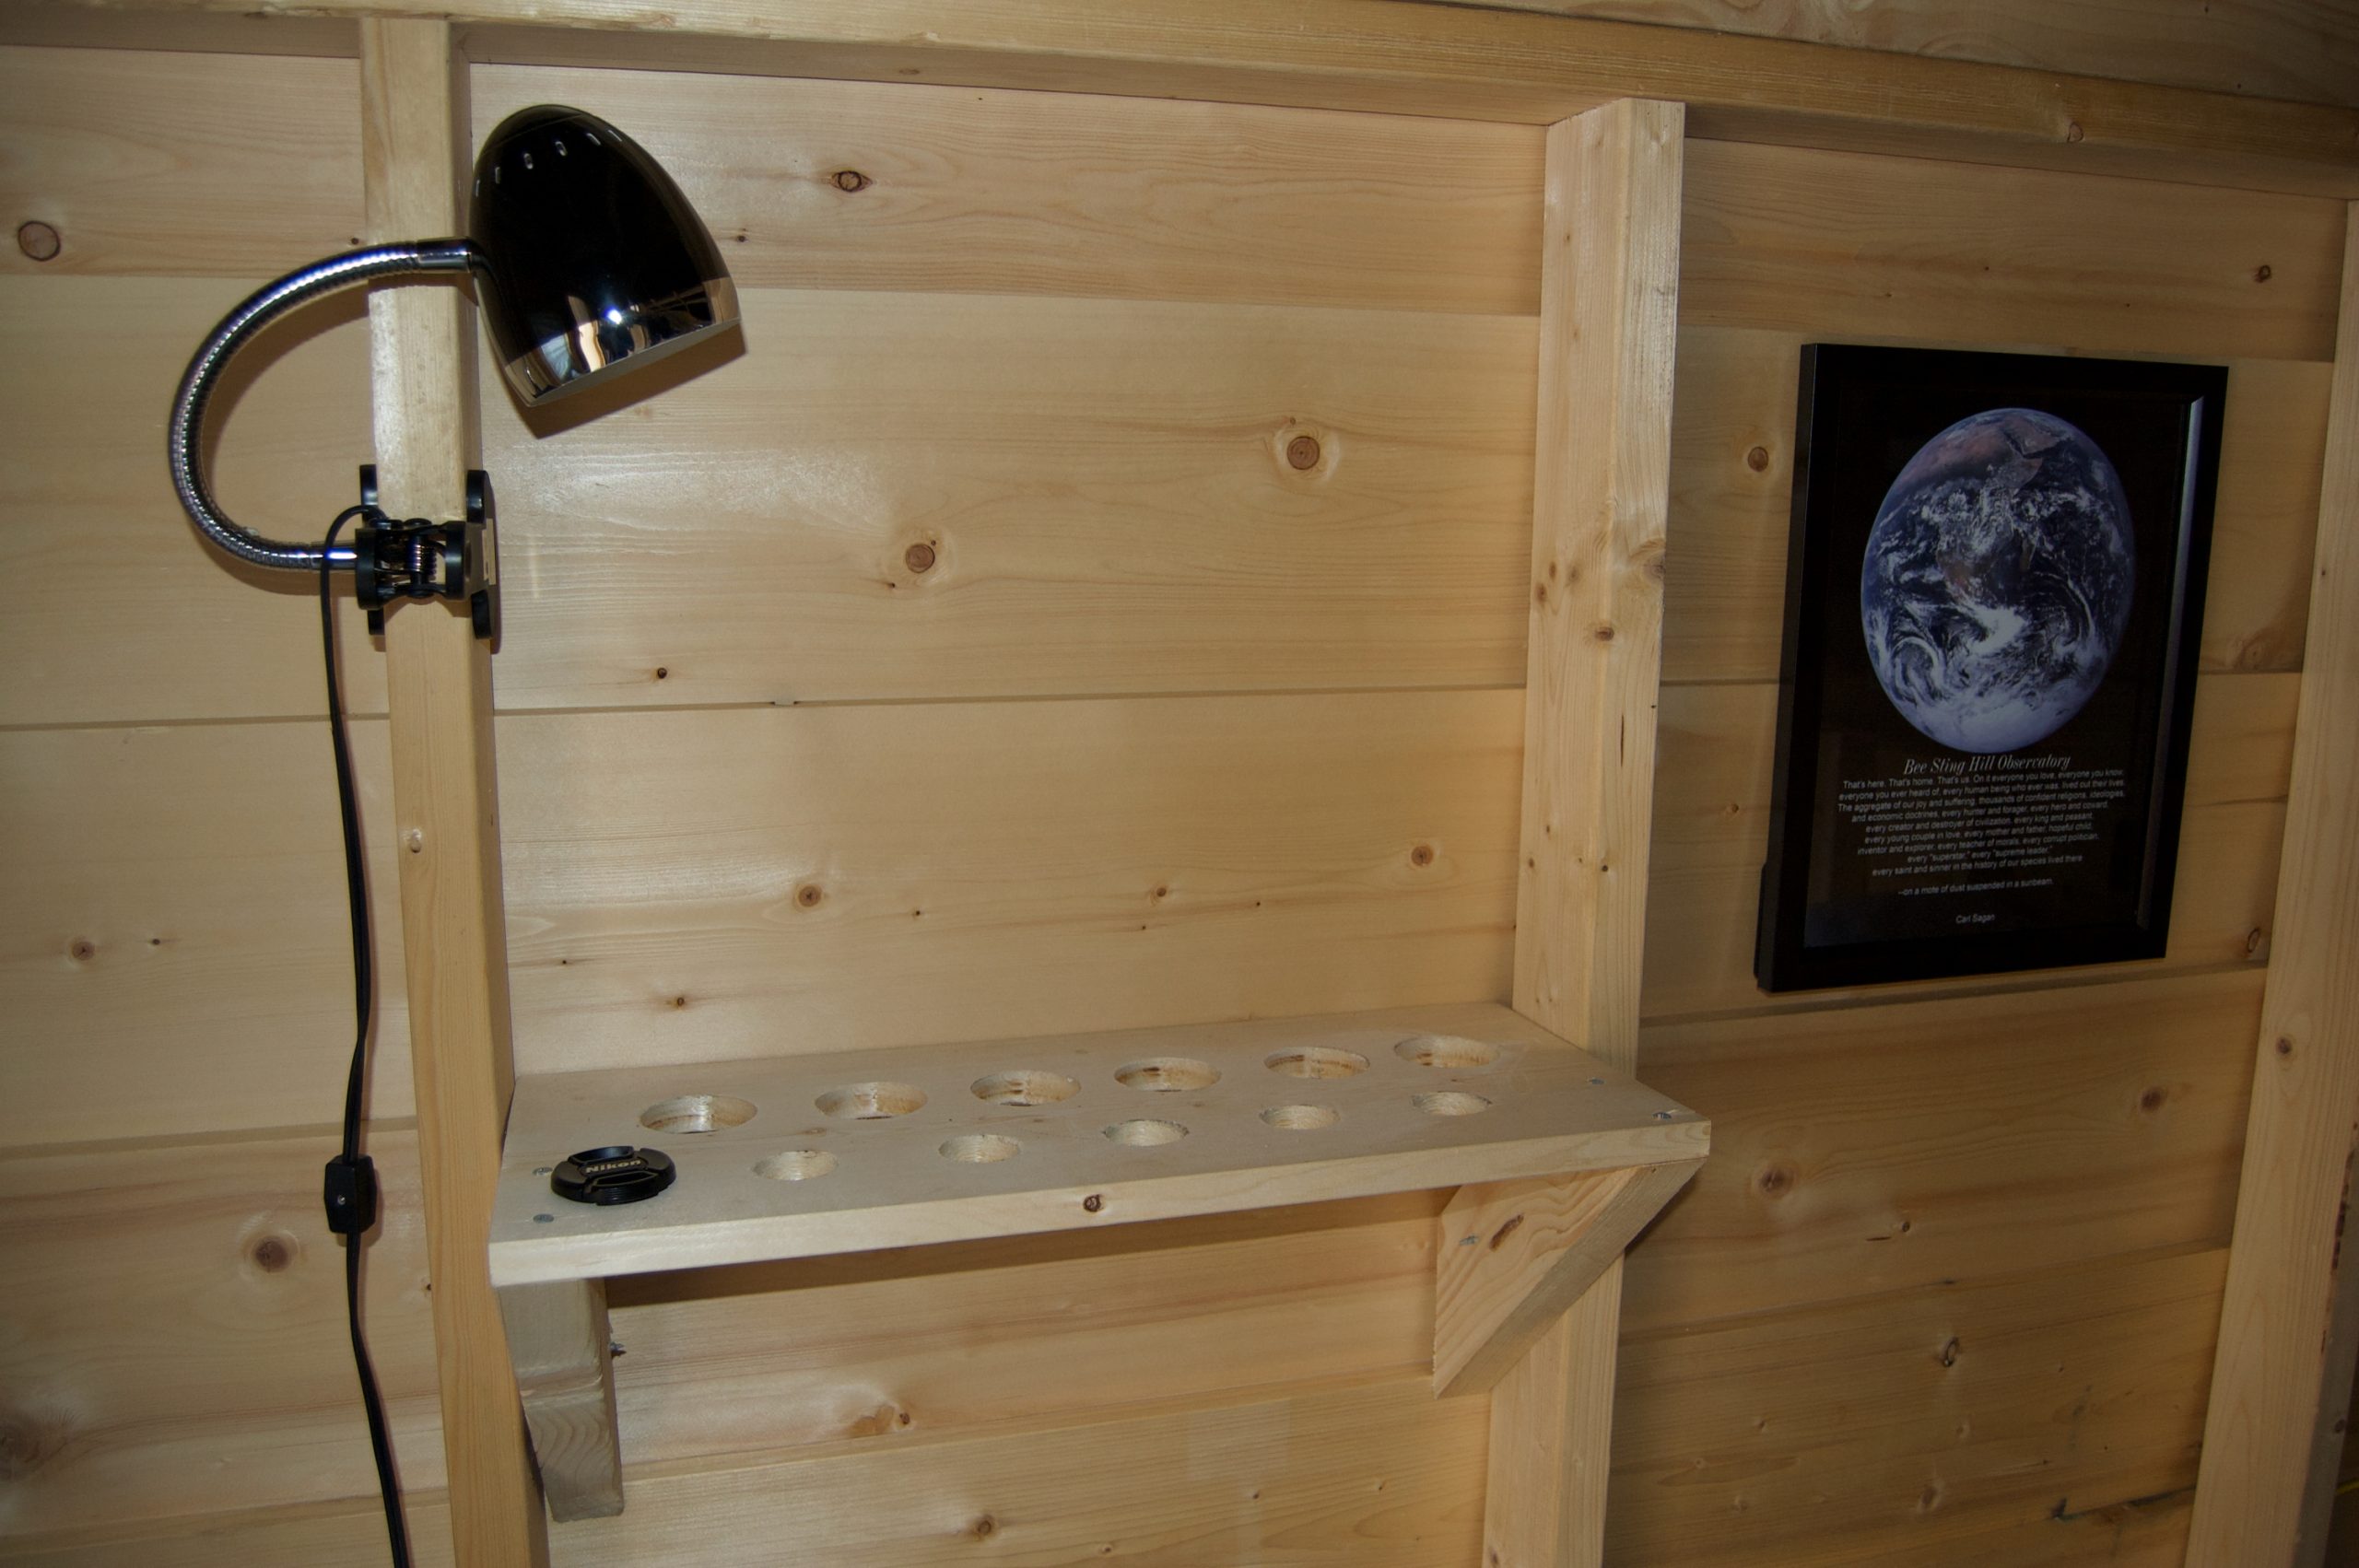
I built a small recessed shelf to keep eyepieces organized and out of harm’s way in the dark. The holes kept them from rolling off, and I paired it with a flexible red light so I could see what I was doing without ruining my night vision. Simple, functional, and just enough space for the essentials.
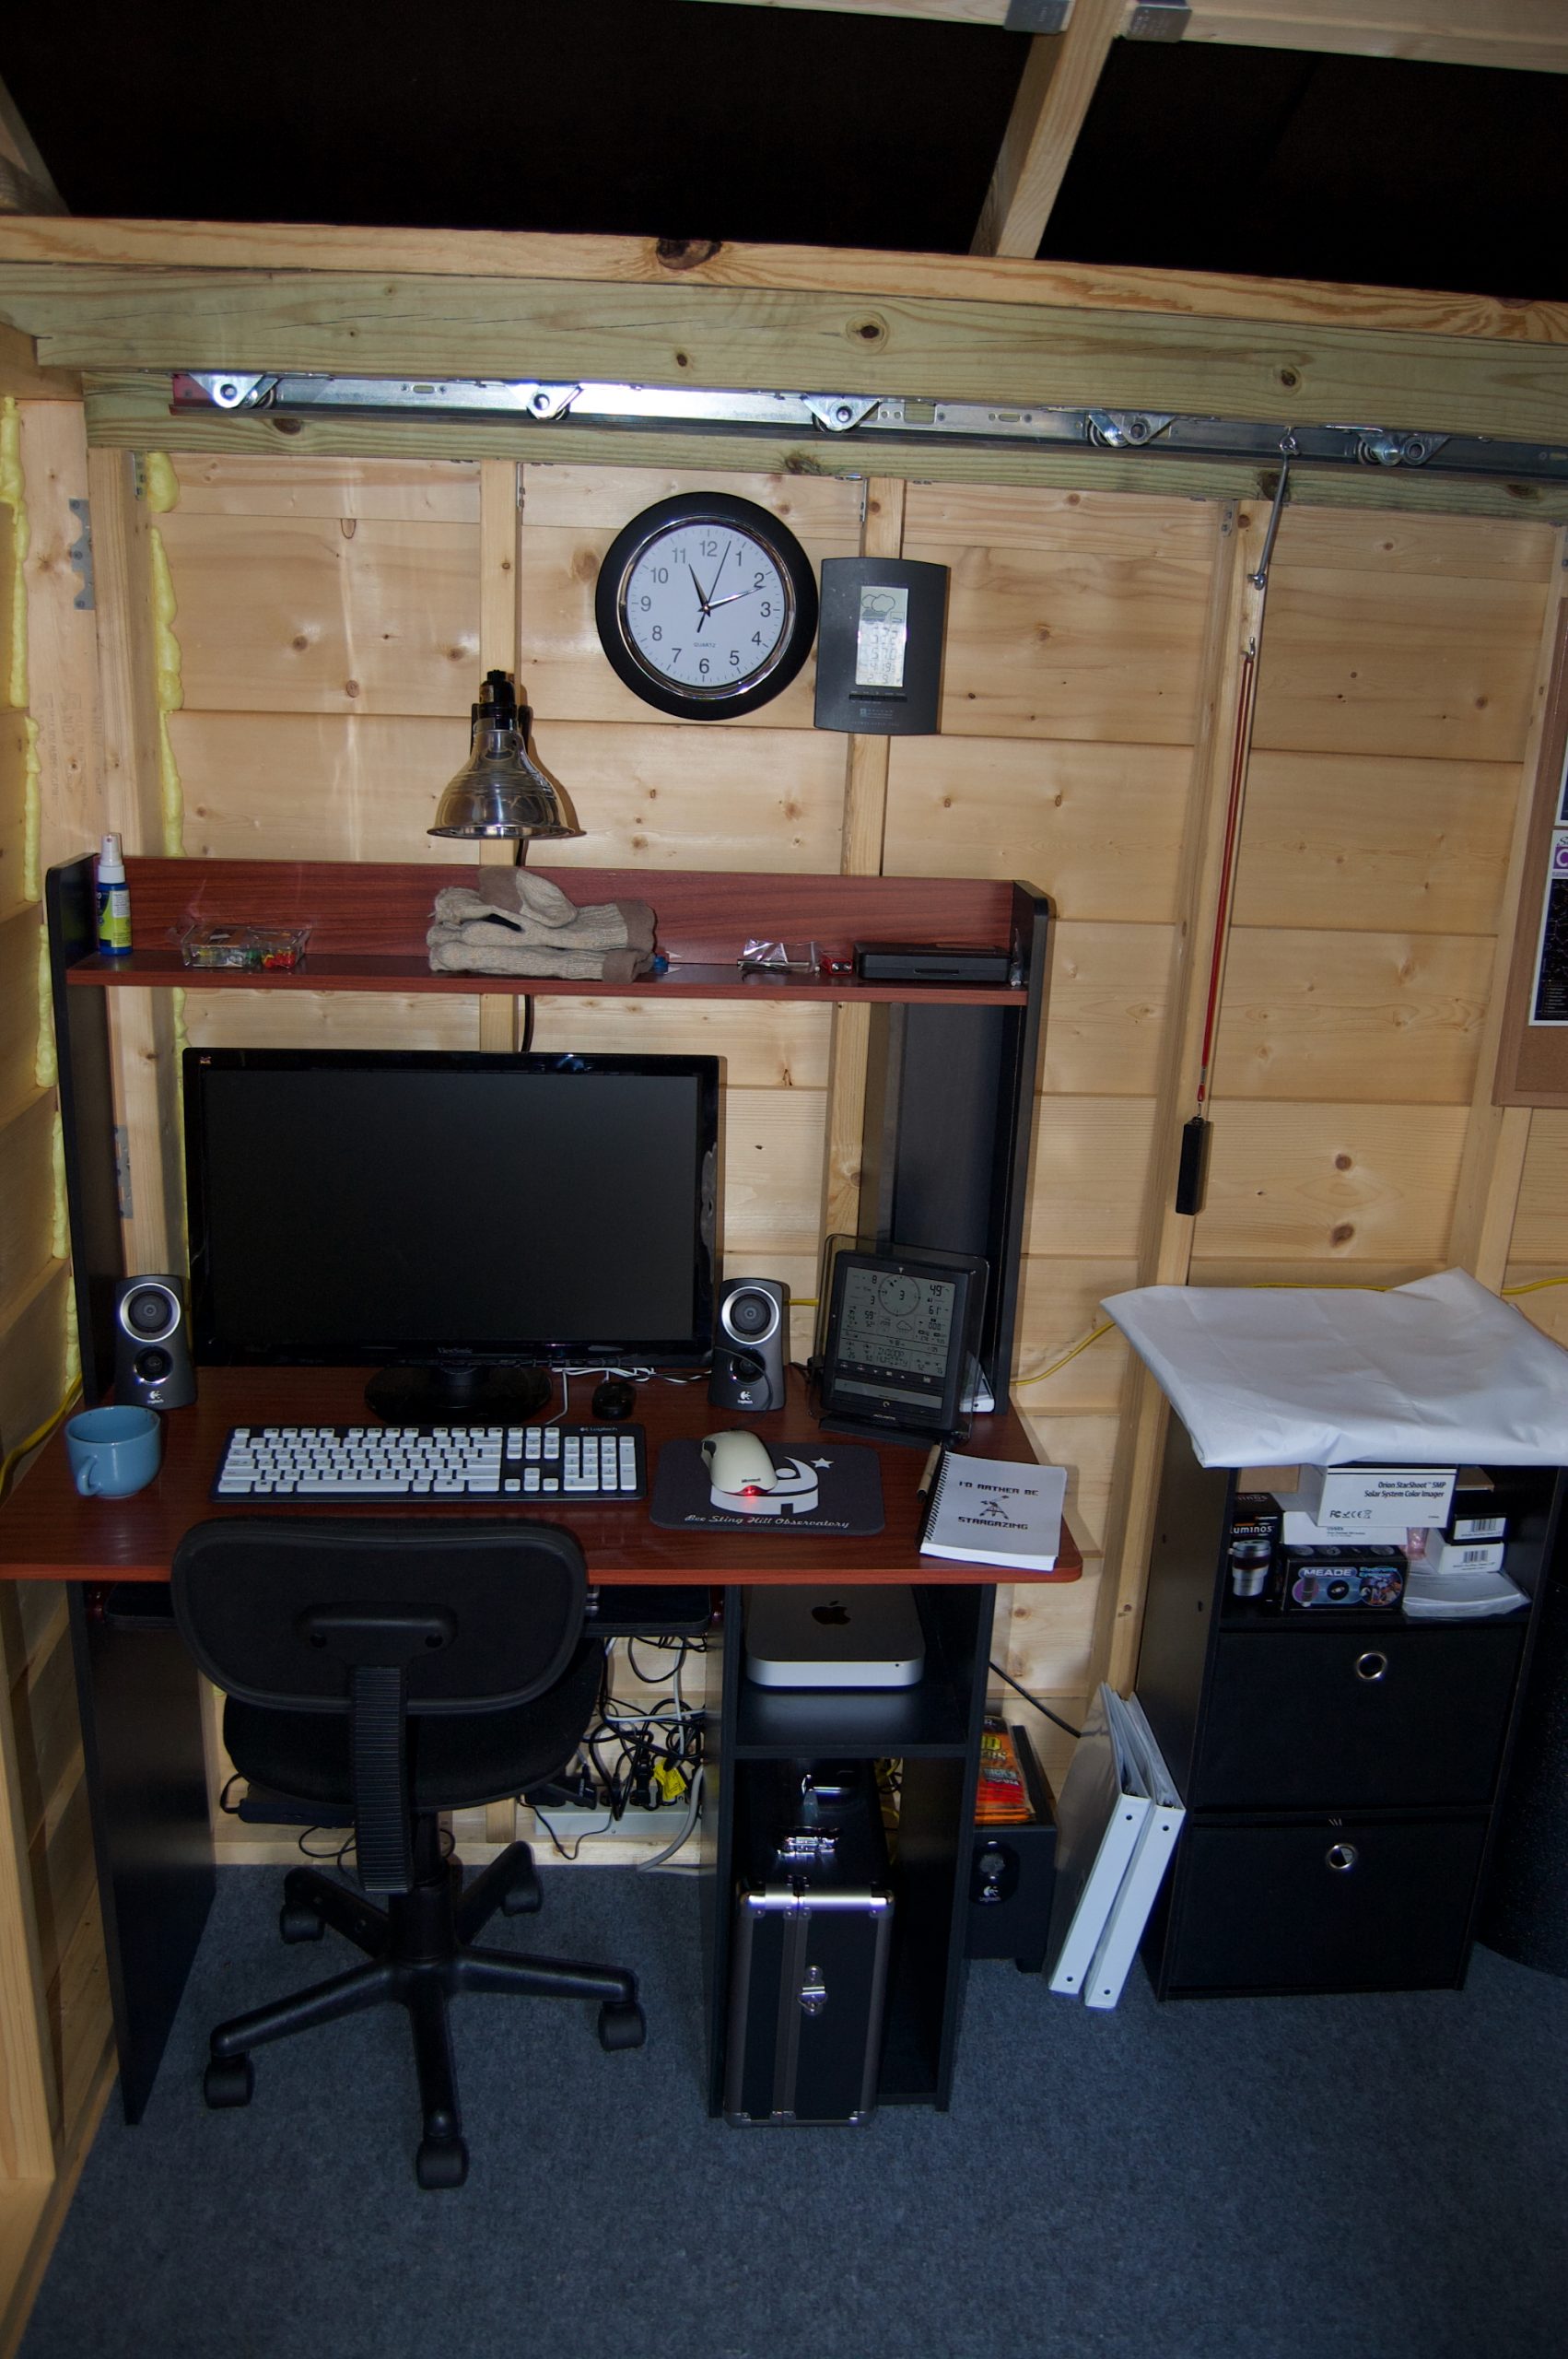
The corner desk served as mission control—housing my main computer, weather station display, and a mix of useful gear within arm’s reach. A red light above the monitor helped preserve night vision, while the analog clock and temperature gauge gave quick-glance info during long sessions. Cozy, compact, and just enough space to get the job done.
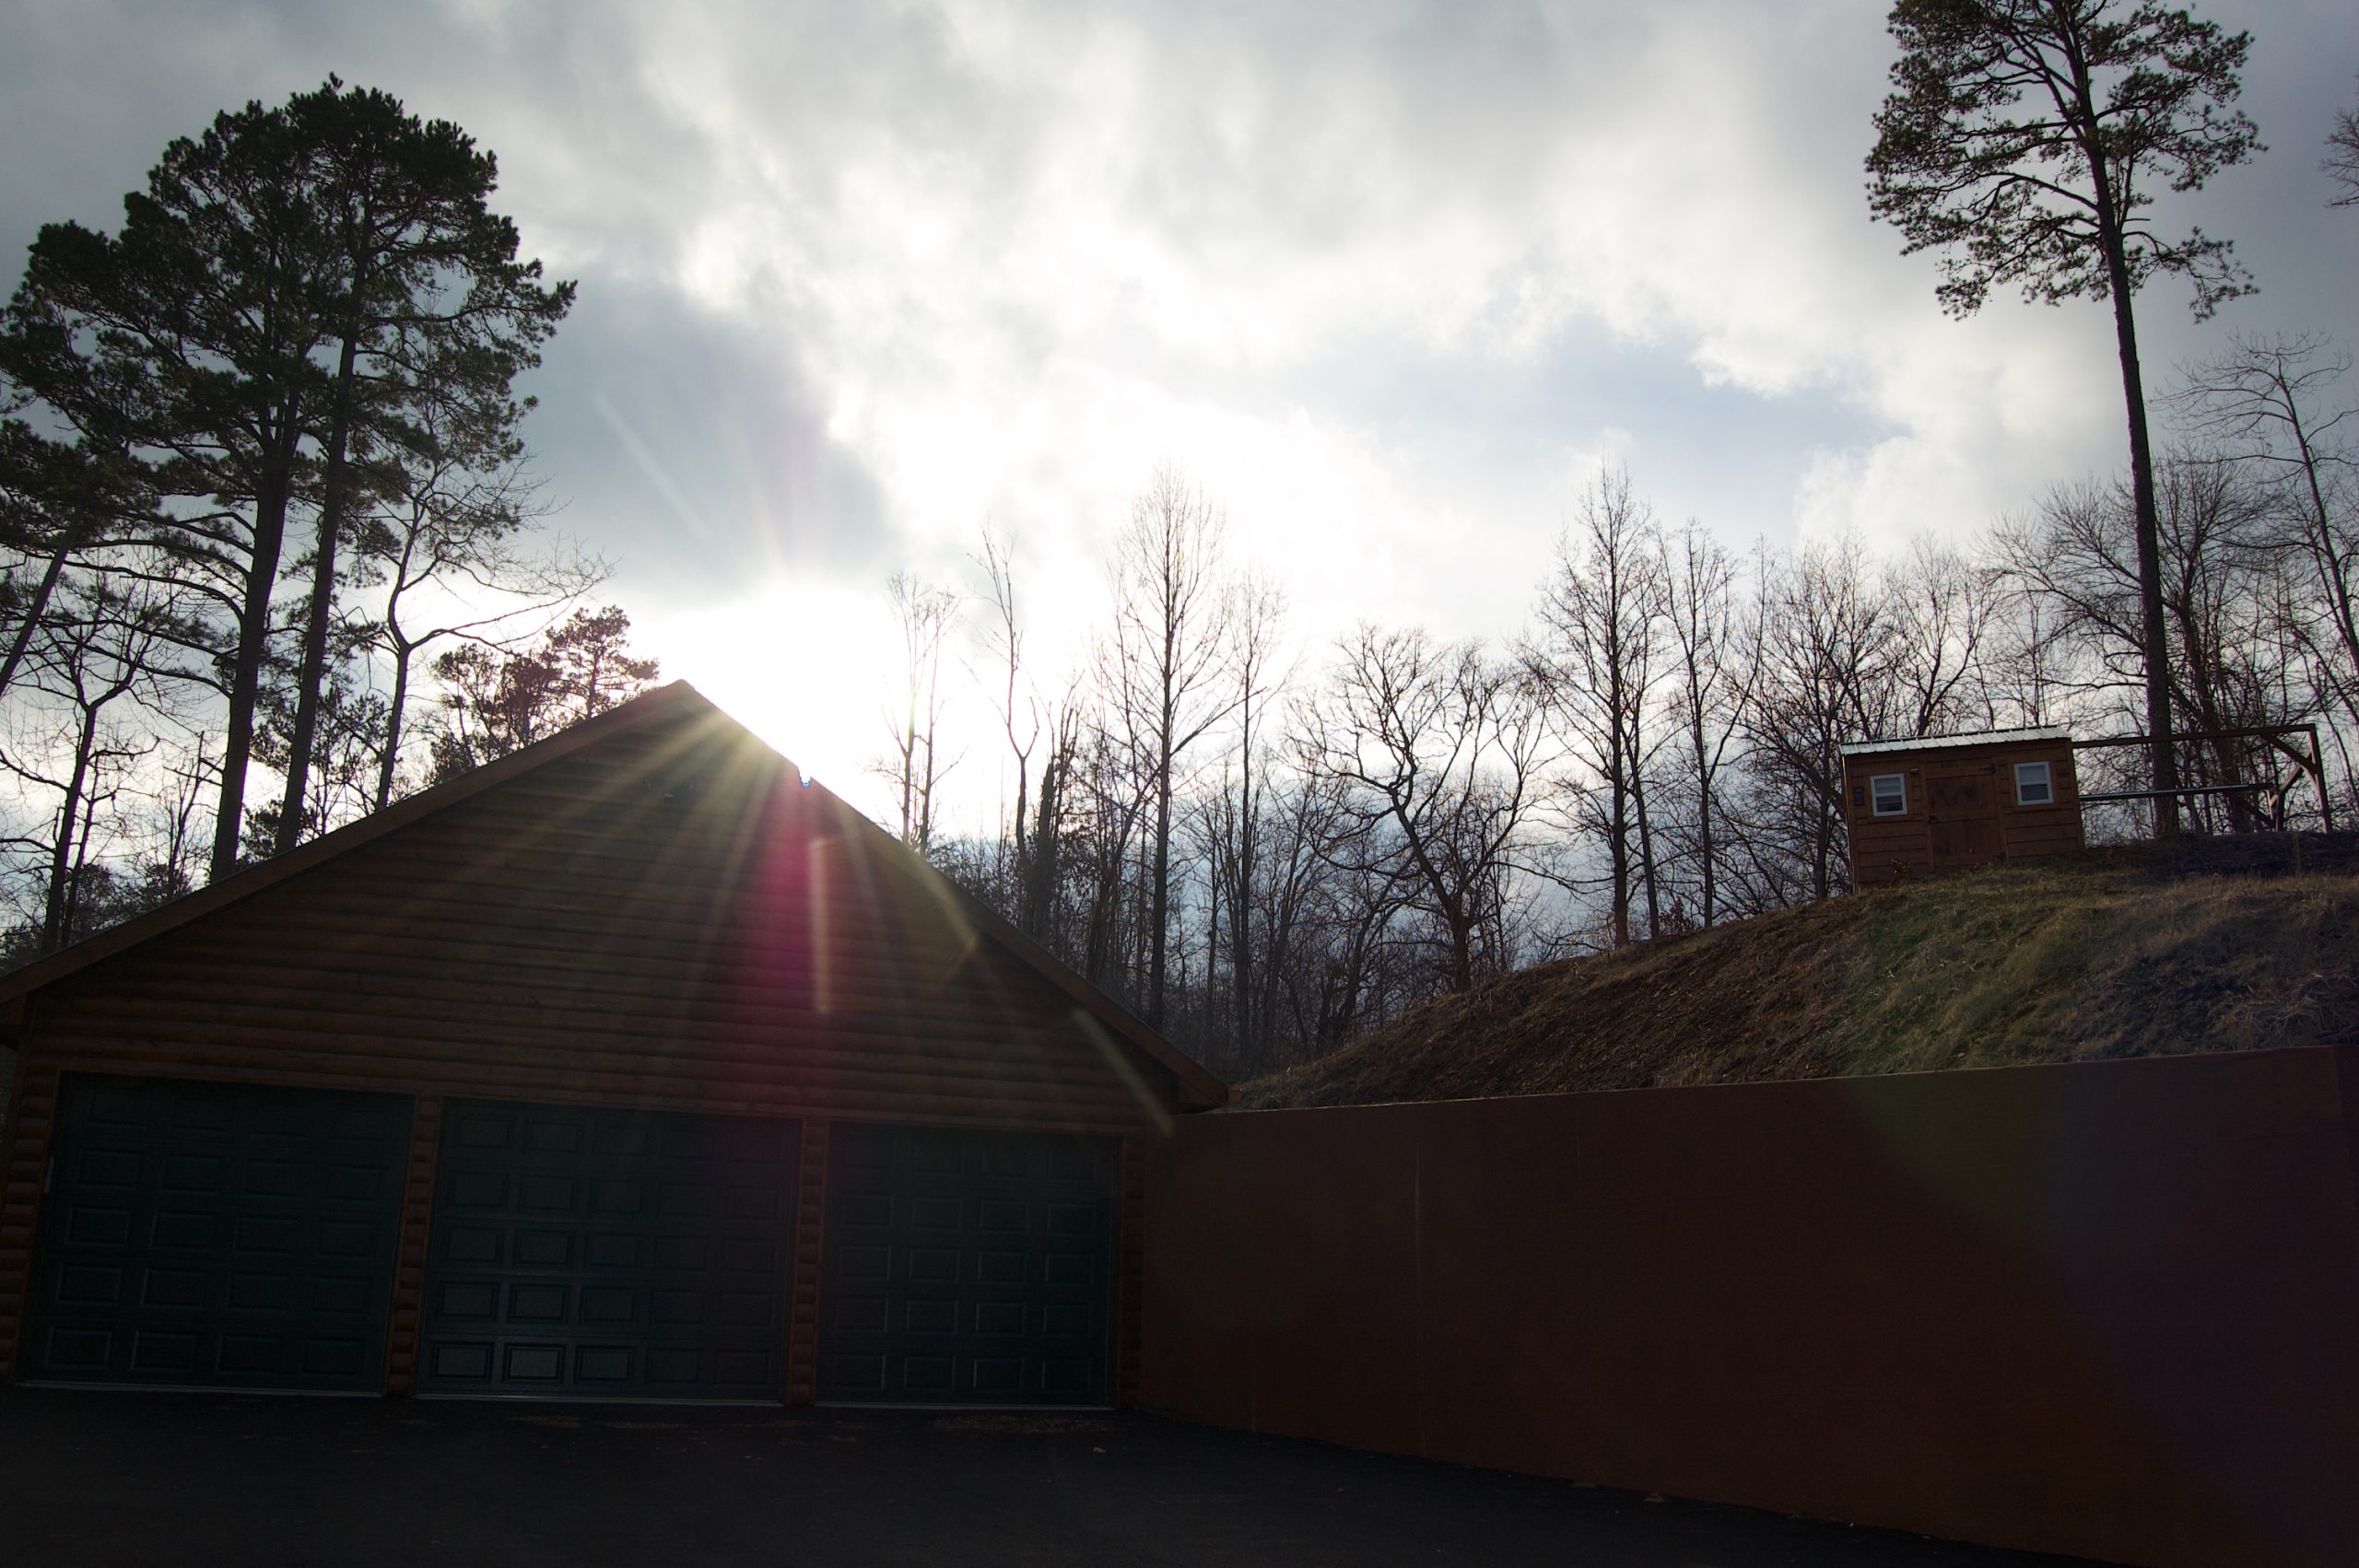
From the driveway below, the observatory stands quiet and proud on the hill—modest in size but massive in meaning. It marked the culmination of a vision, built board by board with care, determination, and the dream of clearer skies. This was more than just a shed for gear—it was a personal launchpad into the universe.
© 2025 Enchanted Astronomy. All rights reserved.